Download presentation
Presentation is loading. Please wait.

1
Progressive Project Using PowerPoint for the Progressive Project This presentation will help you find, organize and present your research

2
Making Folders Prepare for your research by making a folder in your U drive StepAction 1Open the “My Computer” icon on desktop 2Double click on your U drive 3File > New > Folder 4Click on the words “New Folder” and rename it “Notes”

3
Use the East Lyme High School Resource CenterEast Lyme High School Resource Center

4
Use these tutorials for basic instruction with PowerPoint BC Schools Tutorial University of Rhode Island

5
Prepare a picture for insertion Go to Google.com and select ImagesGoogle.com Try American Memories for historical imagesAmerican Memories Right click on image, select “Save Picture As”. Name it and select your Research Notes folder in your U:drive as the location Use the scanner or digital camera to put pictures in a digital format. Save it to your Research Notes folder in your U:drive.

6
Insert a picture into your Powerpoint Presentation from a file or Clip Art Select Insert>Picture>from File. Click the Look In: Box and select the place where the picture is saved. (This should be your Research Notes Folder on your U:drive) Double click on the picture to insert it. or Select Insert>Picture>Clip Art. Type a keyword in the “Search for Clips” box and hit enter. Right click on selected picture and select Insert.
 Double click on the picture to insert it. or Select Insert>Picture>Clip Art. Type a keyword in the Search for Clips box and hit enter. Right click on selected picture and select Insert..")
7
To HyperLink a Web Site Step Action 1Type the name of the web site you wish to link to the PowerPoint slide, such as “The University of Rhode Island” 2Highlight the name you just typed 3Select Insert from the toolbar. 4Select “Hyperlink” 5In the Hyperlink Box that appears, type the full URL on the line “File or Web Page Name”. Be sure to begin the URL with http:// 6Ok

8
Hyperlink

9
Make Contents Notes You can add notes to slides within a presentation for your own use. To add notes to a slide, click the left mouse button under the slide where it says “Click to add notes” When you give your presentation the notes will not show

10
Example of Notes

11
Print Notes Page Print your presentation with notes showing On tool bar Click View>Notes Page File>Print In lower left hand corner you will see a box that says“Print What” Select Notes Page OK

12
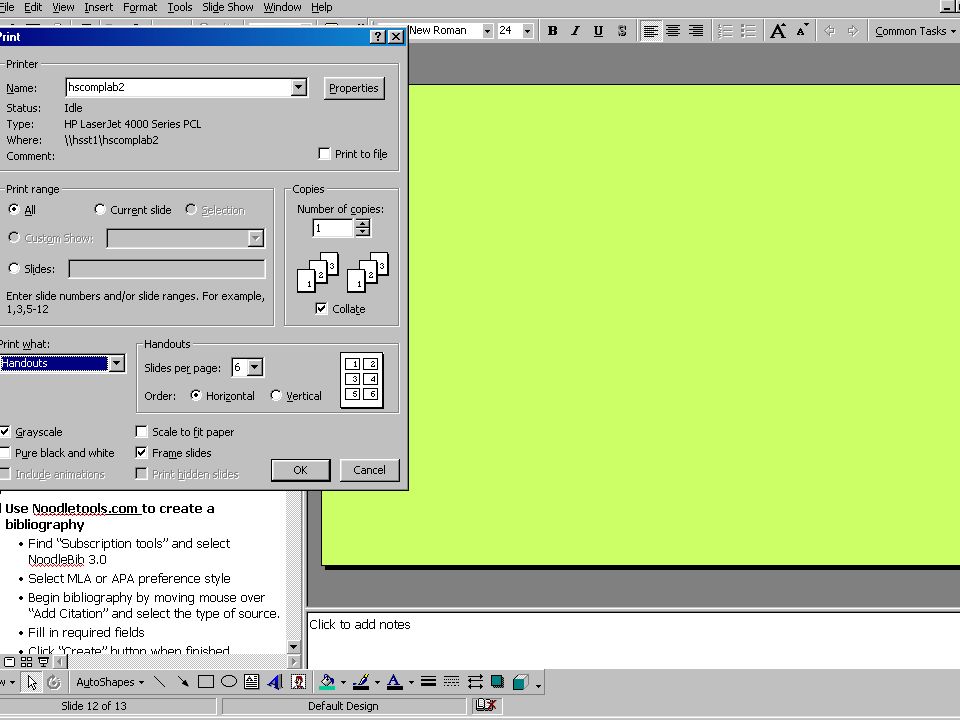
Create a handout of your presentation Select File>Print On the next screen, find the “Print What box” in the lower left hand corner. Using the drop arrow, select Handouts Select number of slides per page Select horizontal or vertical layout OK

14
Use Noodletools.com to create a bibliographyNoodletools.com Find “Subscription tools” and select NoodleBib 3.0 Select MLA or APA preference style Begin bibliography by moving mouse over “Add Citation” and select the type of source. Fill in required fields Click “Create” button when finished Save your bibliography, then cut and paste it into your Powerpoint presentation as your last slide

Similar presentations


>")


 Acknowledgements – Ali Parvin (CCS)>")
