Download presentation
Presentation is loading. Please wait.

2
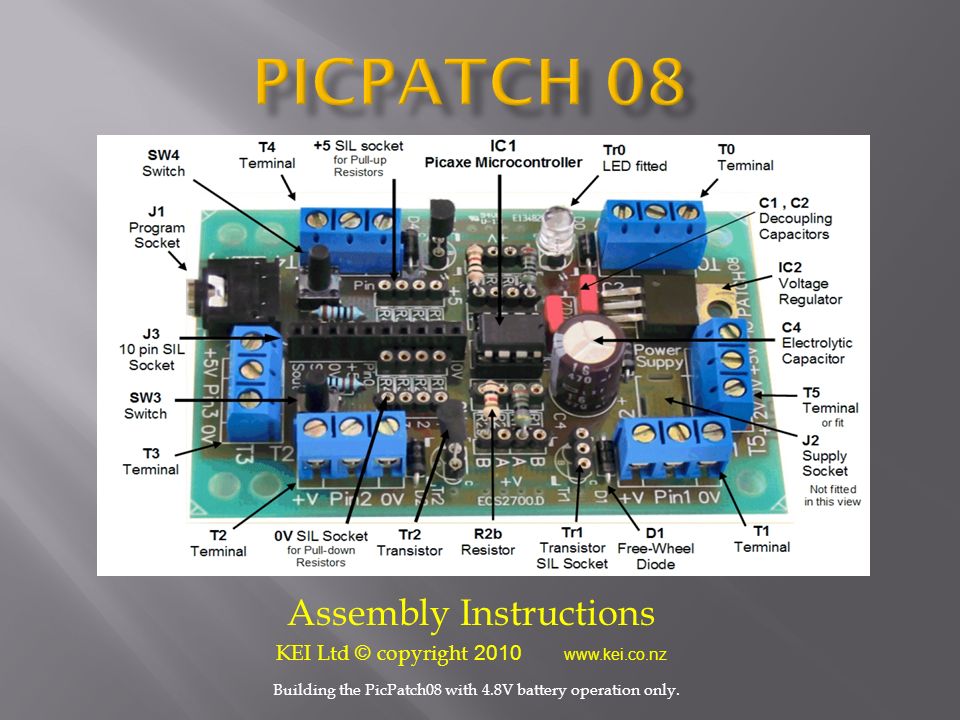
Assembly Instructions KEI Ltd © copyright 2010 www.kei.co.nz Building the PicPatch08 with 4.8V battery operation only.

3
R7 22kΩ Red, Red, Black, Red R5 330Ω Orange, Orange, Black, Black R3 330Ω Orange, Orange, Black, Black R6 10kΩ Brown, Black, Black, Red D0 IN4001… Check band at top end D1 IN4001… Check band at bottom end D2 IN4001… Check band at bottom end D4 IN4001… Check band at top end

4
IC1 DIL4 Socket Indent at this end Link Pins 1 and 3 of IC2 12x 4way SIL Sockets J1 Stereo Socket Trim off small plastic posts on bottom side before inserting.

5
C4 47uF Electrolytic Capacitor -ve (short) lead this side + C1 C2 100nF 0.1uF Capacitors 6x 3 Way Screw Terminals Place with wire entry side facing outwards.
 lead this side + C1 C2 100nF 0.1uF Capacitors 6x 3 Way Screw Terminals Place with wire entry side facing outwards.")
6
+ WARNING!! Check there are no solder bridges or dry solder joints Insert 4x PCB mounting Posts one on each corner of the PCB. +5V Overwrite text with +5V Peal off the backing tape from each adhesive post and stick the assembled PCB to a firm base plate.

7
+ Micro +5V Insert Microchip with indent at this end and dot indicating pin 1. Take care leads are straight and do not bend during insertion Well done, the PicPatch08 assembly is now complete

Similar presentations


 Assembly Instructions This is the instruction slides for the assembly of a transmitter board. This is the board that will fly.>")


 Additional AVR Modifications For BalloonSat Flight Additional AVR Modifications For BalloonSat Flight.>")
