Download presentation
Presentation is loading. Please wait.

1
How to use MediaWiki By Melissa Aaron Sources: http://meta.wikimedia.org/ http://www.cs.drexel.edu/~mea36/wink

3
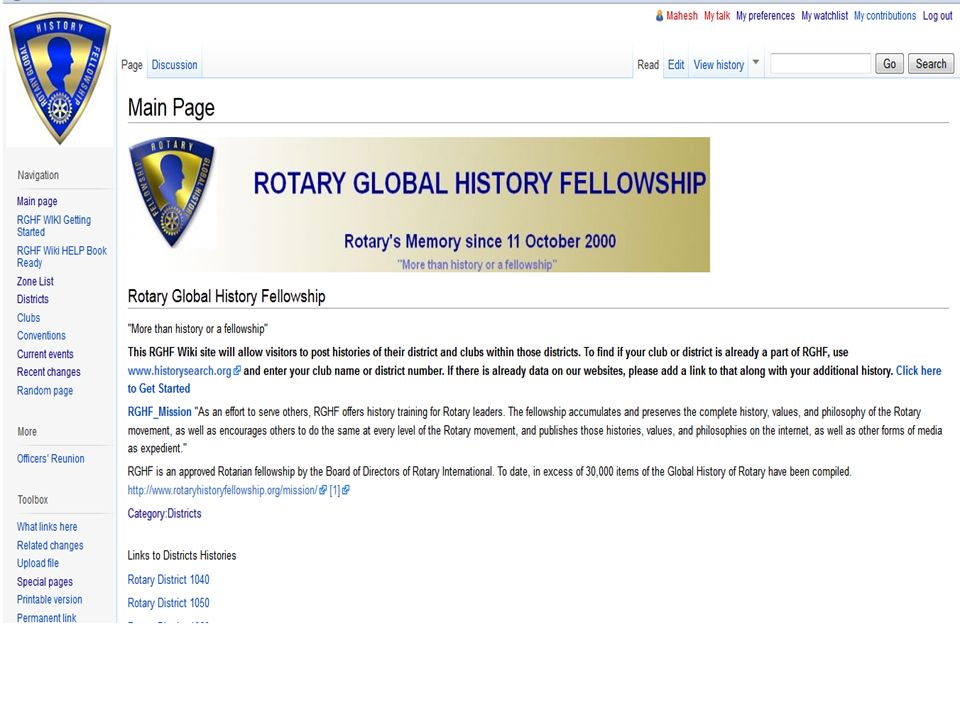
What is wiki? A wiki is a type of website that allows users to easily add, remove, or otherwise edit and change some available content This ease of interaction and operation makes a wiki an effective tool for collaborate authoring The wiki records every edit made to a page This makes it easy to restore vandalized pages or fix an accidental deletion

4
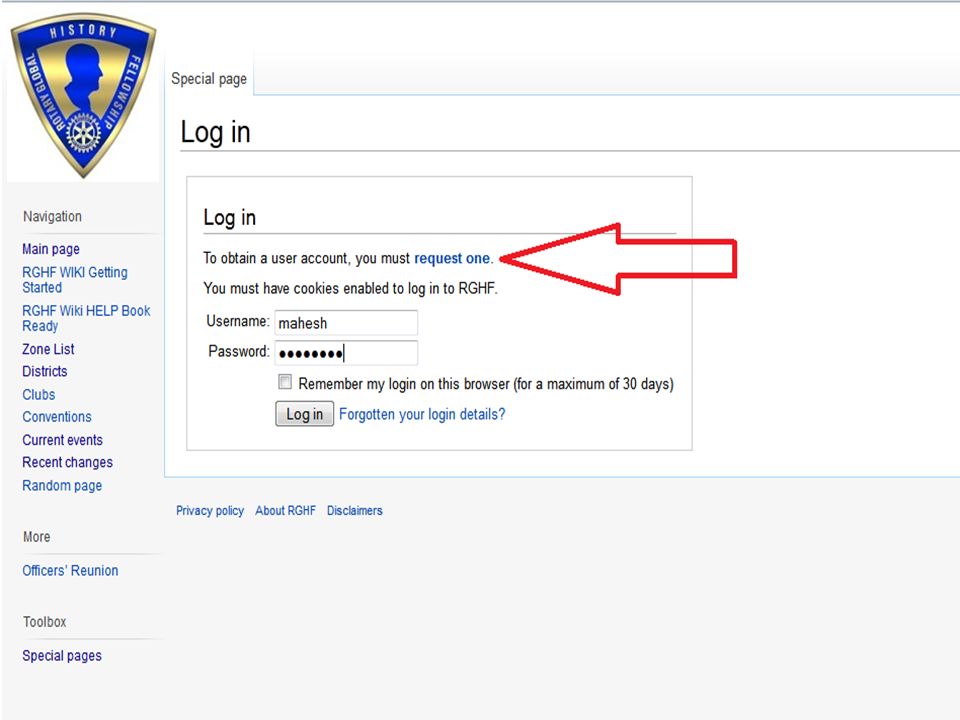
How do I create an account? Creating an account is as simple as clicking the Log in / create account link in the top right corner If you don’t login then the wiki will use your IP address as your username Some wikis may make you email an administrator to get an account

6
Navigation and Search Navigation Main Page – displays the home page Categories – lists all the categories that are within the wiki Recent changes – lists recent changes to the wiki Random page – directs the user to random page Search For a quick search just type in your query and push Search To go directly to a page type in the title and push Go

7
Tabs When you are logged in there are six different tabs on the top of your screen that basically tell you what you are doing Article – tells you that you are viewing an article If you are on a special page it will say that here Discussion – this allows you to talk about the page with other users Edit – allows you to edit the page History – lists the page’s history; if you accidentally delete something, don’t worry, it’ll be in the history Move – moving a page is serious business; make sure you read the instructions before moving a page Watch – watching allows you to keep track of pages. Any page you put on your watchlist will appear in bold on when you view Recent changes

8
Top links My talk – this page allows other users to talk to you Preferences – allows you to change your preferences; take a few minutes and look through this My watchlist – lists all the pages you are watching My contributions – lists all the changes you have made to pages

9
Toolbox All of the options in the toolbox are self explainable The toolbox changes depending on what namespace you are in

10
Special pages Most are the links here are also self explainable This page is important because it provides the user with links that ease the editing process For example: Unused files File list Dead-end pages New pages Wanted pages

11
How to upload a file (1 of 2) Under Destination filename you can rename the file When uploading files keep in mind that other people will be viewing them too, so it may be a good idea to give the files descriptive names Also, include a sentence or two in the Summary box so other users know what you have uploaded
 Under Destination filename you can rename the file When uploading files keep in mind that other people will be viewing them too, so it may be a good idea to give the files descriptive names Also, include a sentence or two in the Summary box so other users know what you have uploaded")
12
How to upload a file (2 of 2) Uploadable extensions include: png, gif, jpg, jpeg, ogg, zip, tar, wmv, tiff and tif Every file you upload gets its own page To view uploaded files Click Special pages in the toolbox Choose File list There are two types of files, images and media. Media includes images, but images does not include media. Images include png, gif, jpg, and tif

14
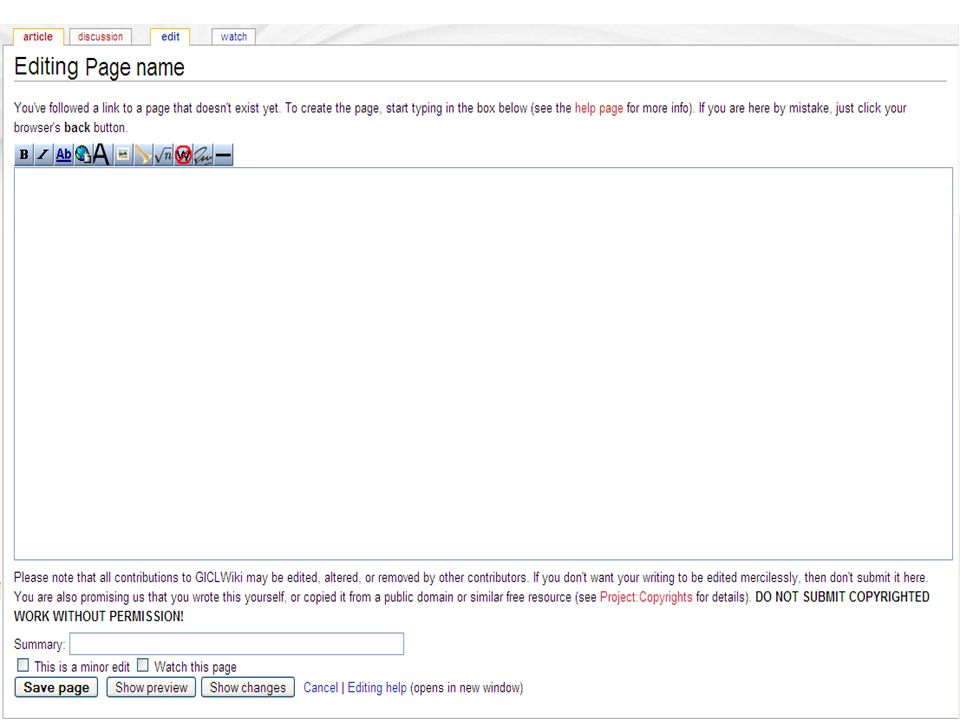
Editing a page (1 of 15) You can end up at an editing page two ways Clicking on the edit tab Clicking on a link who’s page doesn’t exist yet A link who’s page doesn’t contain anything will be red; whereas links with content are blue When editing a page make sure to use the Show Preview button This way you don’t clutter the history page with a lot of minor edits
 You can end up at an editing page two ways Clicking on the edit tab Clicking on a link who’s page doesn’t exist yet A link who’s page doesn’t contain anything will be red; whereas links with content are blue When editing a page make sure to use the Show Preview button This way you don’t clutter the history page with a lot of minor edits")
15
Editing a page (2 of 15) These buttons are at the top of the text box on the editing page They give you the code necessary to perform the action you want
 These buttons are at the top of the text box on the editing page They give you the code necessary to perform the action you want")
16
Editing a page (3 of 15) Bold – put three apostrophes on either side of the text. ‘’’ text ’’’ gives text Italic – put two apostrophes on either side of the text. ’’ text ’’ gives text Bold and Italic – put five apostrophes on either side of the text. ’’’’’ text ’’’’’ gives text

17
Editing a page (4 of 15) To make a new page or link to a page in the wiki use two brackets. [[Page_name]] gives Page name If the page doesn’t exist it will automatically be made Use underscores (_) instead of spaces in page names Page names are case sensitive, so if you named a page “This Page” and you want to refer to it as “this page” you use a pipe ( | ) If you type: Check out [[This_Page|this page]] the text will show: Check out this page
 instead of spaces in page names Page names are case sensitive, so if you named a page This Page and you want to refer to it as this page you use a pipe ( | ) If you type: Check out [[This_Page|this page]] the text will show: Check out this page.")
18
Editing a page (5 of 15) External links only use one set of brackets. You need to include http:// [http://google.com] gives [1] To include a name you just put a space between the address and the name [http://google.com Google] gives Google

19
Editing a page (6 of 15) To make a section heading use two equal signs ( == ) ==Section== gives The underline is automatic To make a subsection just at an equal sign to either side of the text A subsection will not be underlined, just bold Section headings are good to use because they organize your page Additionally they automatically make a table of contents at the top of the page
 To make a section heading use two equal signs ( == ) ==Section== gives The underline is automatic To make a subsection just at an equal sign to either side of the text A subsection will not be underlined, just bold Section headings are good to use because they organize your page Additionally they automatically make a table of contents at the top of the page")
20
Editing a page (7 of 15) Since every upload gets it’s own page, inserting an image or media is like making an internal link; you can even use pipes The only difference is that you have to prefix the filename with “Image:” or “Media:” [[Image:filename.ext]] or [[Media:filename.ext]]
![Editing a page (7 of 15) Since every upload gets it’s own page, inserting an image or media is like making an internal link; you can even use pipes The only difference is that you have to prefix the filename with Image: or Media: [[Image:filename.ext]] or [[Media:filename.ext]]](http://images.slideplayer.com/23/6867444/slides/slide_20.jpg "Editing a page (7 of 15) Since every upload gets it’s own page, inserting an image or media is like making an internal link; you can even use pipes The only difference is that you have to prefix the filename with Image: or Media: [[Image:filename.ext]] or [[Media:filename.ext]]")
21
Editing a page (8 of 15) When inserting images you have many options Pipes (“|”) separate all the parameters To put the image in a frame just type frame A image with a caption needs to be in a frame [[Image:filename.ext | frame | caption text]] You can make the image an external link by adding the link as a parameter You can choose where you want the link to be located; just add right, left or center as a parameter To make an image a thumb nail use the word thumb To make the image a certain size just add the pixel size [[Image:file.ext | thumb | caption | 300px | right | [http://google.com Google] ]]
![Editing a page (8 of 15) When inserting images you have many options Pipes ( | ) separate all the parameters To put the image in a frame just type frame A image with a caption needs to be in a frame [[Image:filename.ext | frame | caption text]] You can make the image an external link by adding the link as a parameter You can choose where you want the link to be located; just add right, left or center as a parameter To make an image a thumb nail use the word thumb To make the image a certain size just add the pixel size [[Image:file.ext | thumb | caption | 300px | right | [ Google] ]]](http://images.slideplayer.com/23/6867444/slides/slide_21.jpg "Editing a page (8 of 15) When inserting images you have many options Pipes ( | ) separate all the parameters To put the image in a frame just type frame A image with a caption needs to be in a frame [[Image:filename.ext | frame | caption text]] You can make the image an external link by adding the link as a parameter You can choose where you want the link to be located; just add right, left or center as a parameter To make an image a thumb nail use the word thumb To make the image a certain size just add the pixel size [[Image:file.ext | thumb | caption | 300px | right | [ Google] ]]")
22
Editing a page (9 of 15) If you want the editor to ignore the wiki markup then use the nowiki tags ( ) ==Heading== gives ==Heading== On a talk page you should “sign” your comments Three tildes (~~~) gives your user name Four tildes (~~~~) gives your user name and date and time Five tildes (~~~~~) give only the date and time You can make a horizontal line by typing ----
 If you want the editor to ignore the wiki markup then use the nowiki tags ( ) ==Heading== gives ==Heading== On a talk page you should sign your comments Three tildes (~~~) gives your user name Four tildes (~~~~) gives your user name and date and time Five tildes (~~~~~) give only the date and time You can make a horizontal line by typing ----")
23
Editing a page (10 of 15) To make an unordered (bulleted) list just type an asterisk (*) before your text To go a level deeper add an asterisk (*) To stay at the same level but not show a bullet, type an asterisk and a colon (*:) before your text
 To make an unordered (bulleted) list just type an asterisk (*) before your text To go a level deeper add an asterisk (*) To stay at the same level but not show a bullet, type an asterisk and a colon (*:) before your text")
24
Editing a page (11 of 15) To make an ordered (numbered) list type the pound sign (#) The same rules that apply to unordered lists apply to ordered lists To make a definition list type a semicolon (;) before the word you want to define and a colon (:) before the definition ; Word : Definition : Another definition
 To make an ordered (numbered) list type the pound sign (#) The same rules that apply to unordered lists apply to ordered lists To make a definition list type a semicolon (;) before the word you want to define and a colon (:) before the definition ; Word : Definition : Another definition")
25
Editing a page (12 of 15) It is possible to use bulleted, numbered and definition lists all at the same time
 It is possible to use bulleted, numbered and definition lists all at the same time")
26
Editing a page (13 of 15) To start a new paragraph you have to insert an empty line (press enter twice) A colon (:) before text indents a paragraph Multiple colons (::) indent multiple times To redirect to another page type: #REDIRECT [[Pagename]]
![Editing a page (13 of 15) To start a new paragraph you have to insert an empty line (press enter twice) A colon (:) before text indents a paragraph Multiple colons (::) indent multiple times To redirect to another page type: #REDIRECT [[Pagename]]](http://images.slideplayer.com/23/6867444/slides/slide_26.jpg "Editing a page (13 of 15) To start a new paragraph you have to insert an empty line (press enter twice) A colon (:) before text indents a paragraph Multiple colons (::) indent multiple times To redirect to another page type: #REDIRECT [[Pagename]]")
27
Editing a page (14 of 15) You can make an anchor or link to a section heading on a page This is like making any other internal link except you put the pound sign (#) before the section name To link to a section on another page: [[Pagename#section name]] To link to a section on the same page: [[#section name]]
![Editing a page (14 of 15) You can make an anchor or link to a section heading on a page This is like making any other internal link except you put the pound sign (#) before the section name To link to a section on another page: [[Pagename#section name]] To link to a section on the same page: [[#section name]]](http://images.slideplayer.com/23/6867444/slides/slide_27.jpg "Editing a page (14 of 15) You can make an anchor or link to a section heading on a page This is like making any other internal link except you put the pound sign (#) before the section name To link to a section on another page: [[Pagename#section name]] To link to a section on the same page: [[#section name]]")
28
Editing a page (15 of 15) Making tables Everything is surrounded by a bracket and pipe ( {| ) Set the border, cellspacing, cellpadding and alignment A pipe ( | ) denotes a different column on a row An exclamation mark ( ! ) does the same thing as a pipe but makes the text bold A pipe followed by a dash ( |- ) creates a new row {| border="1" cellspacing="0" cellpadding="5" align="center" ! This ! is |- | a | table |- |}
 does the same thing as a pipe but makes the text bold A pipe followed by a dash ( |- ) creates a new row {| border= 1 cellspacing= 0 cellpadding= 5 align= center . This . is |- | a | table |- |}.")
29
HTML that can be used to edit (1 of 4) To start a new line insert If you want to write a comment to other editors, but you do not want people who view the page to see the comment use To center information use the center tags ( ) text placed here will appear in the center of the page If you want to block your text use the blockquote tags ( ) text in here will be indented from both sides
 To start a new line insert If you want to write a comment to other editors, but you do not want people who view the page to see the comment use To center information use the center tags ( ) text placed here will appear in the center of the page If you want to block your text use the blockquote tags ( ) text in here will be indented from both sides")
30
HTML that can be used to edit (2 of 4) If you use code tags ( </code) when you write code in a wiki the editor changes the font and puts a dotted line around it If for some reason the code tags don’t work try surrounding your text with pre tags Pre tags ( ) will ignore wiki markup and will not reformat the text
 If you use code tags ( </code) when you write code in a wiki the editor changes the font and puts a dotted line around it If for some reason the code tags don’t work try surrounding your text with pre tags Pre tags ( ) will ignore wiki markup and will not reformat the text")
31
HTML that can be used to edit (3 of 4) Span tags ( ) are recognized by the editor Span has many attributes, two resourceful attributes are font-variant and style Surrounding you text in typewriter tags ( ) will make change the font of your text to that of a typewriter
 Span tags ( ) are recognized by the editor Span has many attributes, two resourceful attributes are font-variant and style Surrounding you text in typewriter tags ( ) will make change the font of your text to that of a typewriter")
32
HTML that can be used to edit (4 of 4) To make super or sub scripts use the and tags The strikeout tag puts a line thru text The underline tag will underline text
 To make super or sub scripts use the and tags The strikeout tag puts a line thru text The underline tag will underline text")
33
Templates (1 of 4) Templates are segments of Wiki markup that are meant to be copied automatically into a page You add them by putting the template's name in double braces ( {{ }} ) {{Template_name}} To edit the template just click on the link you made to it
 Templates are segments of Wiki markup that are meant to be copied automatically into a page You add them by putting the template s name in double braces ( {{ }} ) {{Template_name}} To edit the template just click on the link you made to it")
34
Templates (2 of 4) Some templates take parameters, which you separate with the pipe character ( | ) This means that your template can have replaceable fields where you send in the word that you want to insert in the template The parameter names are surrounded by three braces ( {{{ }}} )
 Some templates take parameters, which you separate with the pipe character ( | ) This means that your template can have replaceable fields where you send in the word that you want to insert in the template The parameter names are surrounded by three braces ( {{{ }}} )")
35
Templates (3 of 4) Lets say you made a template {{Biography}} that contained: {{{name}}} was born on {{{date}}} in {{{birthplace}}}. {{{name}}} likes to {{{hobbies}}} and is {{{job}}}. Now you call the template: {{Biography|name=Jason|date=Feb 21, 1985|birthplace=Philadelphia|hobbies=build stuff|job=a student}} When you save the page the text will show: Jason was born on Feb 21, 1985 in Philadelphia. Jason likes to build stuff and is a student.

36
Templates (4 of 4) Templates don’t have to have parameters You can just write the text you want and when you call the template the text will appear If you call a template that uses parameters but you don’t include the parameters then the text will show the parameter names If you called {{Biography}} the text will show: {{{name}}} was born on {{{date}}} in {{{birthplace}}}. {{{name}}} likes to {{{hobbies}}} and is {{{job}}}.

37
Namespaces (1 of 2) Namespaces can be viewed as folders which separate different basic types of information or functionality There are 18 namespaces: main (which has no prefix) media, special, and 15 others The namespace is the prefix of the page For example, whenever possible, you should categorize your pages [[Category:Category_name]] Here Category is the namespace Each namespace (except for Special) has a corresponding talk page that can be found at namespace_talk (except for the main page where it is just Talk) Talk pages allow users to discuss the article or page or communicate amongst each other Namespaces allow to pages to have the same title but as long as they are in different namespaces they will not conflict with eachother
![Namespaces (1 of 2) Namespaces can be viewed as folders which separate different basic types of information or functionality There are 18 namespaces: main (which has no prefix) media, special, and 15 others The namespace is the prefix of the page For example, whenever possible, you should categorize your pages [[Category:Category_name]] Here Category is the namespace Each namespace (except for Special) has a corresponding talk page that can be found at namespace_talk (except for the main page where it is just Talk) Talk pages allow users to discuss the article or page or communicate amongst each other Namespaces allow to pages to have the same title but as long as they are in different namespaces they will not conflict with eachother](http://images.slideplayer.com/23/6867444/slides/slide_37.jpg "Namespaces (1 of 2) Namespaces can be viewed as folders which separate different basic types of information or functionality There are 18 namespaces: main (which has no prefix) media, special, and 15 others The namespace is the prefix of the page For example, whenever possible, you should categorize your pages [[Category:Category_name]] Here Category is the namespace Each namespace (except for Special) has a corresponding talk page that can be found at namespace_talk (except for the main page where it is just Talk) Talk pages allow users to discuss the article or page or communicate amongst each other Namespaces allow to pages to have the same title but as long as they are in different namespaces they will not conflict with eachother")
38
Namespaces (2 of 2) main - no prefix, or optionally a colon (this is needed when using the page as template) Media - or images and other files themselves, as opposed to the image description pages Special – for special pages, they have no wiki text and are created by the software on demand User – each user gets a page on the wiki, it is found at User: username Meta – this is for matters about the project, like guidelines or discussions Images – for images or other uploaded files, with image description pages MediaWiki – system messages Template – the default namespace for templates When you write {{name}} it refers to the page Template:name Help - typically used for the MediaWiki User's Guide Category – each page represents a category of pages, with each category page displaying a list of pages in that category and optional additional text.
 main - no prefix, or optionally a colon (this is needed when using the page as template) Media - or images and other files themselves, as opposed to the image description pages Special – for special pages, they have no wiki text and are created by the software on demand User – each user gets a page on the wiki, it is found at User: username Meta – this is for matters about the project, like guidelines or discussions Images – for images or other uploaded files, with image description pages MediaWiki – system messages Template – the default namespace for templates When you write {{name}} it refers to the page Template:name Help - typically used for the MediaWiki User s Guide Category – each page represents a category of pages, with each category page displaying a list of pages in that category and optional additional text.")
39
Keyboard shortcuts Mediawiki contains many keyboard shortcuts Some important ones are: Alt – e (edit a page) Alt – f (search) Alt – h (show history) Alt – j (shows what links to that page) Alt – l (opens your watchlist) Alt – o (log in or log out) Alt – p (show preview) Alt – u (upload file) Alt – w (watch this page) Alt – z (main page) For more go to http://en.wikipedia.org/wiki/Wikipedia:Keyboard_shortcut s http://en.wikipedia.org/wiki/Wikipedia:Keyboard_shortcut s
 Alt – f (search) Alt – h (show history) Alt – j (shows what links to that page) Alt – l (opens your watchlist) Alt – o (log in or log out) Alt – p (show preview) Alt – u (upload file) Alt – w (watch this page) Alt – z (main page) For more go to s s")
Similar presentations
 Lecture # 5 HyperText Markup Language (HTML) 1.>")


 FrontPage 2002 Level I (Intro & Training)>")
 angle brackets. Tags can be upper.>")


 Go to www.google.com/a/walthampublicschools.org b) Sign in using your username and password.>")