Download presentation
Presentation is loading. Please wait.

1
WINDOWS MOVIE MAKER “CREATIVITY” Making Your Project, Come To Live An E-Learning Course To Get You Started Created By: Noe Granado Making Your Project, Come To Live An E-Learning Course To Get You Started Created By: Noe Granado

2
INTRUCTIONAL GOAL After completing this course, teachers will be able to use Interactive Multimedia using Movie Maker in which they will be able to create a project and add Video/Pictures. INTENDED AUDIENCE K-12 Teachers LEARNING ENVIRONMENT Teacher will learn how to use Windows Movie Maker through an E-Learning Environment. http://windowsmoviemakercourse.weebly.com/http://windowsmoviemakercourse.weebly.com/ The skills will be carried out in the classroom.

3
Hi!, my name is Noe, in this instructional unit you will be creating a Windows Movie Maker project……. Follow the instructions and you will be on your way to making your projects come to live! Remember that I will be with you through the process of completing this course. I’ll provide you with as much as information as I can in order to assure that you succeed. Make sure you read my introduction through the Blabberize and complete the anticipation guide, before continuing this course.Blabberize anticipation guide

4
Keep in mind that Windows Movie Maker is already pre-installed in your computer, if you are using Windows Operating System. If for any reason your computer does not have the program, then you can download it for free, from microsoft.com, otherwise follow these steps to start Windows MovieWindows Movie MakerWindows Operating System

5
Step One: Import Video Clips and Pictures Click on “start” Select “Windows Movie Maker” Remember to Familiarized Yourself with the Menu Bar, before you continue…

6
Once you have spent time familiarizing yourself with the menu bar, then you are ready to continue. If you are interested in making this instructional unit personal, then have ready some personal/student pictures and a video clip of your family/students. This will personalize this project, making it your own. Keep in mind that Windows Movie Maker has two of views: Storyboard View & Timeline View. For the purpose of this section you will use “StoryBoard View”. Before finalizing this section, feel free to add as many pictures/videos as you want. All imported images/video clips, go into a “Collections Folder”.

7
Ok! Lets make sure you are comprehending…….Answer the question below….Good Luck! As you are familiarizing yourself with Windows Movie Maker, When you import video clips and graphic they go straight to the 1.Collections folderCollections folder 2.StoryboardStoryboard 3.TimelineTimeline 4.MovieMovie

8
Incorrect! Storyboard. The storyboard is the default view in Windows Movie Maker. You can use the storyboard to look at the sequence or ordering of the clips in your project and easily rearrange them, if necessary. This view also lets you see any video effects or video transitions that have been added. Audio clips that you have added to a project are not displayed on the storyboard, but you can see them in the timeline view. The following picture shows the storyboard view in Windows Movie Maker:

9
Incorrect! Timeline. The timeline view provides a more detailed view of your movie project and allows you to make finer edits. Using the timeline view you can trim video clips, adjust the duration of transitions between clips, and view the audio track. You can use the timeline to review or modify the timing of clips in your project. Use the timeline buttons to switch to storyboard view, zoom in or out on details of your project, narrate the timeline, or adjust the audio levels. The following picture shows the timeline view in Windows Movie Maker:Windows

10
Incorrect! Windows Movie Maker is a feature of Windows XP that enables you to create home movies and slide shows on your computer, complete with professional-looking titles, transitions, effects, music, and even narration. And when you’re ready, you can use Windows Movie Maker to publish your movie and share it with your friends and family.complete If you’re new to digital video editing or just new to Windows Movie Maker, keep reading for an introduction to the different tools you'll use in Windows Movie Maker and for links to help you learn more.

11
WOW Great Job! A collection in Windows Movie Maker can contain audio clips, video clips, or pictures that you have imported, as well as the existing transitions and effects. The folders in the Collections pane contain your clips, which are smaller segments of audio and video. Folders help you organize content that you import into Windows Movie Maker.

12
You’re doing great! Lets create and save a project….. Click on “File” “Save Project” “File name: MyFirstMovie” “Save” Make sure that you Click on save every time you make a change Saving the project:

13
Now that you’ve created a project….lets add picture(s)….
….")
14
Now that you’ve imported pictures….lets add video(s)….
….")
15
GREAT JOB! You have completed this instructional tutorial! Remember to switch to “TimeLine View” if you are interested in Editing the Pictures/Videos Don’t forget to click on “Save” to assure that you don’t lose you progress, in case of a power outage! GREAT JOB! You have completed this instructional tutorial! Remember to switch to “TimeLine View” if you are interested in Editing the Pictures/Videos Don’t forget to click on “Save” to assure that you don’t lose you progress, in case of a power outage!

16
Ok! Lets make sure you are comprehending…….Answer the question below….Good Luck! When you drag video clips and graphics to the timeline in which mode can you edit them? 1.Timeline modeTimeline mode 2.Storyboard modeStoryboard mode 3.Movie Maker modeMovie Maker mode 4.Edit movie modeEdit movie mode

17
Incorrect! Storyboard. The storyboard is the default view in Windows Movie Maker. You can use the storyboard to look at the sequence or ordering of the clips in your project and easily rearrange them, if necessary. This view also lets you see any video effects or video transitions that have been added. Audio clips that you have added to a project are not displayed on the storyboard, but you can see them in the timeline view. The following picture shows the storyboard view in Windows Movie Maker:

18
Incorrect! Sorry but “Movie Maker mode “ does not exist but “Timeline” does Timeline. The timeline view provides a more detailed view of your movie project and allows you to make finer edits. Using the timeline view you can trim video clips, adjust the duration of transitions between clips, and view the audio track. You can use the timeline to review or modify the timing of clips in your project. Use the timeline buttons to switch to storyboard view, zoom in or out on details of your project, narrate the timeline, or adjust the audio levels. The following picture shows the timeline view in Windows Movie Maker:Windows

19
Incorrect! Sorry but “Edit movie mode “ does not exist but Try Again….

20
WOW Great Job! Timeline. The timeline view provides a more detailed view of your movie project and allows you to make finer edits. Using the timeline view you can trim video clips, adjust the duration of transitions between clips, and view the audio track. You can use the timeline to review or modify the timing of clips in your project. Use the timeline buttons to switch to storyboard view, zoom in or out on details of your project, narrate the timeline, or adjust the audio levels. The following picture shows the timeline view in Windows Movie Maker: In step one you added video clip(s) and pictures. If you feel comfortable with these clips and graphics then continue using them for editing. If you wish to change them, do so now. In order to be in TimeLine View make sure that you click on “Show TimeLine”. Clicking on the same button will toggle you back and forth from Storyboard to Timeline. In this section you can “Edit” the video clip/picture.
 and pictures. If you feel comfortable with these clips and graphics then continue using them for editing. If you wish to change them, do so now. In order to be in TimeLine View make sure that you click on Show TimeLine . Clicking on the same button will toggle you back and forth from Storyboard to Timeline. In this section you can Edit the video clip/picture..")
21
Congratulations! You have created you own movie using Windows Movie Maker. Use the rubric to Score your knowledge, and you did great throughout this Instructional Unit! Don’t forget to take the Anticipations Guide Performance rubricAnticipations Guide Performance Congratulations! You have created you own movie using Windows Movie Maker. Use the rubric to Score your knowledge, and you did great throughout this Instructional Unit! Don’t forget to take the Anticipations Guide Performance rubricAnticipations Guide Performance This instructional unit was intended for you, to encourage integration of technology in the classroom and lead students to use their creativity during instruction. Let us finalize our Windows Movie Maker project by clicking on the “save” icon and exit Windows Movie Maker

22
Use the rubric to Score your knowledge

23
Windows XP is an operating system produced by microsoft for use on personal computer, including home and business desktops, laptops and media centers. First released to computer manufacturers on August 24, 2001, it is the second most popular version of Windows, based on installed user base. The name "XP" is short for "eXPerience."

24
Overview Movie Maker 2.1 is for Windows XP users whose computer cannot run the XP version of Movie Maker. To test if your computer can run the Vista version of Movie Maker: 1. From the Start menu, click All Programs. 2. Click Windows Movie Maker. If Movie Maker launches, you should not download version 2.6. If you get an error message that says, "Windows Movie Maker cannot start because your video card does not support the required level of hardware acceleration or hardware acceleration is not available", download and install Movie Maker 2.6.Windows System requirements Supported Operating Systems: Window XP any version except Vista. Movie Maker 2.6 requires a version of Microsoft Windows Vista that has the Vista version of Movie Maker already installed.Microsoft

25
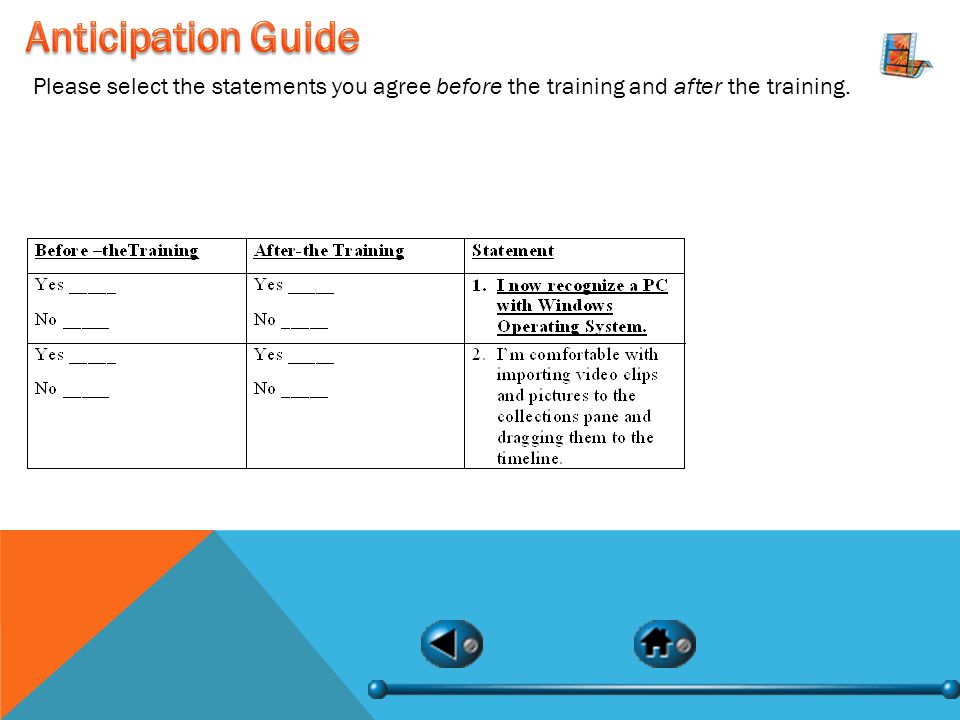
Please select the statements you agree before the training and after the training.

27
“Hi, my name is Noe. I will be guiding you throughout the course. You will have lots of fun learning how to make your projects into movies! Just image that the flag you taught yesterday can now move, that the digestive system can now be seen in 3D, that the math equation can now be interactive, that the pictures you talked about can come to live and that the videos you took can be edited to suit your classroom needs…… Students now, more than ever need to have a teacher who can be creative in the classroom. You will become that teacher after completing this instructional material.

Similar presentations


 as well as any dialogue or action comments.>")


![Microsoft ® Office PowerPoint ® 2003 Training Playing movies [Your company name] presents:](/19/5799862/big_thumb.jpg "Microsoft ® Office PowerPoint ® 2003 Training Playing movies [Your company name] presents:>")


