Download presentation
Presentation is loading. Please wait.

1
Backup Airways New Hampshire Division of Fire Standards & Training and Emergency Medical Services 2011

2
Know Your Options!!! & Don’t hesitate to use them!

3
Purpose It is vital that the prehospital crew be confident and comfortable with the rescue airways approved for their level of licensure. During this module you will review and practice the back up airways for your level of licensure.

4
Purpose Review Backup Airway Devices (Rescue Airways) BVM LMA King-LT-D Combitube
 BVM LMA King-LT-D Combitube")
6
The Basics Position OPA BVM Suction Most difficult airways will still be manageable using basic airway maneuvers!

7
The Need for Oxygen 0 – 1 minute: cardiac irritability 0 – 4 minutes: brain damage not likely 4 – 6 minutes: brain damage possible 6 – 10 minutes: brain damage very likely > 10 minutes: irreversible brain damage

8
Oxygen and Carbon Dioxide Exchange Oxygen-rich air is inhaled to alveoli O2 exchanged at alveolocapillary level Perfusion to capillary beds O2/CO2 exchange at cellular level Perfusion from capillary beds CO2 exhanged at alveolocapillary level CO2 exhaled

9
Assessment of Respiration Patients level of consciousness Respiration quality Pulse quality Respiratory rate Pulse rate SPO2 EtCO2 Blood pressure Glasgow coma score

10
Every TRUE life saving intervention performed by EMS reverses one or more failing components of respiration

11
BVM is the most essential intervention in RSI

12
Inadequate Breathing Fast or slow rate Irregular rhythm Abnormal lung sounds Reduced tidal volume Use of accessory muscles Cool, pale, diaphoretic, cyanotic skin

13
Head Tilt-Chin Lift One hand on the forehead Apply backward pressure Tips of fingers under mandible Lift the chin

14
Jaw-Thrust Maneuver Place fingers behind the angle of the jaw Use thumbs to open mouth

15
Look, Listen, and Feel Assess that Airway!

16
Basic Airway Adjuncts Oropharyngeals Keeps tongue from blocking oropharynx Eases suctioning Used with BVM Patients without gag reflex Nasopharyngeals Maintains patency of oropharynx Patients with gag reflex Should not be used with head trauma

17
Oxygen Nonrebreathing mask – Provides up to 90% oxygen – Used at 10 to 15 L/min Nasal cannula – Provides 24% to 44% oxygen – Used at 1 to 6 L/min

18
Oxygen Nasal cannula 24-40% at 1-6 liters Non-rebreather mask Up to 90% at 15 liters BVM 21% atmosphere Up to 100% at 15 liters with reservoir

19
Artificial Ventilation Mouth to mask BVM – one person BVM – two person

20
Ventilation Rates Adults: 8 - 10 breaths per minute Approximately one breath every 6 – 8 seconds Pediatric: 12 – 20 breaths per minute Approximately one breath every 3 – 6 seconds

21
Bag Valve Mask Delivers > 90% oxygen Requires practice and proficiency Use with airway adjuncts and/or advanced airways O2 Reservoir Bag Valve Mask

22
BVM-Problems encountered Inattentiveness Poor mask seal = poor ventilatory ability Varying ventilatory rates Varying expiration rates Varying tidal volumes Often excessive airway pressure Often hyper-ventilation Mastering the BVM overcomes these obstacles!

23
BVM – One person Insert an oral/nasal airway Seal mask by placing the apex over the bridge of the nose and lower portion of the mask over the mouth and upper chin. Make a “C” with your index finger and thumb around the mask. Maintain the airway with your middle, ring and little finger, creating a “E”, under the jaw to maintain the chin lift. Squeeze the bag with your other hand slowly at a rate of one breath every 6–8 seconds. Monitoring SpO2

24
BVM – Two Person Insert oral/nasal airway First provider hold the bag portion of the BVM with both hands. Second provider seals the mask with apex over the bridge of the nose and base at the upper chin. Using two hands the second provider places his/her thumbs over the top half of the mask; index and middle finger over bottom half; ring and little finger under jaw. Second provider also maintains chin-lift First provider squeezes bag every 6–8 seconds Monitoring SpO2.

25
Adequate Ventilation Equal chest rise and fall Appropriate rate Heart rate returns to normal

26
Inadequate Ventilation Minimal or no chest rise Ventilating too fast or too slow Heart rate does not return to normal

27
Asthma and COPD These patients complicate the traditional RSI approach due to the difficulty encountered when mask ventilating Alveolar hyperinflation secondary to underlying pathophysiology must be considered and adequate passive ventilation time must be ensured Tidal volumes should be reduced, initially, to reduce likelihood of barotrauma and air trapping

28
Gastric Distention Air fills the stomach from too forceful or too frequent ventilations Airway may be blocked and ventilations are re-routed to stomach Decreases lung capacity May cause patient to vomit

29
Airway Obstructions Tongue Vomit Blood, clots, traumatized tissue Swelling Foreign objects

30
Recognizing an Obstruction Partial or complete? Can patient speak? Cough? If unconscious, deliver artificial ventilation Does air go in? Does the chest rise?

31
Removing an Obstruction Heimlich maneuver Suction Magills (paramedics)
")
32
Suctioning Turn on unit and ensure proper suctioning pressure (300 mmHg) Select proper tip and measure Insert with suction off Suction on the way out Suction for no more than 15 seconds
 Select proper tip and measure Insert with suction off Suction on the way out Suction for no more than 15 seconds")
33
Continuous Positive Airway Pressure (CPAP) Is the patient a candidate for CPAP?
 Is the patient a candidate for CPAP")
34
CPAP Indications Any patient in respiratory distress associated with CHF with any of the below obvious signs and symptoms or a history of CHF: Bibasilar or diffuse rales Respiratory rate greater than 25 Pulse oximetry below 92% Retractions or accessory muscle use Abnormal capnography (rate, waveform, CO2 levels)
")
35
RSI Indication Immediate severe airway compromise in the context of trauma, drug overdose, status epilepticus, etc. where respiratory arrest in imminent.

36
Always have a back-up plan. Plans “A”, “B”, and “C” Know the answers before you begin

37
Plan “A”: (ALTERNATIVES) Different: Size of blade Type of blade Miller Macintosh Specialty Position (patient & provider) Hockey stick bend in ETT or Directional tip ETT Remove the stylette as you pass through the cords “BURP” (aka “ELM”) Gum Elastic Bougie 2-person technique “cowboy” or “skyhook” Have someone else try
 Different: Size of blade Type of blade Miller Macintosh Specialty Position (patient & provider) Hockey stick bend in ETT or Directional tip ETT Remove the stylette as you pass through the cords BURP (aka ELM ) Gum Elastic Bougie 2-person technique cowboy or skyhook Have someone else try")
38
Viewmax Scope Easy of use Can be used like a Mac or Miller Should improve your view by one grade

39
“BURP” – a.k.a. “External Laryngeal Manipulation” Backward, Upward, Rightward Pressure: manipulation of the trachea 90% of the time the best view will be obtained by pressing over the thyroid cartilage Differs from the Sellick Maneuver

40
Plan “B”: (BVM and BACK UP Airways) Can you ventilate with a BVM? (Consider two NPA’s and an OPA, + Cricoid pressure w/ gentle ventilation) KING–LT-D Combitube LMA
 KING–LT-D Combitube LMA.")
41
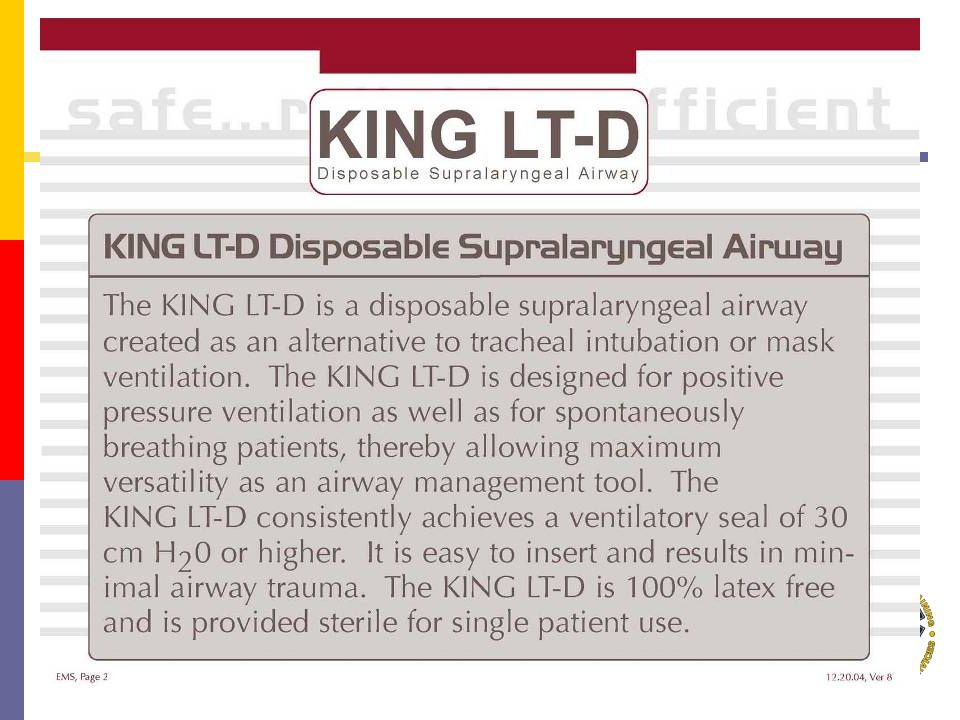
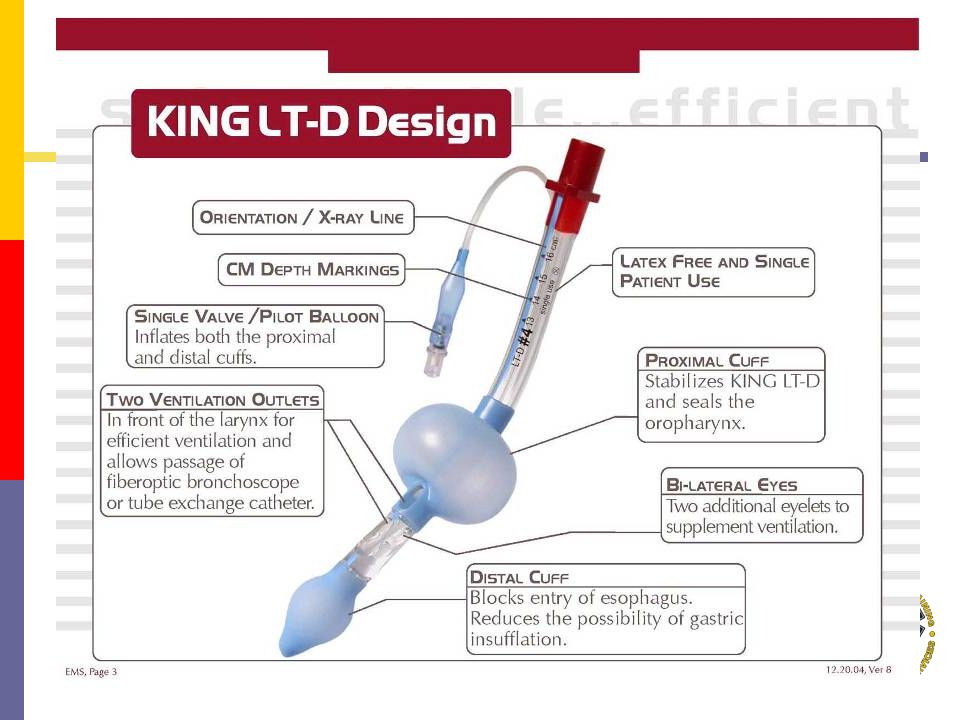
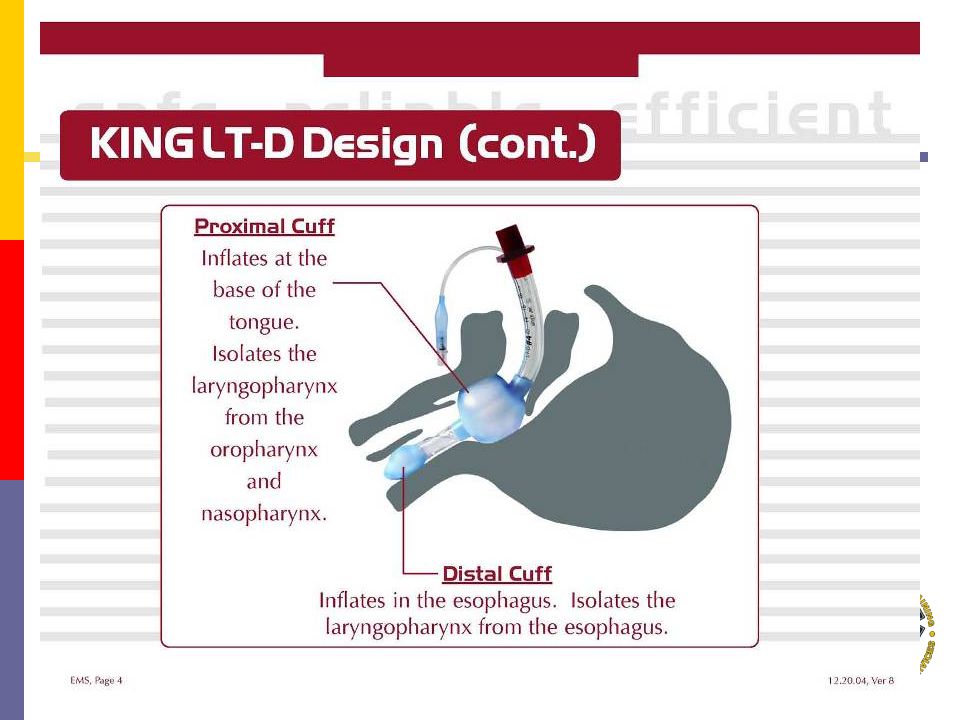
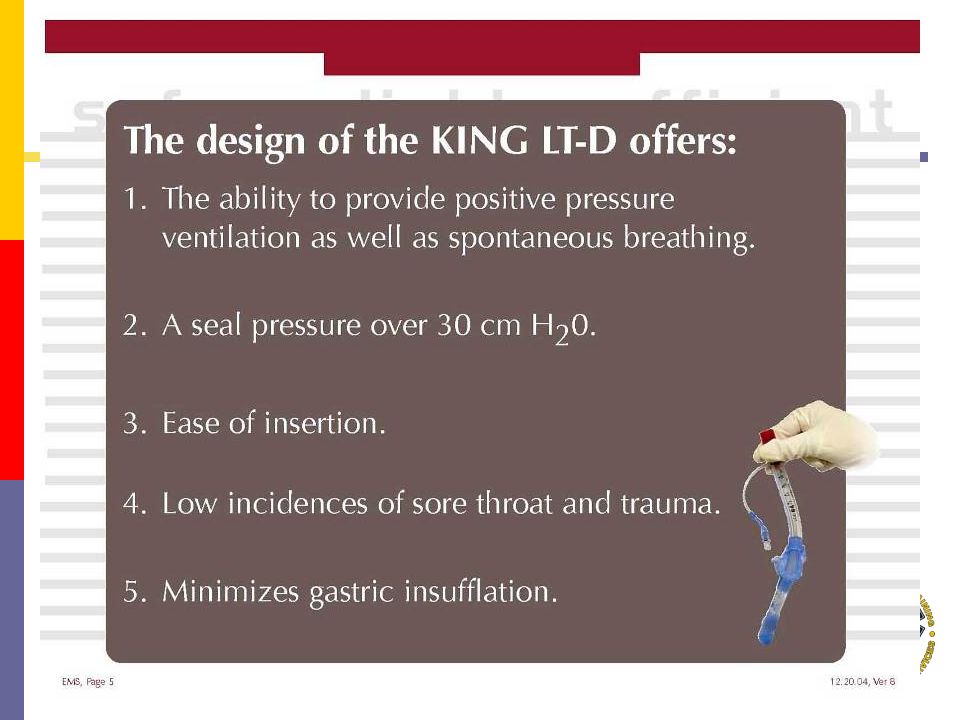
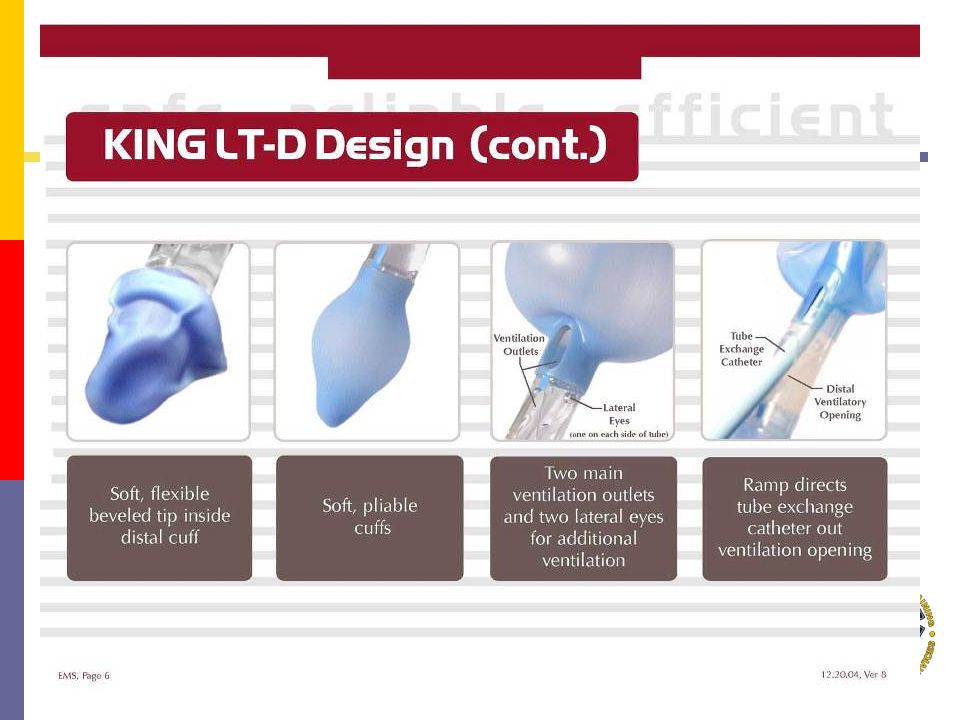
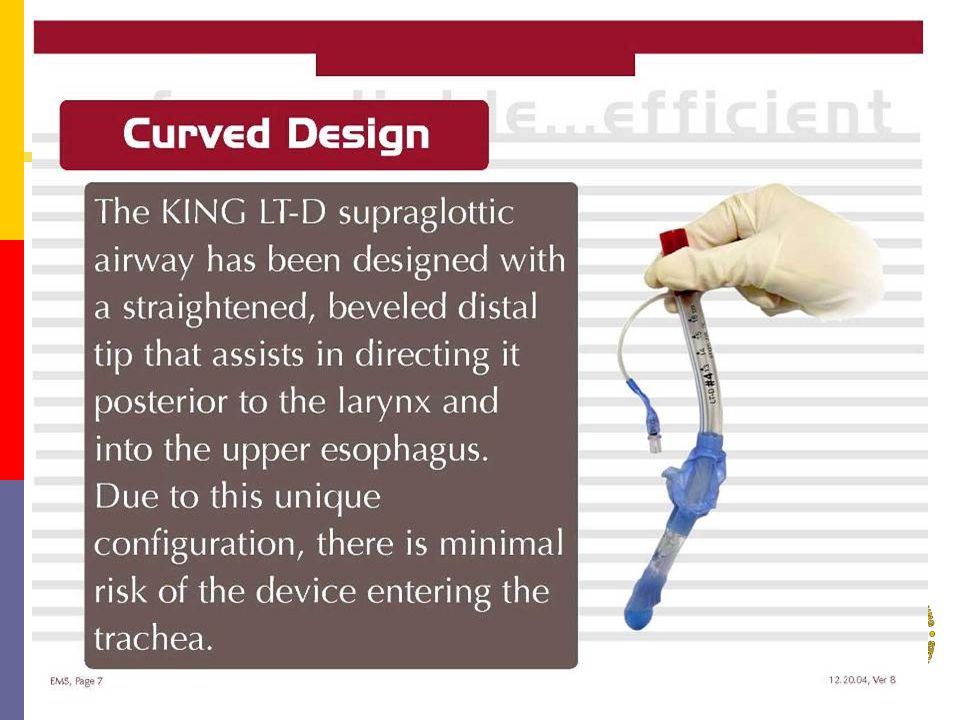
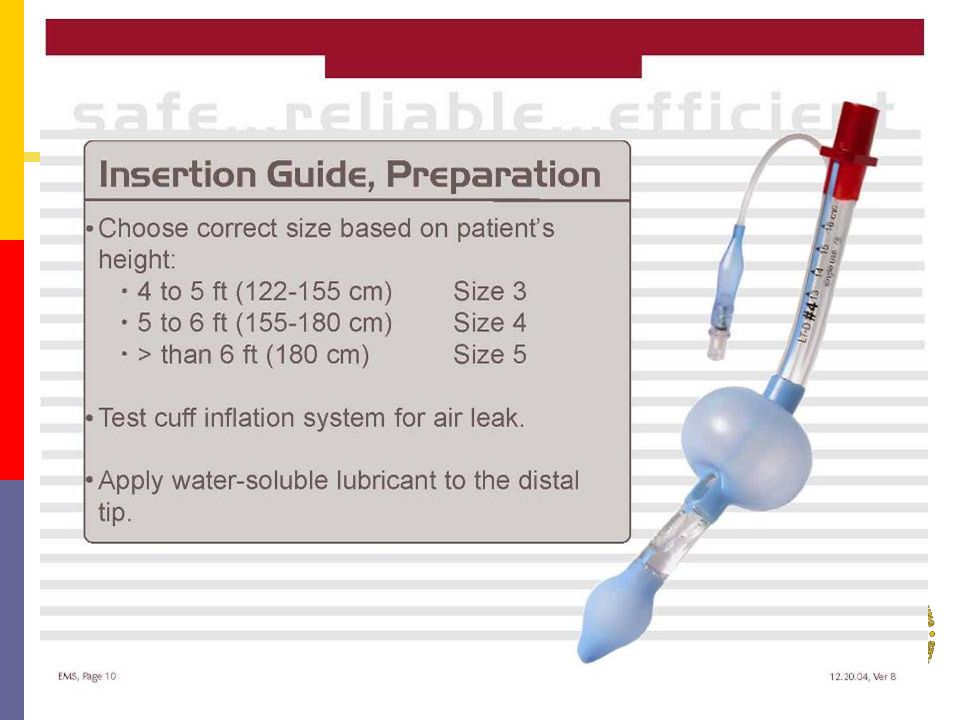
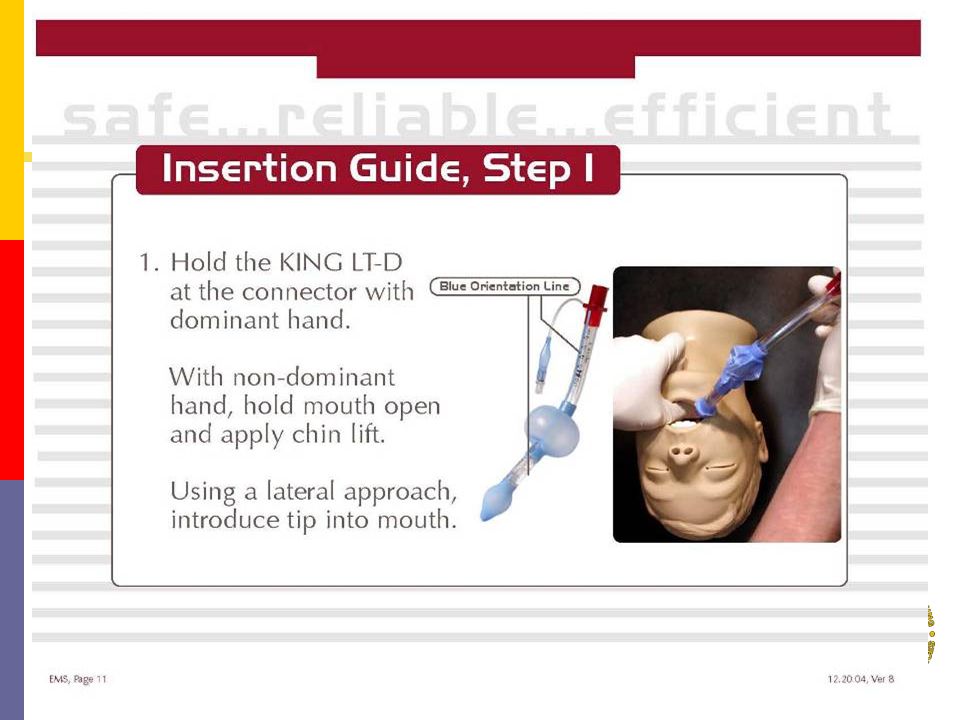
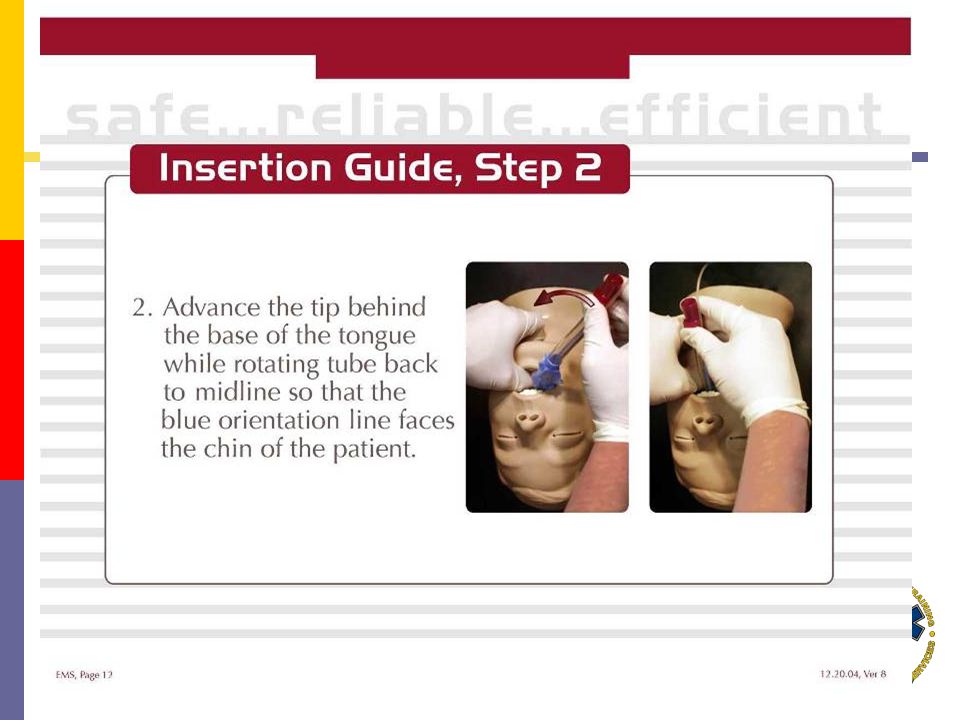
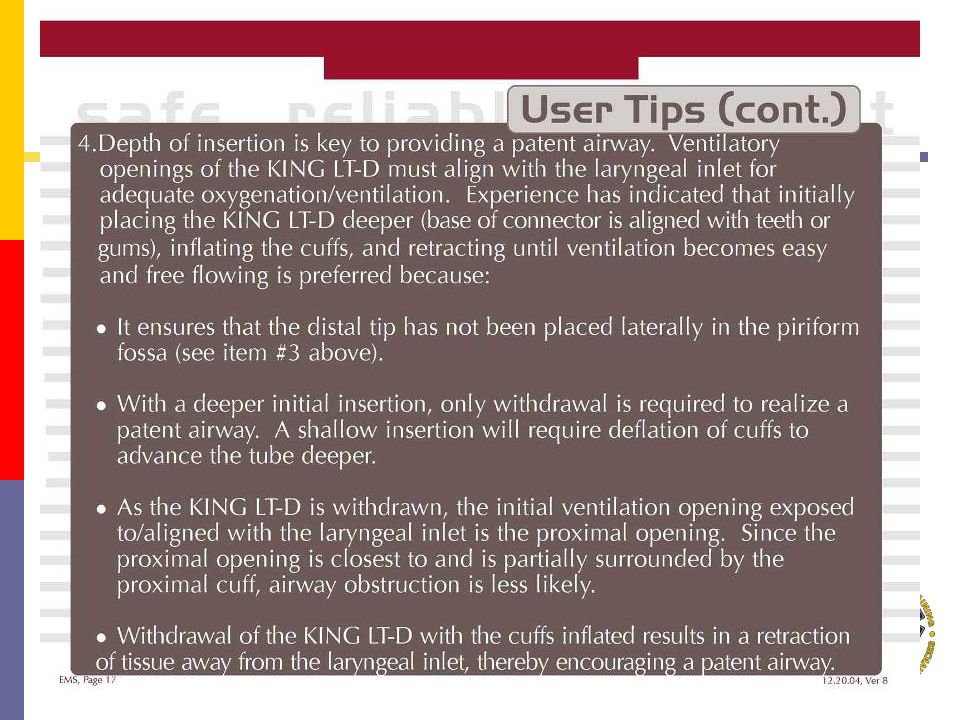
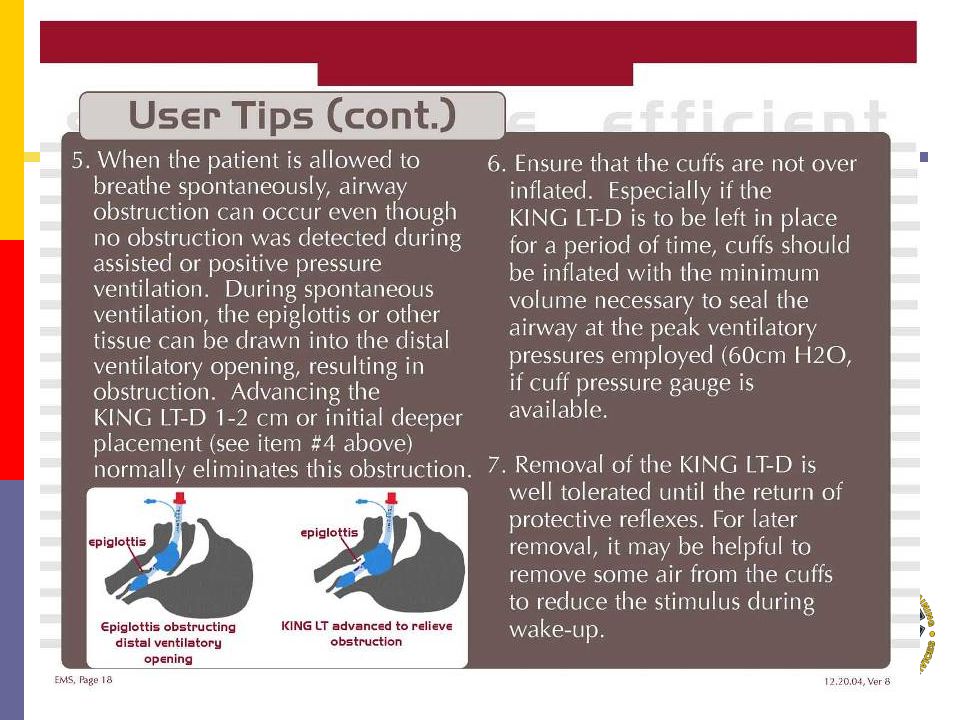
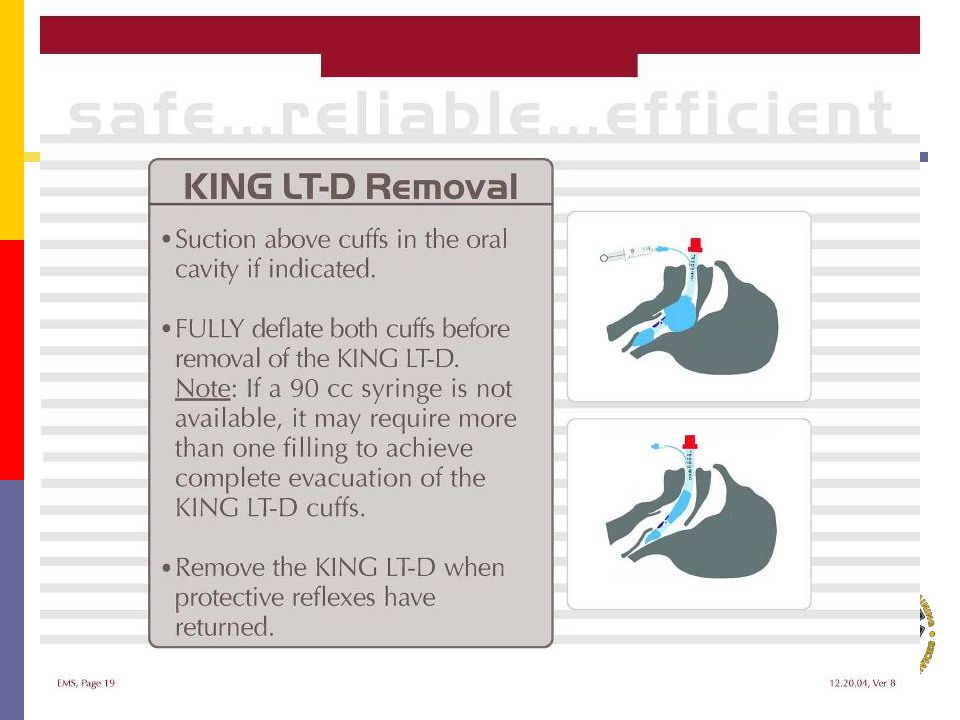
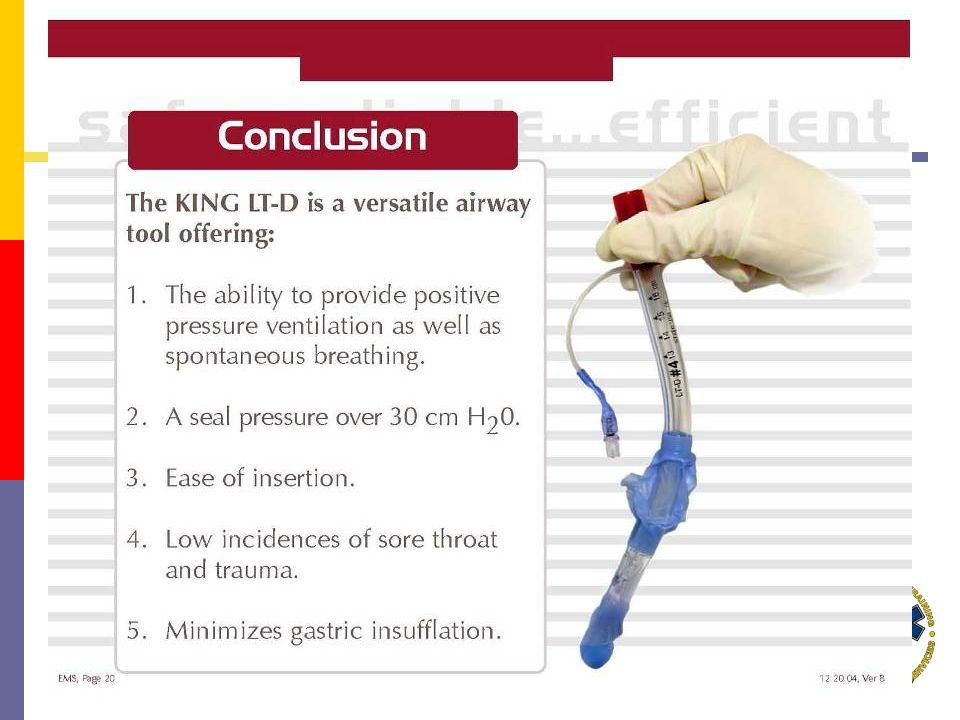
King-LT-D

42
King LT-D

62
Combitube

63
CombiTube

64
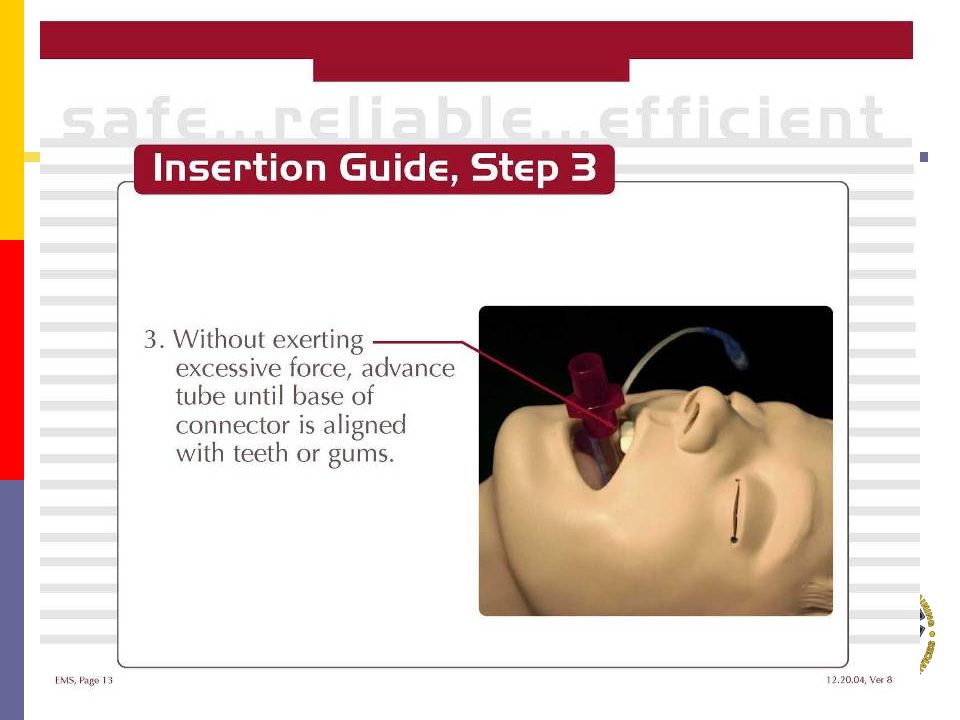
Insertion Technique Tongue-Jaw Lift Anatomical Insertion Black rings will lie between teeth or alveolar ridges Bending the tip prior to use may ease insertion

65
CombiTube Inflate Blue Balloon Inflate White Balloon The CombiTube may reposition as the oropharyngeal is inflated.

66
Esophageal Placement Ventilate Blue Tube Visualize Auscultate EtCO 2

67
Tracheal Placement Ventilate Clear Tube Visualize Auscultate EtCO 2

68
Laryngeal Mask Air LMA

69
LMA The LMA was invented by Dr. Archie Brain at the London Hospital in Whitechapel in 1981 The LMA consists of two parts: The mask The tube The LMA has proven to be a very effective management tool for the airway

70
Introduction continued The LMA design: Provides an “oval seal around the laryngeal inlet” once the LMA is inserted and the cuff inflated. Once inserted, it lies at the crossroads of the digestive and respiratory tracts.

71
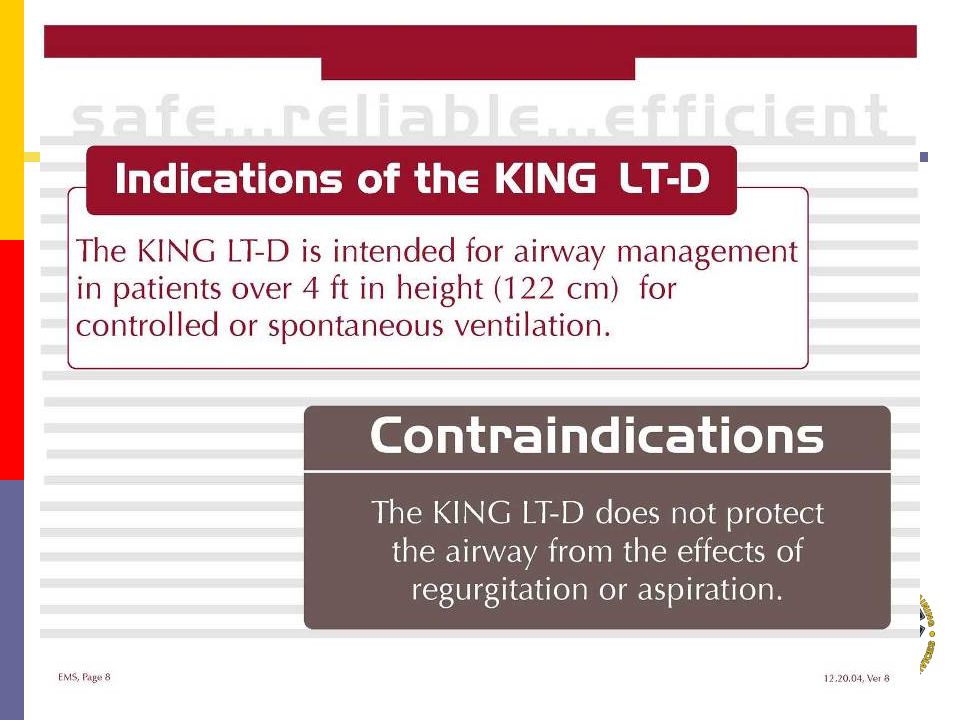
Indications Situations involving a difficult mask (BVM) fit. May be used as a back-up device where endotracheal intubation is not successful. May be used as a “second-last-ditch” airway where a surgical airway is the only remaining option.

72
Contraindications Greater than 14 to 16 weeks pregnant Patients with multiple or massive injury Massive thoracic injury Massive maxillofacial trauma Patients at risk of aspiration NOTE: Not all contraindications are absolute

73
Complications Throat soreness Dryness of the throat and/or mucosa Complications due to improper placement vary based on the nature of the placement

74
Equipment for LMA Insertion Body Substance Isolation equipment Appropriate size LMA Syringe with appropriate volume for LMA cuff inflation Water soluble lubricant Ventilation equipment Stethoscope Tape or other device(s) to secure LMA
 to secure LMA")
75
Preparation Step 1: Size selection Step 2:Examination of the LMA Step 3: Check deflation and inflation of the cuff Step 4:Lubrication of the LMA Step 5:Position the Airway

76
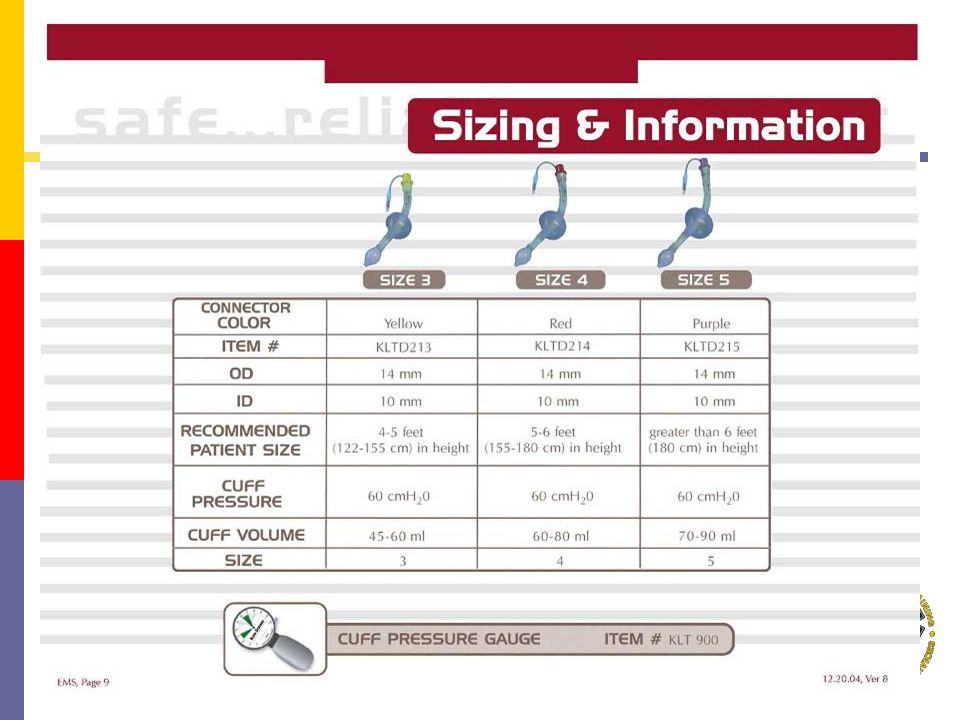
Step 1: Size Selection Verify that the size of the LMA is correct for the patient Recommended Size guidelines: Size 1:under 5 kg Size 1.5:5 to 10 kg Size 2: 10 to 20 kg Size 2.5: 20 to 30 kg Size 3: 30 kg to small adult Size 4: adult Size 5: Large adult/poor seal with size 4

77
Step 2: Examine the LMA Visually inspect the LMA cuff for tears or other abnormalities Inspect the tube to ensure that it is free of blockage or loose particles Deflate the cuff to ensure that it will maintain a vacuum Inflate the cuff to ensure that it does not leak

78
Step 3: Deflation & Inflation Slowly deflate the cuff to form a smooth flat wedge shape which will pass easily around the back of the tongue and behind the epiglottis. During inflation the maximum air in cuff should not exceed: Size 1: 4 ml Size 1.5: 7 ml Size 2: 10 ml Size 2.5: 14 ml Size 3: 20 ml Size 4: 30 ml Size 5: 40 ml

79
Step 4: Lubrication Use a water soluble lubricant to lubricate the LMA Only lubricate the LMA just prior to insertion Lubricate the back of the mask thoroughly Important Notice: Avoid excessive amounts of lubricant on the anterior surface of the cuff or in the bowl of the mask. Inhalation of the lubricant following placement may result in coughing or obstruction.

80
Step 5: Positioning of the Airway Extend the head and flex the neck Avoid LMA fold over: Assistant pulls the lower jaw downwards. Visualize the posterior oral airway. Ensure that the LMA is not folding over in the oral cavity as it is inserted.

81
LMA Insertion Technique Step 1 Step 5 Step 4 Step 2 Step 3

82
LMA Insertion Step 1 Grasp the LMA by the tube, holding it like a pen as near as possible to the mask end Place the tip of the LMA against the inner surface of the patient’s upper teeth

83
LMA Insertion Step 2 Under direct vision: Press the mask tip upwards against the hard palate to flatten it out. Using the index finger, keep pressing upwards as you advance the mask into the pharynx to ensure the tip remains flattened and avoids the tongue.

84
LMA Insertion Step 3 Keep the neck flexed and head extended: Press the mask into the posterior pharyngeal wall using the index finger.

85
LMA Insertion Step 4 Continue pushing with your index finger. Guide the mask downward into position.

86
LMA Insertion Step 5 Grasp the tube firmly with the other hand Then withdraw your index finger from the pharynx. Press gently downward with your other hand to ensure the mask is fully inserted.

87
LMA Insertion Step 6 Inflate the mask with the recommended volume of air. Do not over-inflate the LMA. Do not touch the LMA tube while it is being inflated unless the position is obviously unstable. Normally the mask should be allowed to rise up slightly out of the hypopharynx as it is inflated to find its correct position.

88
Verify Placement of the LMA Connect the LMA to a Bag-Valve Mask device or low pressure ventilator Ventilate the patient while confirming equal breath sounds over both lungs in all fields and the absence of ventilatory sounds over the epigastrium

89
Securing the LMA Insert a bite-block or roll of gauze to prevent occlusion of the tube should the patient bite down. Now the LMA can be secured utilizing the same techniques as those employed in the securing of an endotracheal tube.

90
Verify During ventilation observe end-tidal CO 2 monitor or pulseoximetry to confirm oxygenation

91
Waveform Capnometry Prerequisite Requirement Becoming a standard of care Easy to Use Good measure of Pulmonary Perfusion Relates well to PaCO 2 Does have limitations

92
Problems with LMA Insertion Failure to press the deflated mask up against the hard palate or inadequate lubrication or deflation can cause the mask tip to fold back on itself.

93
Problems with LMA Insertion Once the mask tip has started to fold over, this may progress, pushing the epiglottis into its down- folded position causing mechanical obstruction

94
Problems with LMA Insertion If the mask tip is deflated forward it can push down the epiglottis causing obstruction If the mask is inadequately deflated it may either push down the epiglottis penetrate the glottis

95
Always expect the unexpected!

96
RSI Procedure: The Seven P’s 1. Preparation 2. Preoxygenate the patient 3. Premedicate the patient 4. Paralyze the patient 5. Pass the tube 6. Proof of placement 7. Post intubation care

Similar presentations
>")


 cardiopulmonary.>")


 ภาควิชาวิสัญญีวิทยา วิทยาลัยแพทยศาสตร์ กรุงเทพมหานครและวชิรพยาบาล.>")
