Download presentation
Presentation is loading. Please wait.

1
Microsoft Store Windows 7 Setup

2
Training Objectives Identify the features of Windows 7
Identify the different Setup Options Identify the System Requirements of Windows 7 Identify the procedures on how to setup Windows 7

3
Windows 7 Features There are many new and improved features in Windows 7. The changes are designed to make it faster and easier to perform everyday tasks as well as to improve the overall performance of Windows.

4
Windows 7 Advanced Features
Action Center Action Center Troubleshooters Biometric Framework Desktop Slideshow Device Management Handwriting Recognition Home Group Internet Explorer 8 Jump Lists Media Features Performance Improvements Reduced Disk Space Utilization Taskbar Windows Touch

5
Disk Space Usage Windows 7 has disk usage space compared to Windows Vista. Beyond the changes to servicing, other specific disk space usage improvements include: Reduction in size of drivers included on- disk Log file size reduction and compression Page file size reduction (Virtual RAM) System Restore disk space usage reduced
 System Restore disk space usage reduced.")
6
Setup Options Windows 7 can be installed using one of the following methods. Each is discussed in more detail in this module. Upgrade Install This method can be used to install Windows 7 while preserving your current applications, user accounts, user profile data, and settings.

7
Setup Options Clean Install This is the method to use for installing Windows 7 without preserving settings, such as on a new computer, when there is no upgrade path from your current operating system version, or due to a problem with your current installation.

8
Setup Options Windows Anytime Upgrade This is the method for upgrading from one edition of Windows 7 to a higher edition. Other Setup Options: (Not Supported) OEM Image This is the method of installation for many computers that you purchase with Windows 7 already installed. This installation method may include additional non-Windows software, preinstalled by the OEM Examples could include security software or other programs. Corporate Deployment This is the method some companies use to install Windows over a network or via automation so that each user does not need to perform setup-related tasks. This is out of scope for this course.
 OEM Image This is the method of installation for many computers that you purchase with Windows 7 already installed. This installation method may include additional non-Windows software, preinstalled by the OEM Examples could include security software or other programs. Corporate Deployment This is the method some companies use to install Windows over a network or via automation so that each user does not need to perform setup-related tasks. This is out of scope for this course.")
9
Recommended System Requirements
1 gigahertz (GHz) or faster 32-bit (x86) or 64-bit (x64) processor 1 gigabyte (GB) RAM (32-bit) or 2 GB RAM (64-bit) 16 GB available hard disk space (32-bit) or 20 GB (64-bit) DirectX 9 graphics device with WDDM (Windows Display Driver Model) 1.0 or higher driver
 or faster 32-bit (x86) or 64-bit (x64) processor. 1 gigabyte (GB) RAM (32-bit) or 2 GB RAM (64-bit) 16 GB available hard disk space (32-bit) or 20 GB (64-bit) DirectX 9 graphics device with WDDM (Windows Display Driver Model) 1.0 or higher driver.")
10
32-bit vs. 64-bit What is the difference between 32-bit and 64-bit versions of Windows? The terms 32-bit and 64-bit refer to the way a computer's processor (also called a CPU), handles information. The 64-bit version of Windows handles large amounts of random access memory (RAM) more effectively than a 32-bit system.
, handles information. The 64-bit version of Windows handles large amounts of random access memory (RAM) more effectively than a 32-bit system.")
11
32-bit vs. 64-bit How can I tell if my computer is running a 32-bit or a 64-bit version of Windows? Windows 7 and Vista Start Right Click “Computer Properties

12
Right Click “My Computer”
32-bit vs. 64-bit How can I tell if my computer is running a 32-bit or a 64-bit version of Windows? Windows XP Start Right Click “My Computer” Properties x64 = 64-bit x86 = 32-bit

13
32-bit vs. 64-bit Which version of Windows 7 should I install: the 32-bit version or the 64-bit version? 64-bit will only work for 64-bit – could fully maximize the usage of 4GB and could handle upto 16TB of RAM 32-bit will work for both – could handle a maximum of 4GB of RAM

14
32-bit vs. 64-bit How do I tell if my computer can run a 64-bit version of Windows? To run a 64-bit version of Windows, your computer must have a 64-bit-capable processor. To find out if your processor is 64-bit-capable in Windows 7 or Windows Vista, do the following:

15
32-bit vs. 64-bit Start Type “Performance Information and Tools” Click “View and print detailed performance and system information” Windows 7 Note: If your computer is already running a 64-bit version of Windows, you won't see the 64-bit capable listing

16
32-bit vs. 64-bit

17
32-bit vs. 64-bit Windows Vista
Start Type “Performance Information and Tools” Click “View and print details” Windows Vista Note: If your computer is already running a 64-bit version of Windows, you won't see the 64-bit capable listing

18
Right click “My Computer”
32-bit vs. 64-bit Start Right click “My Computer” Click “Properties” Windows XP Note: If "x64 Edition" is listed under System, your processor is capable of running a 64-bit version of Windows

19
32-bit vs. 64-bit Can I upgrade from a 32-bit version of Windows to a 64-bit version of Windows 7 or from a 64-bit version of Windows 7 to a 32-bit version of Windows? It depends Windows Vista 64-bit – Windows 7 64-bit Windows Vista 32-bit – Windows 7 32-bit

20
32-bit vs. 64-bit Windows Vista 32-bit to Windows 7 64-bit and Vice Versa Here’s How: Back up your files Choose “Custom” Install Restore files Reinstall programs

21
32-bit vs. 64-bit Can I run 32-bit programs on a 64-bit computer? YES
Most programs designed for the 32-bit version of Windows will work on the 64-bit version of Windows. Notable exceptions are many antivirus programs

22
32-bit vs. 64-bit Can I run 64-bit programs on a 32-bit computer? NO
If the program is specifically designed for the 64-bit version of Windows, it won't work on the 32-bit version of Windows.

23
32-bit vs. 64-bit Can I run 32-bit drivers on a 64-bit computer? NO
Device drivers designed for the 32-bit version of Windows don't work on computers running a 64-bit version of Windows. If you're trying to install a printer or other device that only has 32-bit drivers available, it won't work correctly on a 64-bit version of Windows

24
Notes: To install a 64-bit version of Windows 7 on a computer running a 32-bit version of Windows, you'll need to start, or boot, your computer using a 64-bit Windows 7 installation disc or files If you start your computer using a 64-bit Windows 7 installation disc or files, but your computer isn't capable of running a 64-bit version of Windows, you'll see a Windows Boot Manager error. You'll need to use a 32-bit Windows 7 installation disc or files instead Windows Easy Transfer can't transfer files from a 64-bit version of Windows to a 32-bit version of Windows. If you're running a 64-bit version of Windows Vista but you plan to install a 32-bit version of Windows 7, you can move your files to an external location manually or use Backup and Restore in Windows Vista If you're running a 64-bit version of Windows XP, you'll need to move your files to an external location manually

25
Upgrade Path

26
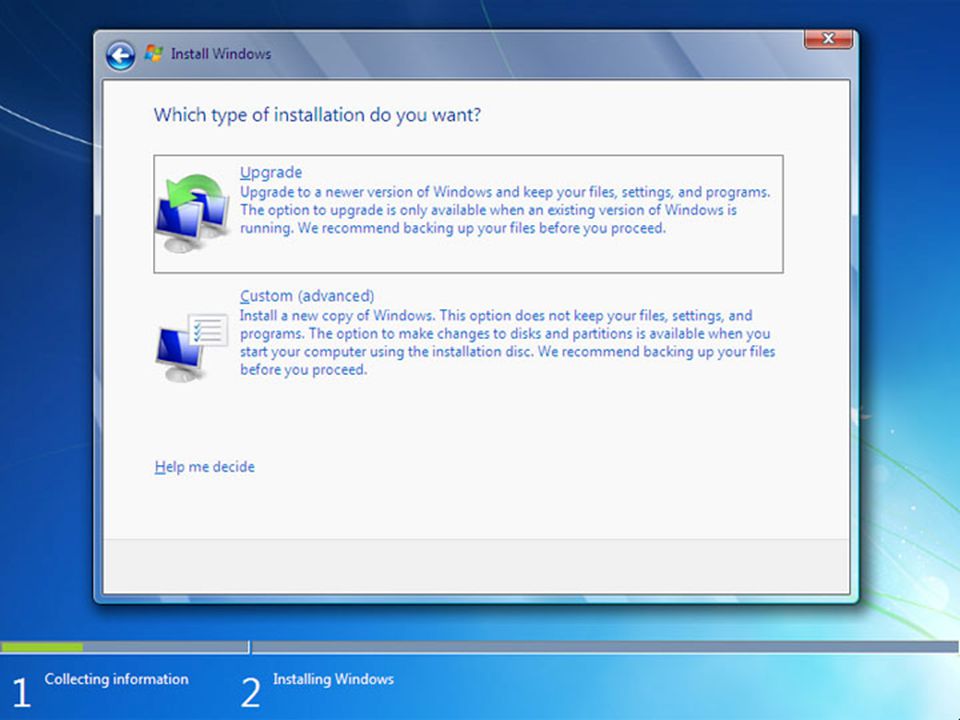
Upgrade Path Custom /Clean Install – gives you the option to either completely replace your operating system or install Windows on a specific partition or drive that you select. You could also perform a custom install if your computer does not have an operating system

27
Upgrade Path In-Place Upgrade – keeps your files, settings, and programs intact from your current version of Windows

28
Installation Phases for Upgrade Path
1st Phase Downlevel 2nd Phase WinPE (Pre-Installation Envi) 3rd Phase Online Configuration 4th Phase Windows Welcome
 3rd Phase. Online Configuration. 4th Phase. Windows Welcome.")
29
Installation Phases for Upgrade Path
Downlevel Starting the installation. Copying Setup files to the hard drive, and setting up a boot entry to boot directly to the next phase

30
Installation Phases for Upgrade Path
WinPE This phase starts with the Windows Setup boot entry and the rest of the migration gathering is done in this phase, followed by the application of the generic Windows 7 image

31
Installation Phases for Upgrade Path
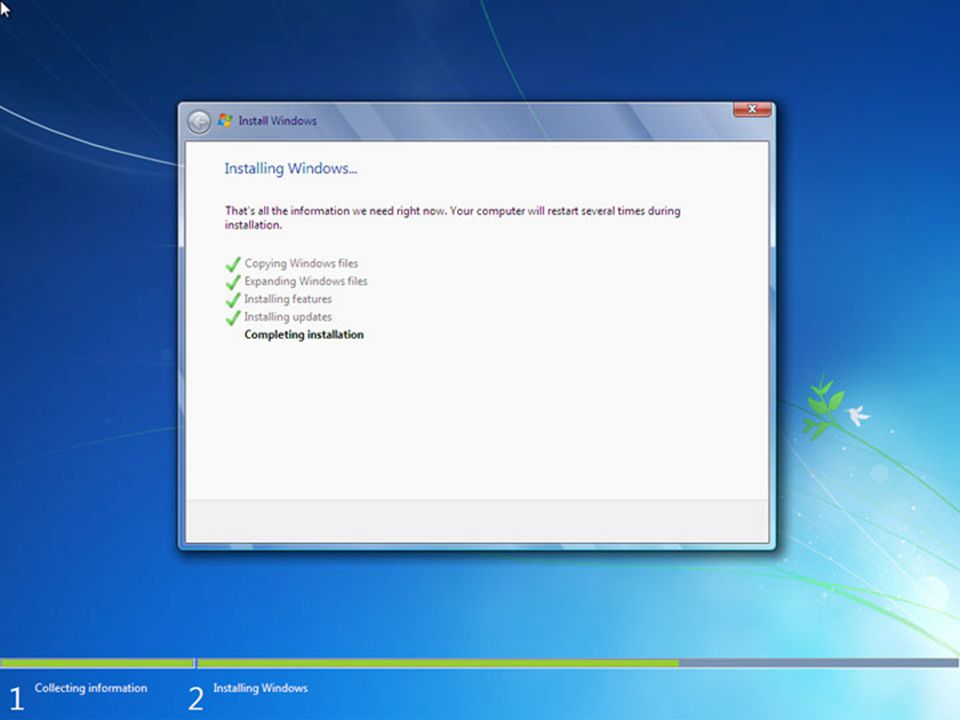
Online Configuration In this step the computer is started in Windows 7 for the first time. Setup first performs a set of specialization actions that make the installation of Windows unique. Drivers for detected hardware are installed, and collected migration data is now reapplied to the system.

32
Installation Phases for Upgrade Path
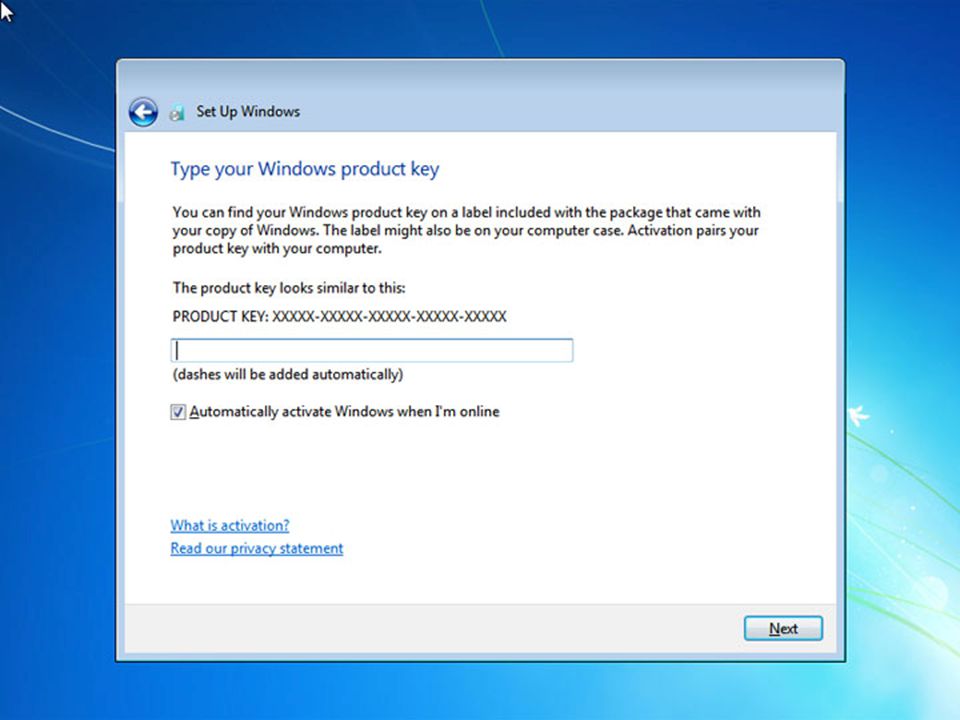
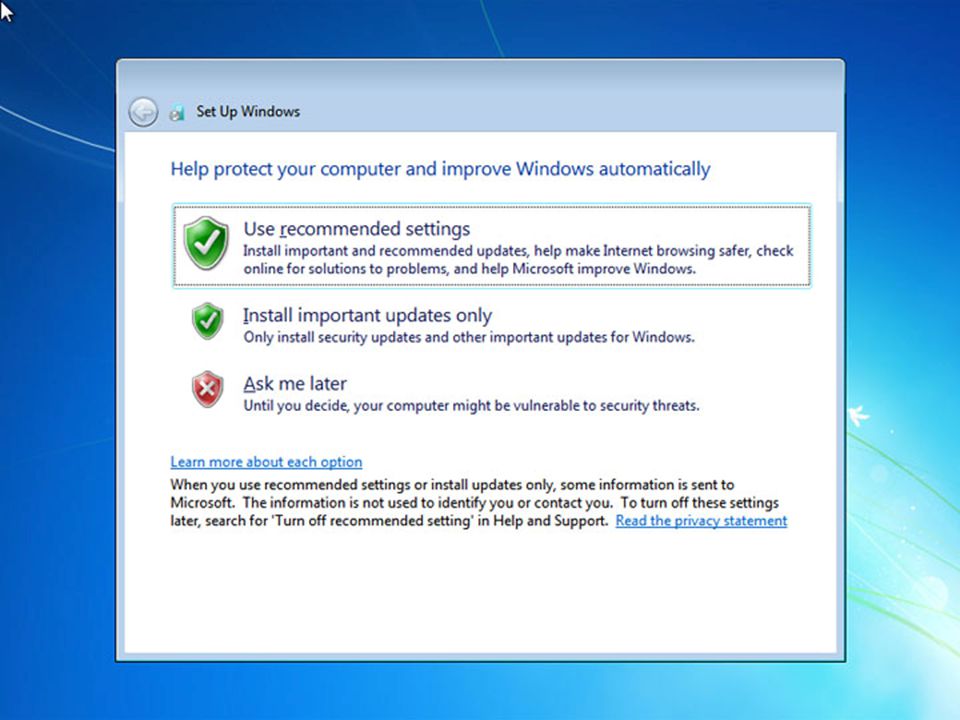
Windows Welcome When setup is finished, you begin using Windows 7 in the Windows Welcome phase, also known as the Out Of Box Experience (OOBE). This is the portion of setup where you set the time zone, choose the configuration for updates and safety features, have a chance to connect to a network, and join a HomeGroup if one is found on your network’ This is also the phase where it will be asking for the “Activation Key”.
. This is the portion of setup where you set the time zone, choose the configuration for updates and safety features, have a chance to connect to a network, and join a HomeGroup if one is found on your network’ This is also the phase where it will be asking for the Activation Key .")
33
Compatibility Report Warnings or SoftBlock – When the compatibility report has identified an issue that could result in a less than desirable outcome, you will see a warning message. This indicates that the upgrade can continue, but with some impact to your current configuration.

34
Examples: A warning message related to Windows features, such as the removal of Ultimate Extras, or language pack issues starts with this text: Upgrading Windows will affect the following features This may also include a step to turn off specific Windows Features: These Windows features might not work properly after the upgrade. Before upgrading, we recommend turning off these features. Cancel the upgrade, open Control Panel, and search for “turn Windows features on or off”.

35
Examples: Upgrading Windows will affect the following devices and/or programs The hardware compatibility message continues with this text: These devices might not work properly after the upgrade. Before upgrading, we recommend updating the drivers for these devices. Cancel the upgrade, open Control Panel, and search for “update device drivers”, or go to the device manufacturer’s website to search for updated drivers. For program compatibility issues, the message shows: These programs might not work properly after the upgrade. Before upgrading, we recommend uninstalling these programs. Cancel the upgrade, open Control Panel, and search for “uninstall a program”. (Note: Programs marked as * can be safely reinstalled after the upgrade.) All of these are messages indicate a potentially undesirable outcome, but not a problem that will prevent Setup from performing the upgrade.
 All of these are messages indicate a potentially undesirable outcome, but not a problem that will prevent Setup from performing the upgrade.")
36
Compatibility Report Upgrade Blocks or HardBlocks – Upgrade block messages differ from warnings in that they indicate that the upgrade cannot be performed. In order to upgrade Windows, you must first resolve the issues identified in the report.

37
Examples: When an upgrade blocking issue is found, the Compatibility Report will start with the following text: The following issues are preventing Windows from upgrading. Cancel the upgrade, complete each task, and then restart the upgrade to continue. This is followed by one of the following main types of actions: Turn off these Windows features. Open Control Panel and search for “turn Windows features on or off”. Uninstall these programs. Open Control Panel and search for “uninstall a program”. Install updated drivers for the following devices. Open Control Panel and search for “update device drivers”. Once you complete the actions indicated, you should be able to complete the upgrade successfully.

38
Features Removed During Upgrade
Movie Maker Photo Gallery Windows Mail Windows Calendar Meeting Place

39
Ultimate Components Removed
Ultimate Extras Windows DreamScene and DreamScene Content Packs Microsoft Tinker Hold Em Poker Game Windows Sound Schemes Language Packs Installed language packs are removed during the upgrade. You will need to reinstall language packs after the upgrade is complete.

40
Upgrade Best Practices
Upgrade from Damaged Windows Vista Often during operating system releases, we encounter support calls from customers who are trying to resolve problems by upgrading to a new Windows version. This is a risky and often problematic approach to solving PC problems. Many of the software or hardware issues impacting the stability of Windows Vista could be migrated into, or directly affect the new installation of Windows 7. As a result, the best approach is to backup/migrate data, and perform a clean install of Windows 7. This means using the same procedure as recommend for Windows XP to Windows 7 migration. In addition, you might also recommend some steps to check for hardware issues, if the problems manifested as system instability or stop errors.

41
Upgrade Best Practices
Backup Data before an Upgrade To protect against problems during the upgrade process, you should recommend that your customer perform a backup of critical data to an off-computer storage device before upgrading to Windows 7. This could be to an online backup service, DVD discs, or an external hard disk that is disconnected from the computer during setup. This precaution can help protect against coincidental hardware failures that may damage data on the machine, as well as from other potential problems.

42
Upgrade Best Practices
Upgrade on Small Disk PCs Small disk PCs, such as netbooks, present challenges for an upgrade installation. The upgrade process maintains a copy of the original operating system files so that a rollback can be performed in the event of problems. This means that additional free disk space is needed As a general recommendation, you should have 16 GB free disk space for upgrade to complete successfully. The minimum possible space permitted by setup much less. If you have insufficient space to upgrade even after freeing disk space, follow the same recommendation as for Windows XP to Windows 7 migration – migrate out data and settings, then clean install Windows 7.

43
Upgrade Best Practices
Uninstall back to Previous Version During an upgrade to Windows 7 there is a Rollback option provided from the Boot Menu providing an option to return to the previous OS configuration. This is removed at the end of Online Configuration. Once the Rollback option is removed, there is not an Uninstall procedure that returns you directly to the pre-setup state. This is the same as was done in Windows Vista. To return to the previous version of Windows you must perform a clean installation of that previous version.

44
Upgrade Best Practices
Repairing Windows 7 with an In-Place Upgrade Like Windows Vista, Windows 7 supports re-install from within Windows in order to repair the current installation

45
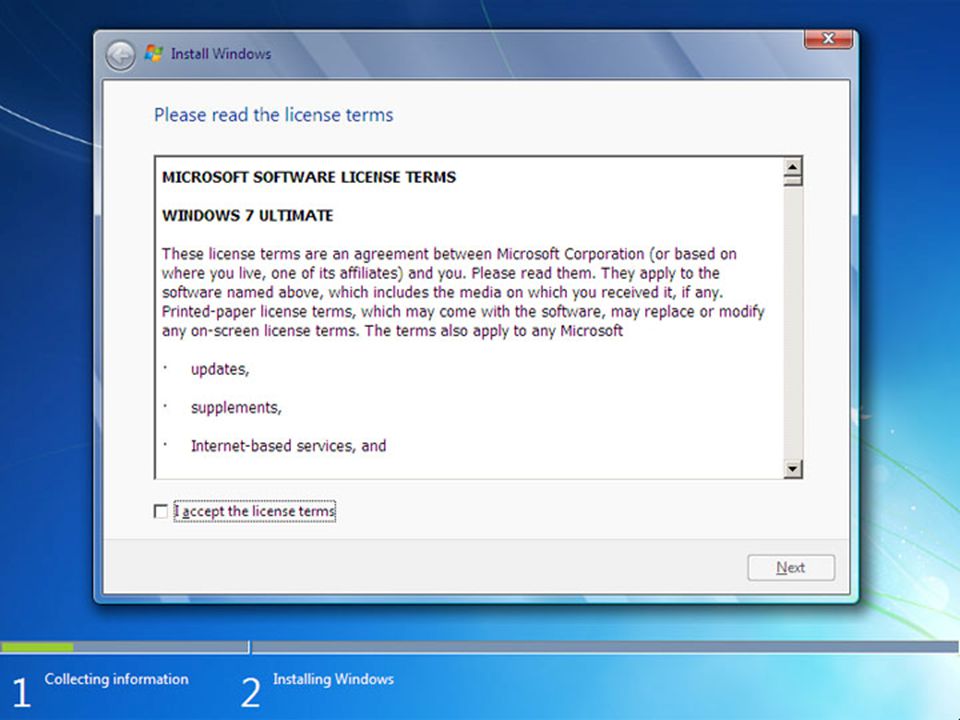
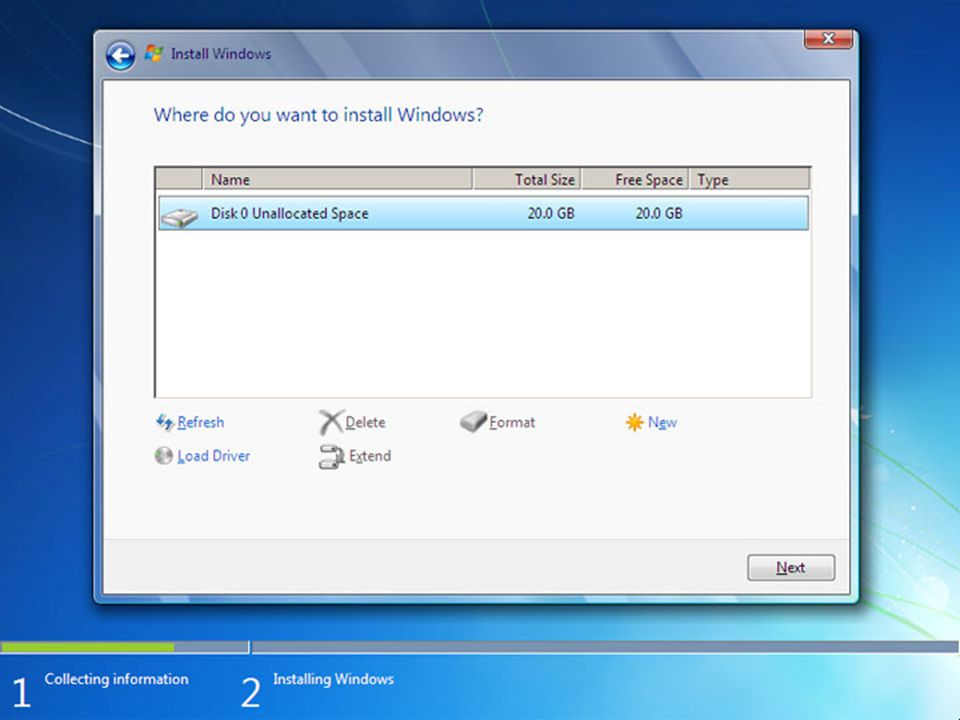
Custom | Clean Installation
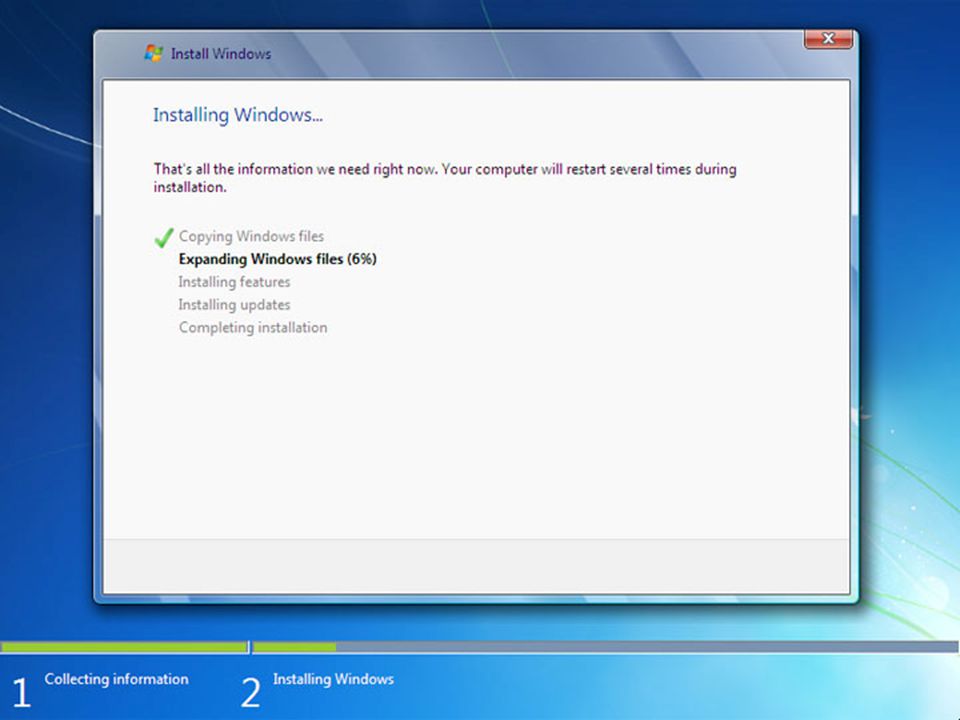
When you clean install via DVD boot, Windows 7 setup launches directly into WinPE mode. When starting in this way, you are given full setup options for disk configuration and partition creation.

46
Custom | Clean Installation
The first step of setup from DVD boot is to “Press any key to boot from CD or DVD.” WinPE (Pre-Installation Envi)
")
47
Custom | Clean Installation
WinPE begins loading, and shows the “Windows is loading files” progress indicator, as shown below.

82
Windows Anytime Upgrade
Windows Vista – involved setup.exe and one of the risks is data loss Windows 7 – unlocks the feature of a certain edition. Driver, data and application migration issues are completely bypassed

83
Windows Anytime Upgrade
Open start and type “Windows Anytime Upgrade” or; Open the Windows Anytime Upgrade module via the Control Panel and enter the new key and finally re-activate Windows

84
WAU Activation States Licensed – with Windows Genuine logo
Initial Grace Period – grace period given usually 30 days before the software expires Notification – another 3 days of grace period after 30 days Additional Grace Period – happens when a major hardware component was changed Non – Genuine Grace Period – without Genuine Logo Unknown – incompatibility with licensing components Unlicensed –

85
Types of Product Keys Retail Key Retail Upgrade Key
OEM SLP Key – Embedded on the disk OEM COA Non-SLP Key

86
WAU Basic Troubleshooting Steps
Verify Key Verify the installed product (if compatible but still having issues…) Stop and show 3rd party services by going to msconfig to unblock a possible cause Type cmd in search field Type msconfig Click on Startup tab and click on Disable and apply Click on Services and Hide all services and apply
 Stop and show 3rd party services by going to msconfig to unblock a possible cause. Type cmd in search field. Type msconfig. Click on Startup tab and click on Disable and apply. Click on Services and Hide all services and apply.")
87
WAU Basic Troubleshooting Steps
Check for compatibility – for drivers and hardware incompatibility, check your manufacturer’s website to download new drivers that will run with Windows 7 Check for Internet Connection – WAU process needs internet connection

88
WAU Basic Troubleshooting Steps
Turn –off AntiVirus – Antivirus or anti-malware program and third-party firewall may interfere with the installation of Windows 7 during the upgrade process. Temporary turn-off the security tools and re-enable only after the install process has finished.

89
Windows Recovery Environment (WinRE)
Startup Repair – automatically fix problems that are preventing windows from starting or booting System Restore – restore windows to an earlier point System Image Recovery – recover your computer using system image created earlier Windows Memory Category – check your computer for memory hardware errors Command Prompt – for accessing commands

90
Network Connection Status
Computer Logo or Signal– means the computer can receive and send data Triangle with Exclamation Point – Limited or No Connectivity (do the troubleshooting in Action Center. If not resolve, contact servicer) With X – no connection
 With X – no connection.")
91
How to check Drivers Click on Start and type Device Manager
? – not installed ! – conflicting with other hardware (incompatible) X – disabled
 X – disabled.")
92
Windows Easy Transfer (WET)
Windows Easy Transfer is the easiest way to backup files to another computer, external harddrive, flashdrive, other User Account and CD/DVD Note: Migration Rules (PC-PC) 32-bit – 32-bit (possible) 64-bit – 32 bit (not possible)
 32-bit – 32-bit (possible) 64-bit – 32 bit (not possible)")
93
Windows Easy Transfer (WET)
For Windows Vista and Windows 7 (WET) is already included For Windows XP, you have to download and install the files for you to use the application
 is already included. For Windows XP, you have to download and install the files for you to use the application.")
94
How to do WET in Windows 7 Three methods to transfer files:
Using a Windows Easy Transfer Cable (direct PC-to-PC) Over a network External hard drive Activity: Windows Easy Transfer Lab Exercises for better understanding
 Over a network. External hard drive. Activity: Windows Easy Transfer Lab Exercises for better understanding.")
95
Backup and Restore Another way to back up your files before doing the upgrade. For Windows 7, it’s only available for Windows 7 Professional and Ultimate. This feature will automatically back up the files to another storage space depending on your configuration

96
Thank you.

Similar presentations


 or faster 32-bit (x86)>")

? Hard drive failure Is the system powered on? Is the power supply OK? Is the system.>")


