Download presentation
Presentation is loading. Please wait.

1
RADIOGRAPHIC TECHNIQUES DR SAMY I AL-AGHA A.PROFESSOR OF RADIOLOGY AL-AZHAR –GAZA UNIVERCITY

2
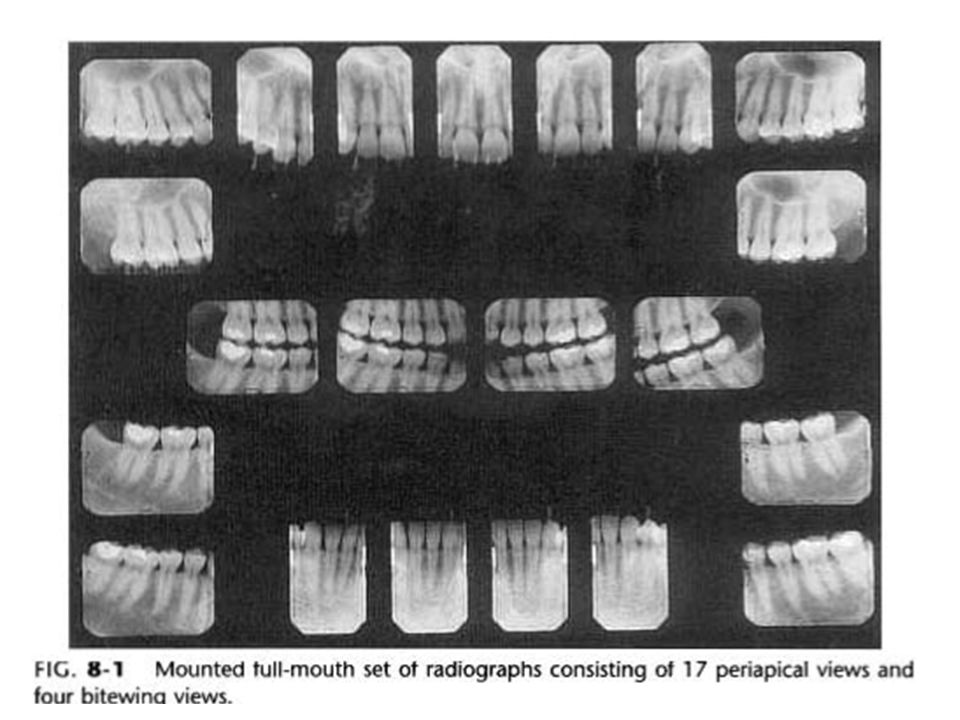
RADIOGRAPHIC TECHNIQUES CLASSIFICATION A-Periapical B-Bite-wing C-Occlusal

4
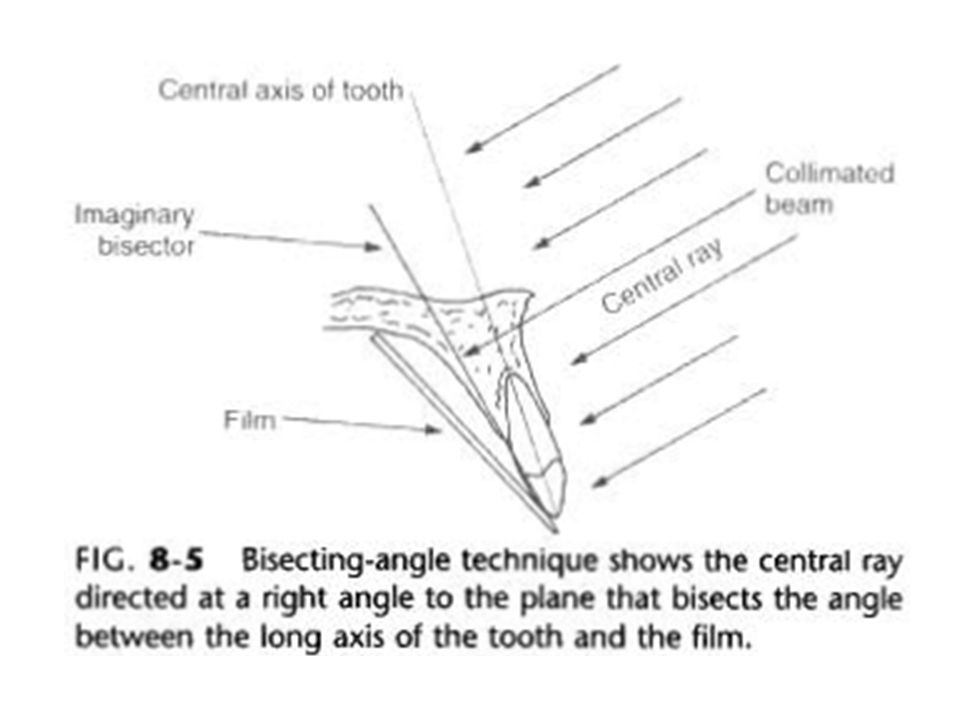
PERIAPICAL RADIOGRAPHIC TECHNIQUES 1-BISECTING ANGLE TECNIQUE A-Patient,s position For maxillary teeth>>>ala tragus line is parallel to floor For mandibular teeth>>>line from tragus to corner of mouth is parallel to floor

6
PERIAPICAL RADIOGRAPHIC TECHNIQUES B-Film placement: Tube side of the film packetis towards the tube. The film(short dimension) is parallel to occlusal plane(For anterior region) The film (long dimension) is parallel to occlusal plane(For posterior region) Avoid over-bending of film packet The area of interest is in the center of film.
 is parallel to occlusal plane(For anterior region) The film (long dimension) is parallel to occlusal plane(For posterior region) Avoid over-bending of film packet The area of interest is in the center of film..")
7
PERIAPICAL RADIOGRAPHIC TECHNIQUES 2-3mm of film packet should be left beyond the occlusal plane The patient holds the packet with finger Avoid movements of patient,film,or cone during exposure. C-Cone,s position: 1-Central ray(C.R)angulation a-V.A b-H.A 2-Point of entry
angulation a-V.A b-H.A 2-Point of entry.")
8
PERIAPICAL RADIOGRAPHIC TECHNIQUES Vertical angulation Denotes the angle between C.R&occlusal plane Vertical angle of maxillary teeth(+ve) Incisors>>>>>>55-60 Canines>>>>>>45-50 Premolars>>>>35-40 Molars>>>>>>25-30
 Incisors>>>>>>55-60 Canines>>>>>>45-50 Premolars>>>>35-40 Molars>>>>>>25-30")
9
PERIAPICAL RADIOGRAPHIC TECHNIQUES V.A for mandibular teeth(-ve) Incisors>>>>>>15-20 Canines>>>>>>10-15 Premolars>>>>5-10 Molars>>>>>>0-5 Increase V.A 5 in a-shallow palate or floor of mouth b-flat ridges(edentulous pt) c-inclined teeth
 Incisors>>>>>>15-20 Canines>>>>>>10-15 Premolars>>>>5-10 Molars>>>>>>0-5 Increase V.A 5 in a-shallow palate or floor of mouth b-flat ridges(edentulous pt) c-inclined teeth")
10
PERIAPICAL RADIOGRAPHIC TECHNIQUES Decrease V.A 5 in case a-high palate b-deep floor of mouth Horizontal angulation It is the angle between CR&mid-sagittal plane It control width(dimention of tooth) CR must project through interproximal surfaces of examined teeth
 CR must project through interproximal surfaces of examined teeth")
11
PERIAPICAL RADIOGRAPHIC TECHNIQUES H.A Incisor>>>>>zero Canines>>>>45-60 Premolars>>>60-70 Molars>>>>>>90 Point of entry The cone is positioned so that CR is directed to apices of the teeth

12
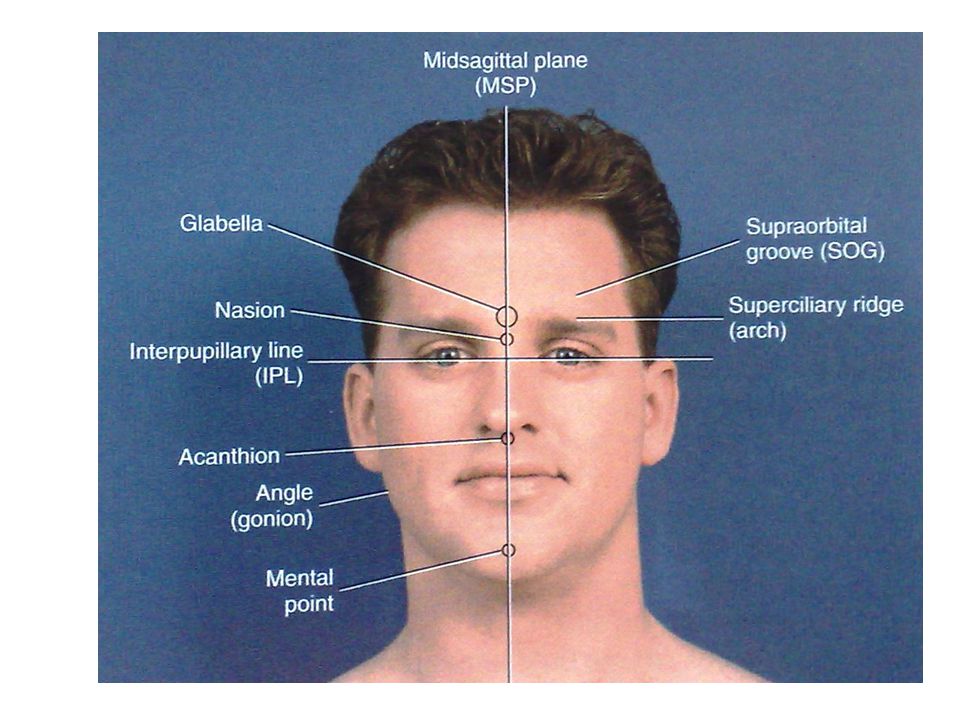
PERIAPICAL RADIOGRAPHIC TECHNIQUES For maxillary teeth>>>points of entry are located on ALA TRAGUS LINE Incisors>>>>>tip of the nose Canines>>>>>0.2cm distal to ala of nose Premolars>>>vertical line from eye pupil to ala tragus line 1 st Molar>>>>vertical line from outer canthus to ala tragus line

13
PERIAPICAL RADIOGRAPHIC TECHNIQUES 2 nd Molar>>>vertical line from 1cm distal of outer canthus to ala tragus line 3 rd Molar>>>>vertical line from 2cm distal of outer canthus to ala tragus line For mandibular teeth >>>the same as for maxillary teeth but located on a line 0.5cmabove inferior border of the mandible Time of exposure depends on area of rediographed,KV,mA, film speed&age of Pt

14
PERIAPICAL RADIOGRAPHIC TECHNIQUES Advantages of bisecting angle technique 1-Easy,quick &comfortable 2-Used in all patients 3-short object-source distance>decrese exp time 4-periapical area can be demonstrated 5-Speed technique Disadvantages: 1-Not standerdized 2-error of angulation>>>superimpositionof structures over the area of interest

15
PERIAPICAL RADIOGRAPHIC TECHNIQUES 2-The paralleling technique(long cone tech) or Right angle technique C.R is perpendicular to both film &tooth The film is placed in mid of oral cavity to get parallism between tooth&film>>>image magnification&unsharpness. Target-object distance is increased to avoid unsharpness(16 inches)>>>increase KV,mA,s and fast film(increase exposure time 4times) Film holders are used.
>>>increase KV,mA,s and fast film(increase exposure time 4times) Film holders are used..")
16
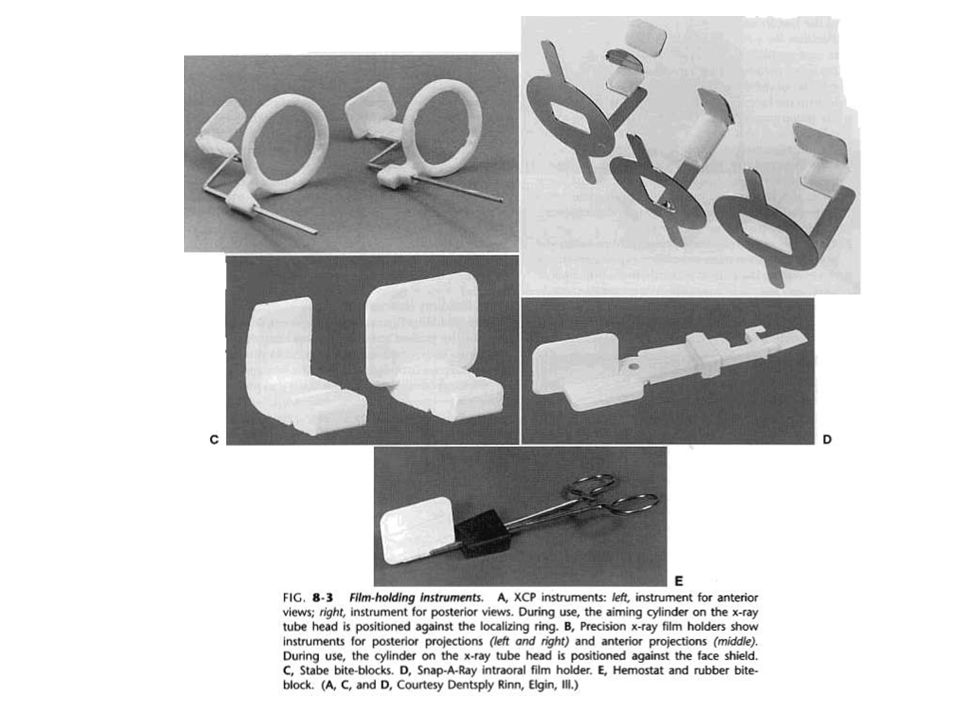
PERIAPICAL RADIOGRAPHIC TECHNIQUES FILM HOLDERS: 1-Rinn instrument 2-Bite block 3-hemostat 4-Cotton rolls 5-Precision rectangular collimating instrument Advantages of film holders 1-Provide parallism 2-Avoid exposure to Pt fing Disadvantages 1-Closure of mouth before exposure 2-Cannot examin the periapical structures 3-Limited in small mouths or gagging sesation

21
PERIAPICAL RADIOGRAPHIC TECHNIQUES ADVANTAGES OF PARALLELING TECHNIQUE 1-Standerdized>>>used in research 2-Accurate images 3-Avoids superimposition on apices 4-H.A&V.A detrmined by positioning devices 5-No overbending of films

22
PERIAPICAL RADIOGRAPHIC TECHNIQUES DISADVANTAGES OF PARALLELING TECHNIQUE 1-Difficult to image all parts of the mouth 2-Increased exposure time 3-Need long cones &film holders 4-Cannot image apical area in shallow palate 5-Discomfort of film holder 6-Time consuming

23
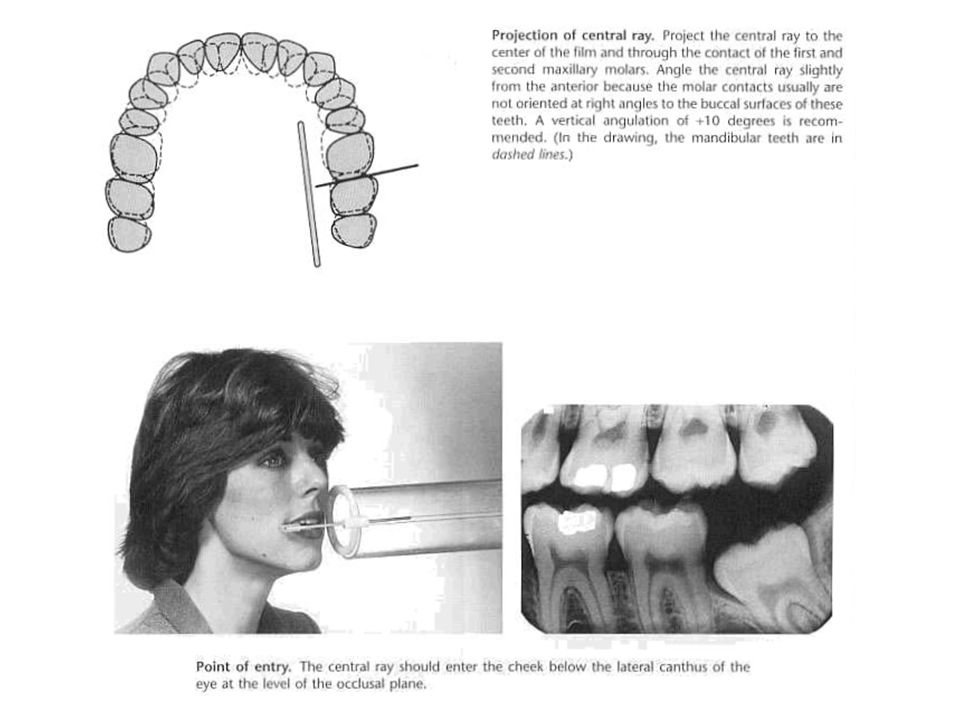
BITE-WING TECHNIQUE Used mainly for posterior teeth. The wing is on the tube side of film backet. Film backet is parallel to long axis of coronal portion of upper &lower teeth. CR is perpendicular to center of film

24
BITE-WING TECHNIQUE TECHNIQUE MSP is perpendicular to floor&ala tragus line is parallel to floor Remove any metallic objects. Patient should close mouth during exposure. For premolar teeth >>>the film bite should be centered over the lower 2 nd premolar &anterior border of the film extends anteriorly beyond the lower canine and 1 st premolar.

25
BITE-WING TECHNIQUE For molar teeth>>>the posterior border of film is behind the distal surface of most posteriorly erupted molar &the film bite is centered over the lower molar teeth. The patient should close his mouth in centric occlusion when radiography of posterior teeth In edentulous patient replace missing teeth by cotton rolls

26
BITE-WING TECHNIQUE In anterior bitewing film we shoul use 1-smaller film size 2-short dimension is parallel to occlusal plane 3-patient closes his mouth in edge to edge position 4-longer wing to avoid bending of film

27
BITE-WING TECHNIQUE CONE POSITION CR IS PERPENDICULAR to film packet. +ve 5 for premolar &10 for molar(short cone) +ve 6 for premolar &8 for molar (long cone) For posterior teeth use 2 films For anterior teeth use 3 films
 +ve 6 for premolar &8 for molar (long cone) For posterior teeth use 2 films For anterior teeth use 3 films.")
33
PANORAMIC RADIOGRAPHY Produces radiographs for only one section (slice) of the patient. Patient is placed so that dental arches are located in the middle of focal plane. Patient places edges of incissors in bite block device. MSP in midline position. Patient,s occlusal plane is lowered 20-30 degrees below horizontal plane.

34
PANORAMIC RADIOGRAPHY Patient,s back is in erect position with extended neck. Patient should hold tongue in contact with hard palate &keep lips closed during exposure Patient,s breathing is shallow during exposure

35
PANORAMIC RADIOGRAPHY INDICATIONS 1-Evaluation of truama &3 rd molars. 2-Evaluation of teeth development. 3-Evalution of developmental anomaly. 4-Examination of maxillary sinuses.

36
PANORAMIC RADIOGRAPHY ADVANTAGES: 1.Imaging broad anatomic region. 2.Relative low radiation dose. 3.Convenient,easy &speedy. DISADVANTAGES: 1.Fine anatomic details are not demonstrated. 2.Magnification,geometric distortion&overlapping of teeth. 3.High cost.

37
EXTRA-ORAL TECHNIQUES 1-Lateral views: a-True lateral b-Lateral oblique 2-PA views: a-True PA b-Sinus(Water,s view) c-Reversed Town,s view 3-AP views: a-True AP b-Modified Town,s c-SMV d-Frontal TMJ(transorbital)
 c-Reversed Town,s view 3-AP views: a-True AP b-Modified Town,s c-SMV d-Frontal TMJ(transorbital)")
40
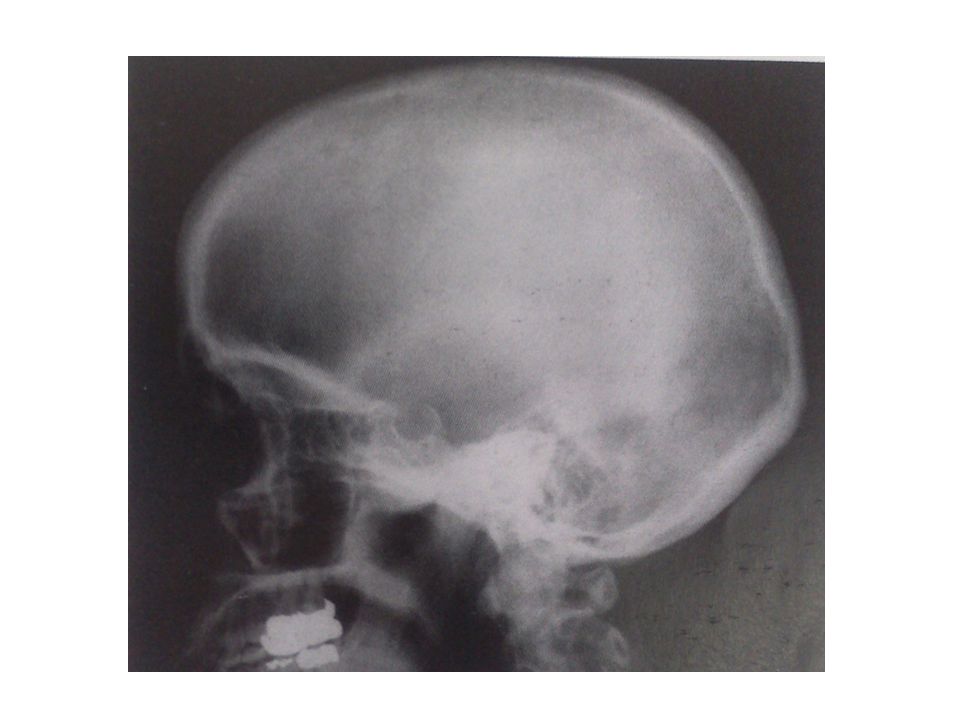
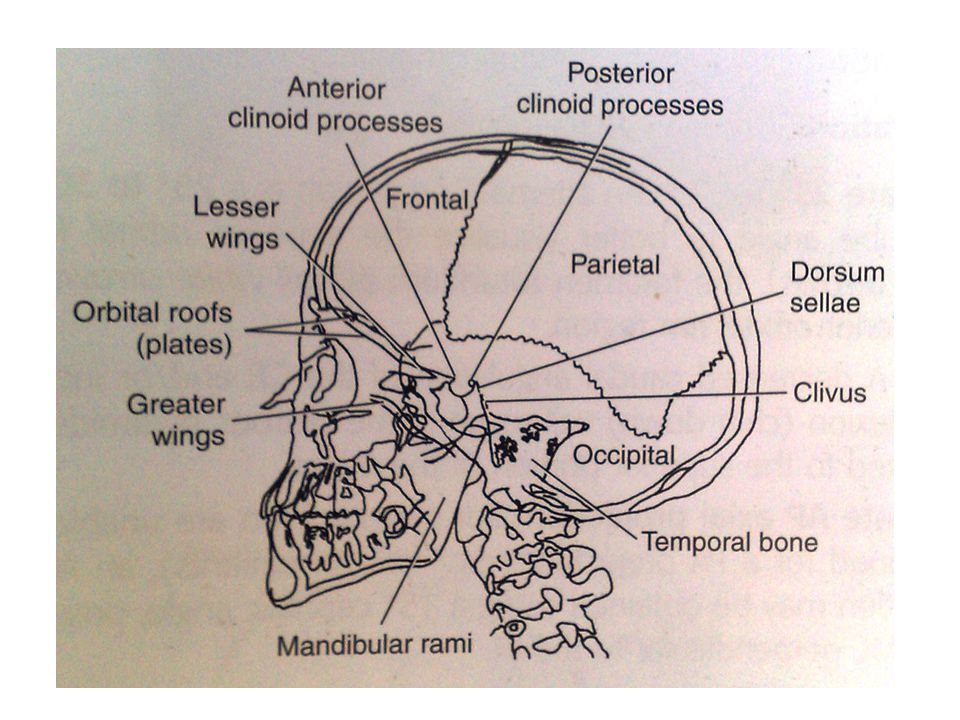
LATERAL VIEW

43
LATERAL OBLIQUE

46
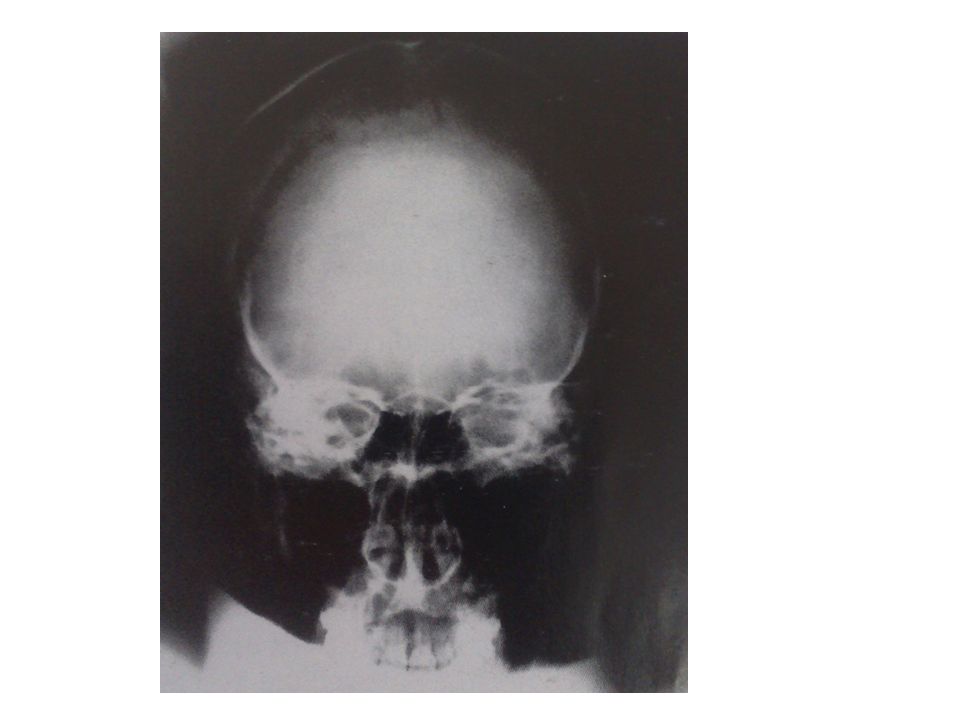
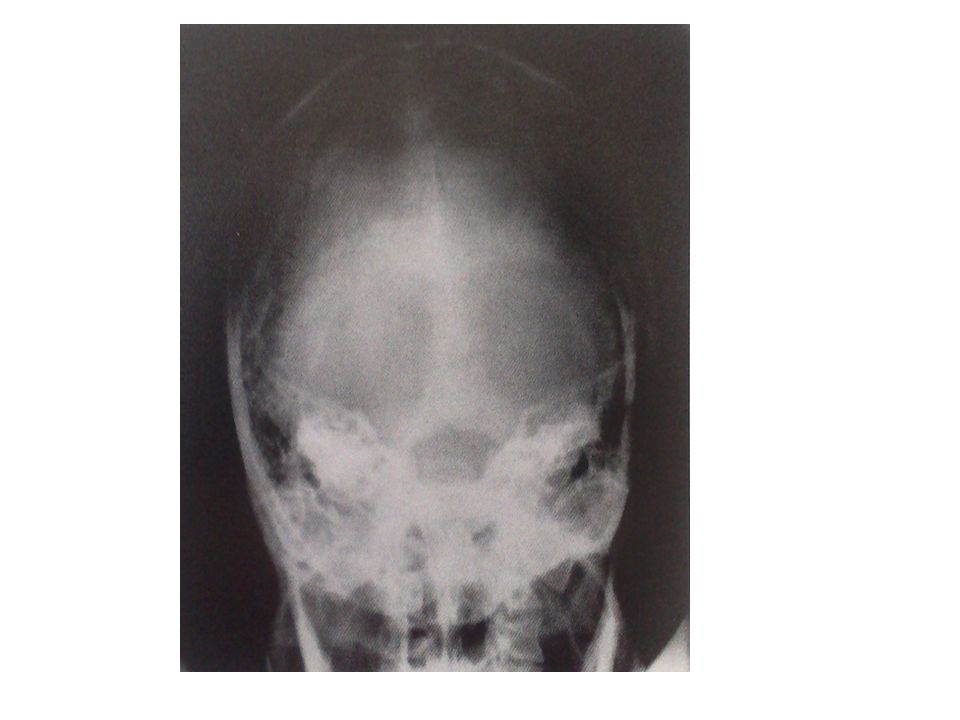
TRUE PA

49
TRUE PA FOR MANDIBLE

51
AP SKULL FOR TMJ

53
SINUS(WATER,S)VIEW
VIEW")
56
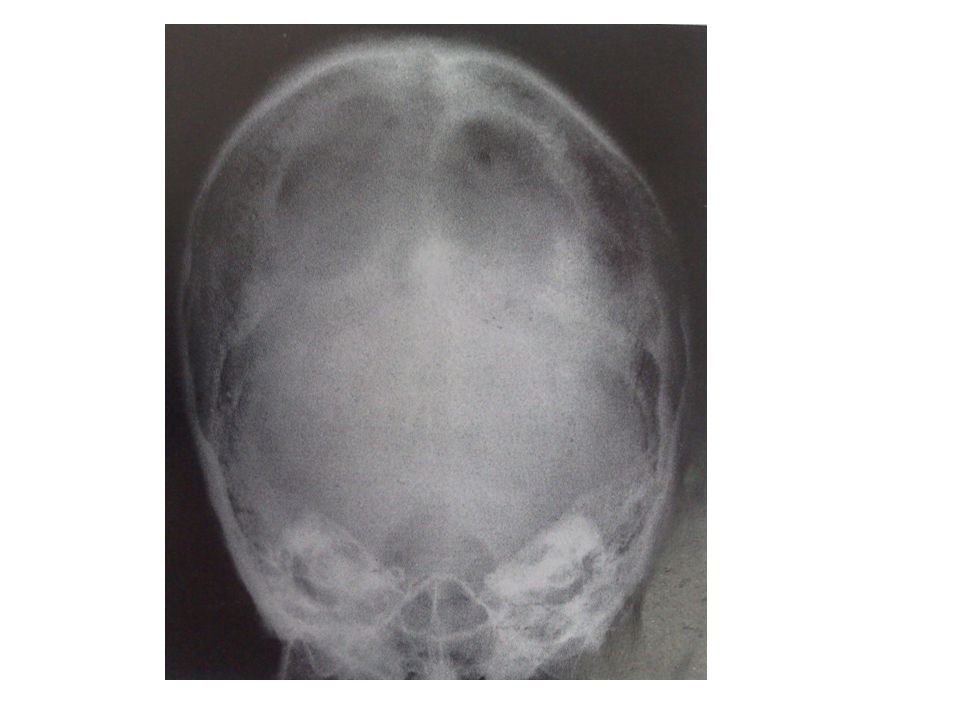
REVERSE TOWN VIEW

59
TOWN VIEW

62
SMV VIEW

65
PANORAMA

69
TMJ

71
END

Similar presentations


, you see the mouse holding an x-ray tubehead (see below),>")


>")


