Download presentation
Presentation is loading. Please wait.

2
Objectives (students will be able to): Select a traditional roof style and create a roof plan for a two-story house Calculate the pitch of a roof using a pitch ratio triangle Define important vocabulary related to roof design
: Select a traditional roof style and create a roof plan for a two-story house Calculate the pitch of a roof using a pitch ratio triangle Define important vocabulary related to roof design")
3
Definition: The exterior surface and its supporting structures on the top of a building A roof greatly affects the overall appearance of a house

4
Roof Systems http://www.youtube.com/watch?v=PTt7zaYKmqA&feature=cha nnel http://www.youtube.com/watch?v=PTt7zaYKmqA&feature=cha nnel Roof Framing Animation (Google SketchUp) http://www.youtube.com/watch?v=OlzJD9geAgE Interior Framing (Rafters) http://videos.howstuffworks.com/discovery/35700-gimme- shelter-roof-construction-elements-video.htm http://videos.howstuffworks.com/discovery/35700-gimme- shelter-roof-construction-elements-video.htm Roof Types (Gable vs. Hip) http://www.youtube.com/watch?v=f8PhTekho3s
 v=f8PhTekho3s.")
5
Gable Roof

6
Pros: Easy to build, sheds water well, provides for ventilation, and can be applied to most house designs (popular) Cons: Extra wall leading up to the gable is more expensive to build. Can collapse from wind.

7
Hip Roof

8
Pros: Aesthetically-pleasing. Could be cheaper than gable roof because there is less exterior wall and more roof material. More wind-resistant. Cons: Slightly more difficult to build than a Gable Roof. Does not provide as well for ventilation

9
Flat Roof Pros: Most economical to build Cons: Adds little to a design. Requires a “build-up” or membrane roof covering. Bad idea for rainy or snowy climates

10
Shed Roof Similar to a flat roof, but has pitch. Frequently used for additions or with other roof styles.

13
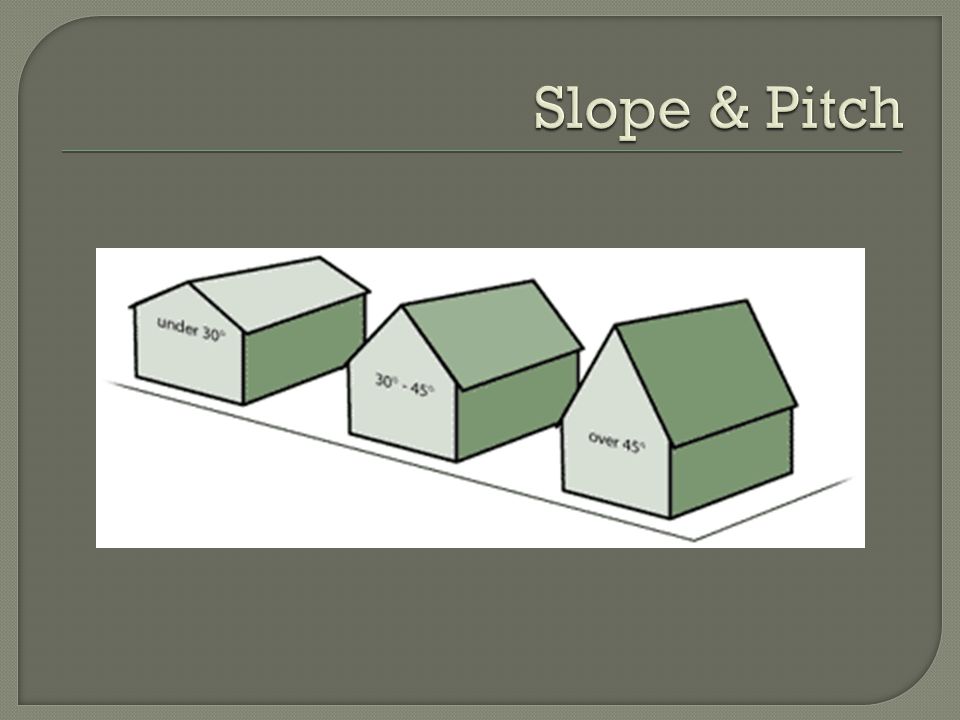
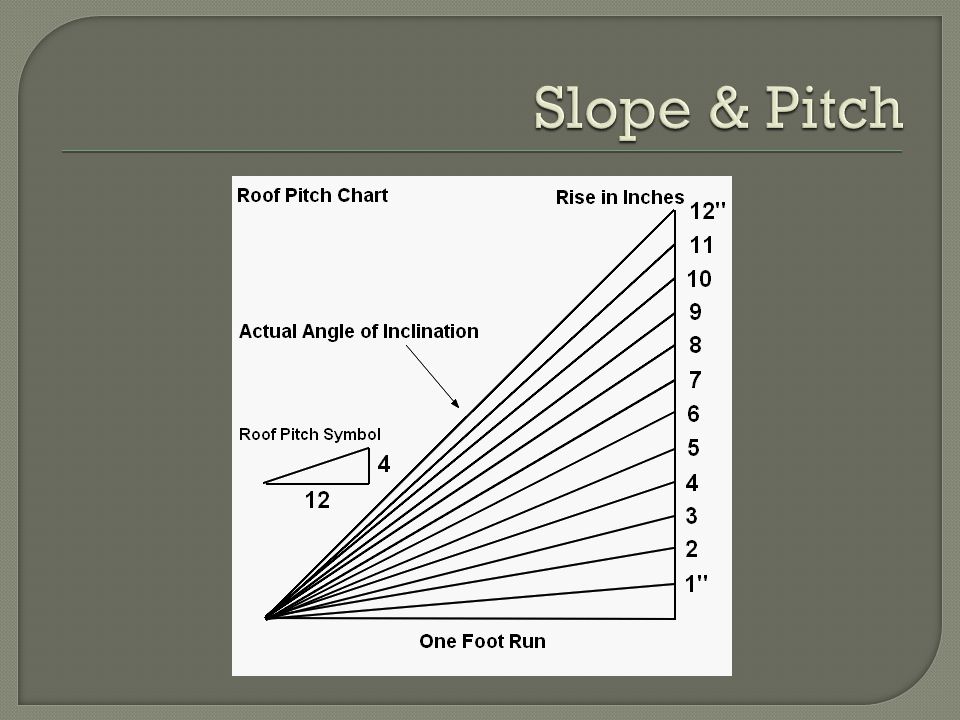
One of the main reasons for having a roof is to keep out rainwater and snow. This is done by providing a slope (pitch) to angle the roof. Figuring out the slope: In Europe & Australia: They define the pitch in degrees. So a 5 degree pitch is pretty flat, and a 45 degree pitch is fairly steep. In the USA: We refer to the slope of the roof as the ratio of the rise over the run. The ratio always uses 12” as the run value.
 to angle the roof. Figuring out the slope: In Europe & Australia: They define the pitch in degrees. So a 5 degree pitch is pretty flat, and a 45 degree pitch is fairly steep. In the USA: We refer to the slope of the roof as the ratio of the rise over the run. The ratio always uses 12 as the run value..")
14
Section through the Roof

15
How to calculate roof pitch 156” x 312”

16
How to calculate roof pitch X 156 5 12 156 5 12 ____65

17
How to calculate roof pitch 156” x 312” 65”

18
How to calculate roof pitch 12 5

21
The pitch angle determines what material can and can't be used for the roof sheeting. For example, if you want to use corrugated iron sheeting, there is a minimum pitch specified by the manufacture (it may be 5 degrees). Similarly, with roof tiles, it could be 15 degrees. Architects usually check the material specifications before designing the roof pitch. If the structure is built in an area with high rainfall or snowfall, be wary of almost flat roofs. Roofs with less of a slope are better for warm, drier climates.
. Similarly, with roof tiles, it could be 15 degrees. Architects usually check the material specifications before designing the roof pitch. If the structure is built in an area with high rainfall or snowfall, be wary of almost flat roofs. Roofs with less of a slope are better for warm, drier climates..")
22
RIDGE

25
Roof Ventilation Methods

26
Gable Type Ventilators

27
Eaves The overhang of the roof at the wall Perform valuable functions apart from the appearance. They protect the walls from bad weather. Eaves overhang the exterior walls 12” 12”

29
Nail Plated Timber Trusses All Steel Roof Construction

30
Exposed rafters on interior

31
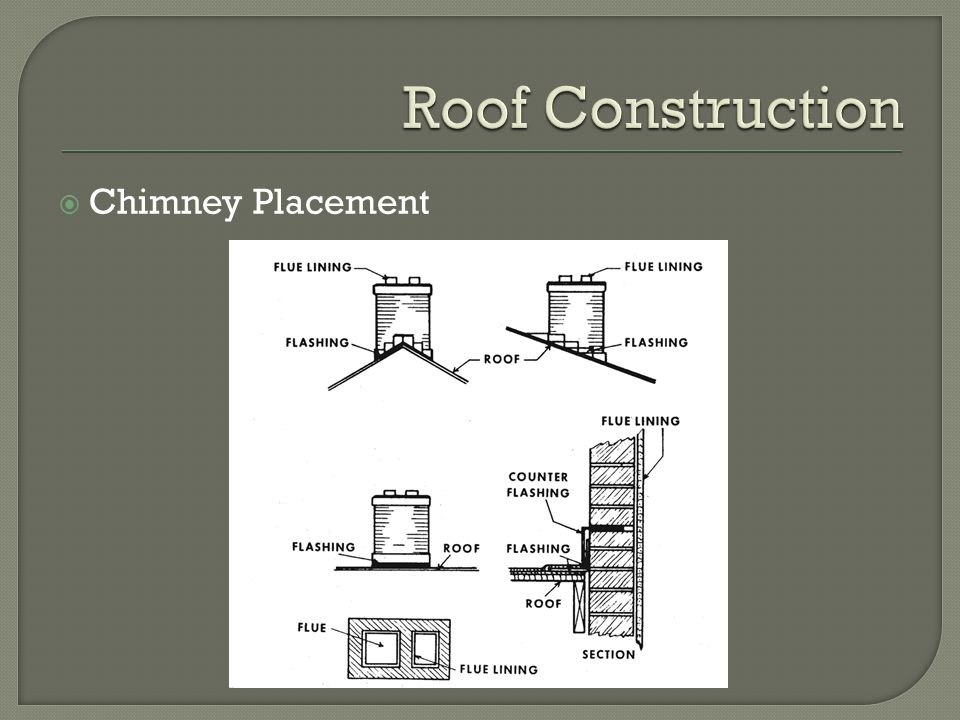
Chimney Placement

33
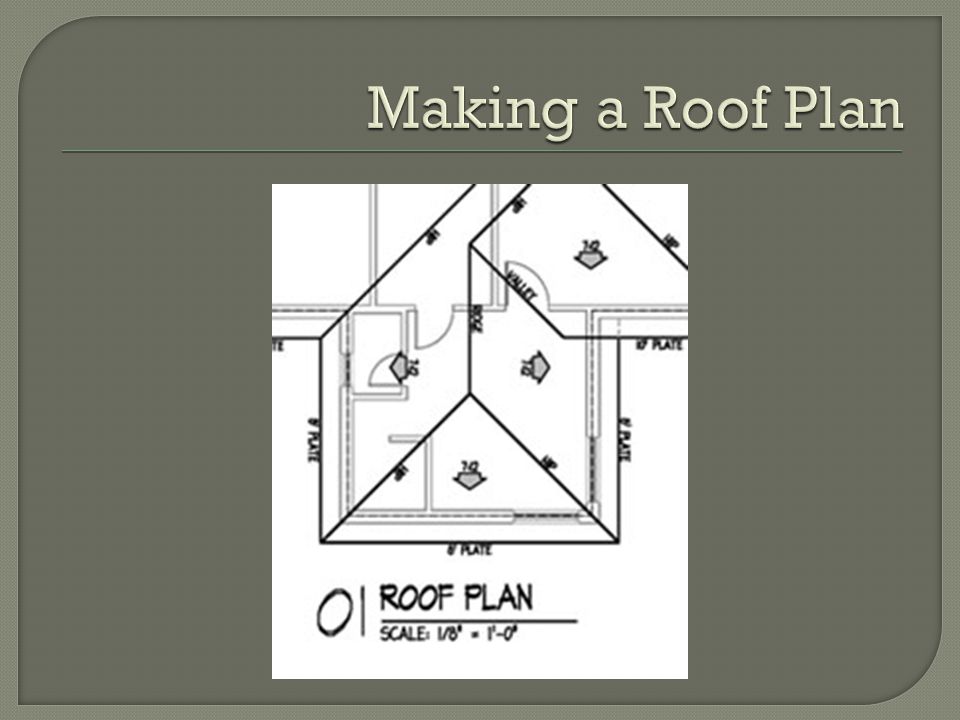
How to draw a chimney on a roof plan

34
Skylights

37
Step 1: Open a new drawing. Save it in your folder and name it: 2storyhouse-RoofPlan.dwg Step 2: Insert xrefs of first and second floor of house Step 3: Manage layers so that you can only see the walls of the first and second floor (turn of all xref layers) Step 4: Put each floor on a new layer: First Floor = Default Cyan Second Floor = Default Red
 Step 4: Put each floor on a new layer: First Floor = Default Cyan Second Floor = Default Red.")
38
Step 5: Fit the second floor on top of the first floor (use the stairs as a guide)
")
39
Step 6: Using Layer 0, draw lines on top of the exterior walls

40
Step 7: Use the offset tool to offset those lines 12” out (b/c the eave is 12” from the walls) Step 8: Change the inside black lines to Hidden Lines
 Step 8: Change the inside black lines to Hidden Lines")
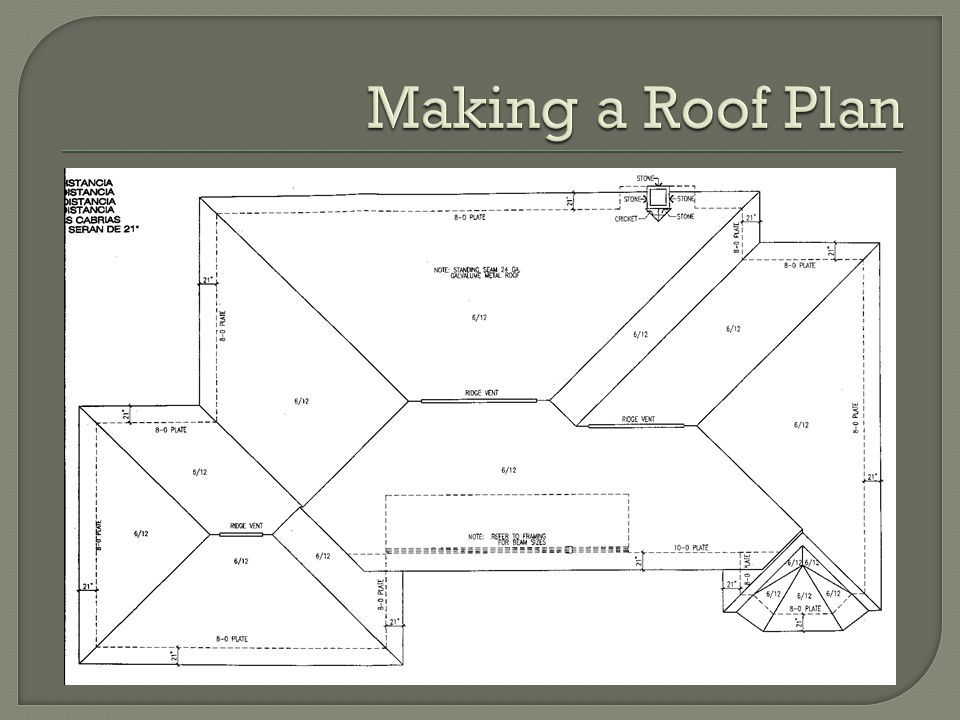
41
Step 9: Hide the First Floor and Second Floor layers so we can only see the Layer 0 (the roof). Decide where ridges should go. GABLE ROOF

42
Step 9: Hide the First Floor and Second Floor layers so we can only see the Layer 0 (the roof). Decide where ridges should go. HIP ROOF

43
Roof Basics: http://www.builderbill-diy-help.com/roof.html Roof Slide Presentation: http://www.slideshare.net/stootypal/roof-types#

Similar presentations