Download presentation
Presentation is loading. Please wait.

1
Construction Surveys

2
List of Figures

3
Stages and Measurements of CS Design stages: topographic Surveying, and site maps Construction stage: Setting-out and positioning works. 60% of surveying hours. involves establishing lines and grades by means of stakes and string lines to guide the contractor During and after construction: as built drawings, a record and a check. Measurements involved: Horizontal and vertical angles, elevations, horizontal distances.

4
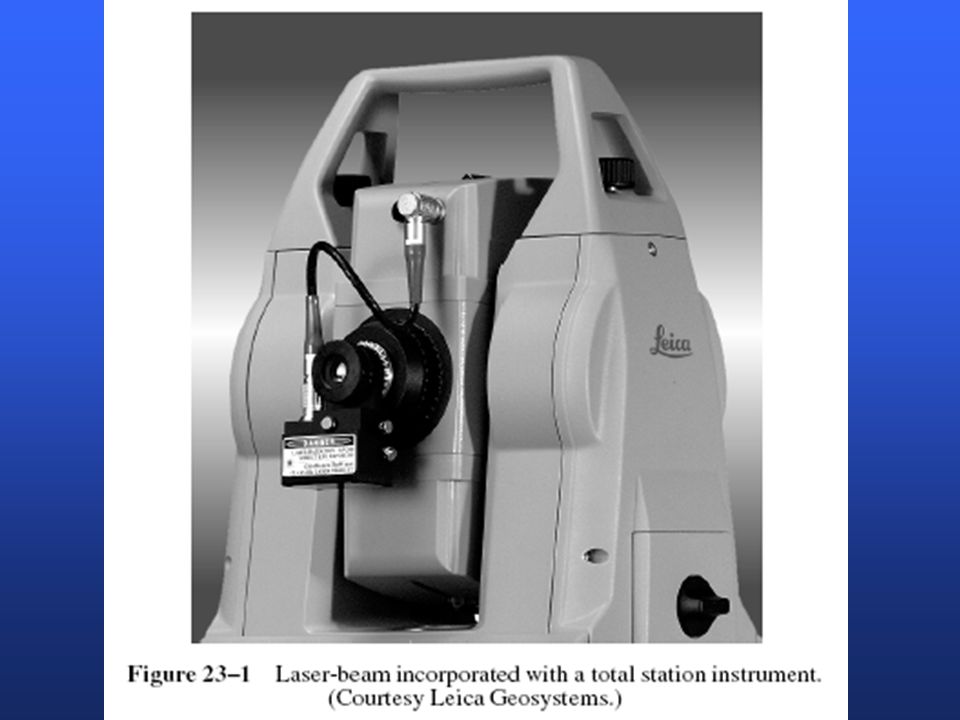
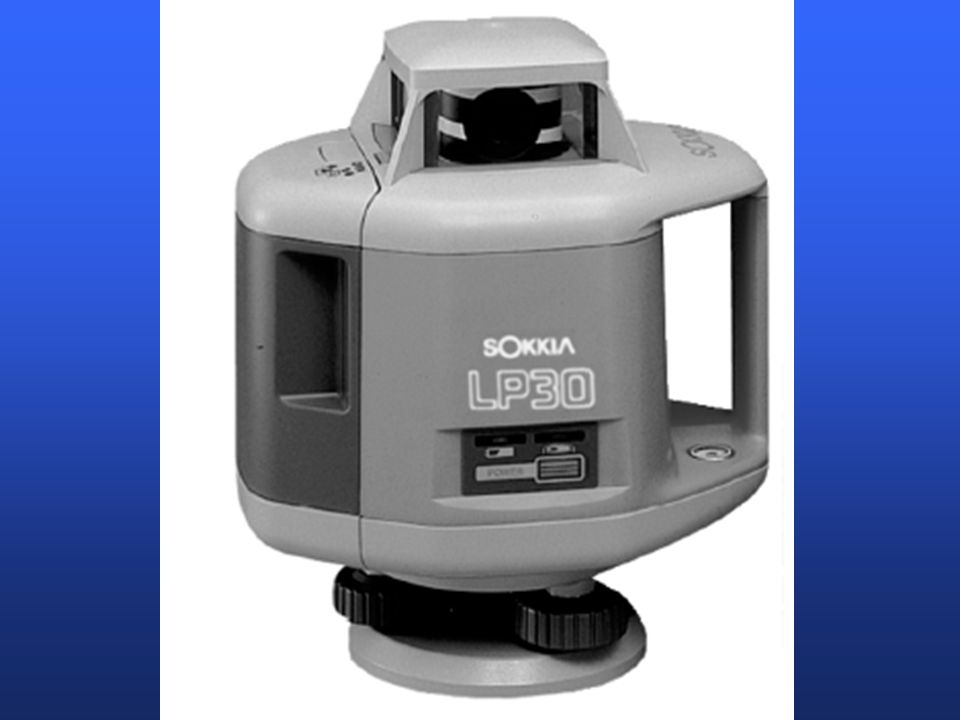
CS Equipment Laser Instruments: –to create a visible line, or plane of known elevation or tilt –The line or plane could be horizontal, vertical, or tilted. –Single beam lasers will project visible string lines or plumb lines –Rotating beam lasers: a rotating single beam to create a plane. –Examples: »Laser levels, laser theodolite and total stations, hand- held EDM instruments (Figures 23-1 to 23-4) »Recent technology of prism-less total stations and EDMs, and HDS “High Density Surveys”. »Machine Guidance
 »Recent technology of prism-less total stations and EDMs, and HDS High Density Surveys . »Machine Guidance.")
7
Laser is used to guide the blade

8
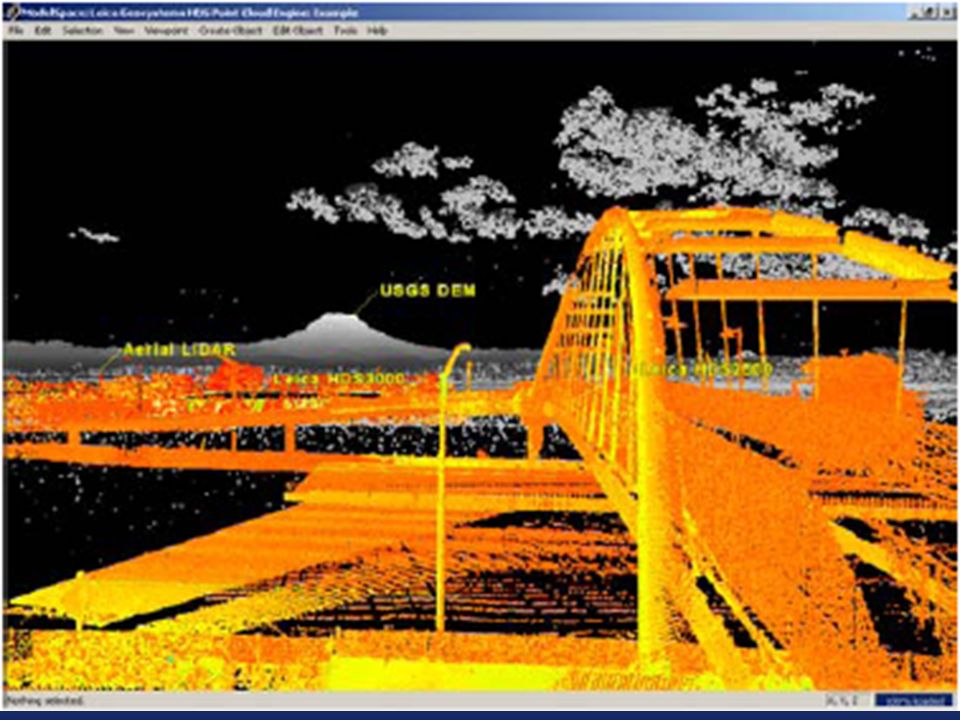
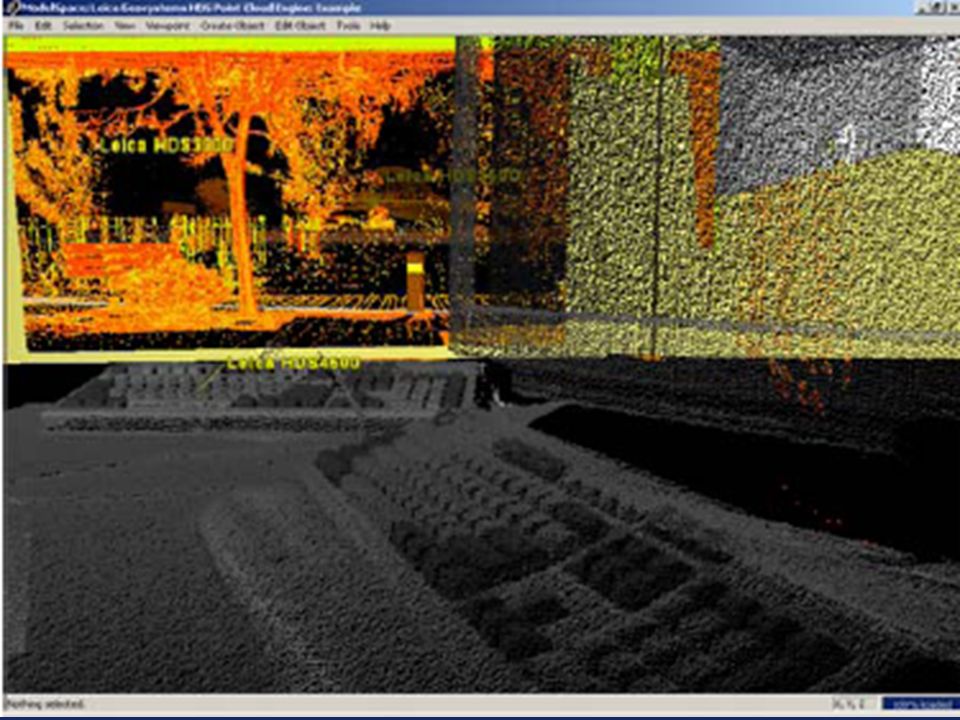
HDS Surveys

14
Total Stations: the ones designed for CS are of lower angular resolution(10” or 20”), and shorter ranges(500 m) Relative GPS: sub-centimeter accuracy with real time kinematic GPS in horizontal, few cm in vertical. Must maintain visibility with satellites Levels

15
Horizontal and Vertical Control Before Construction: new control points around the site must be established with high accuracy. Additional points inside the site are then established. All points must be “tied out” for repositioning. These initial points should: Meet certain accuracy standards Be clearly marked, referenced, and recorded Be far enough to be safe during construction. During Construction: additional control is extended by the contractor as needed, around or inside the structure. These additional points should be close enough to the structure so that workers with simple equipment can use them

19
Staking out a Pipeline Sanitary (sewage) sewers and storm sewers which carry storm runoffs operate under gravity. The grade in such pipelines is critical. City water, oil, and natural gas pipes are not as critical. The location of the line is determined after a profile leveling is done. The center line and an offset reference line are established. Precise alignment and grade are guided by laser beams or battered boards.

20
Pipe Laying Laser system by Apache Source: laserlevels.net

21
Staking Pipeline Grades A- Cut and Fill: The center line and an offset line are marked and stationed. The actual profiling and staking are on the offset line, not the CL. Using profile leveling method, obtain ground elevation at each stake, compute the depth of cut or fill to the invert level. Mark that depth on the stake side facing the trench, mark the station on the other side of the stake. B- Line and grade: Generally done using laser equipment.

22
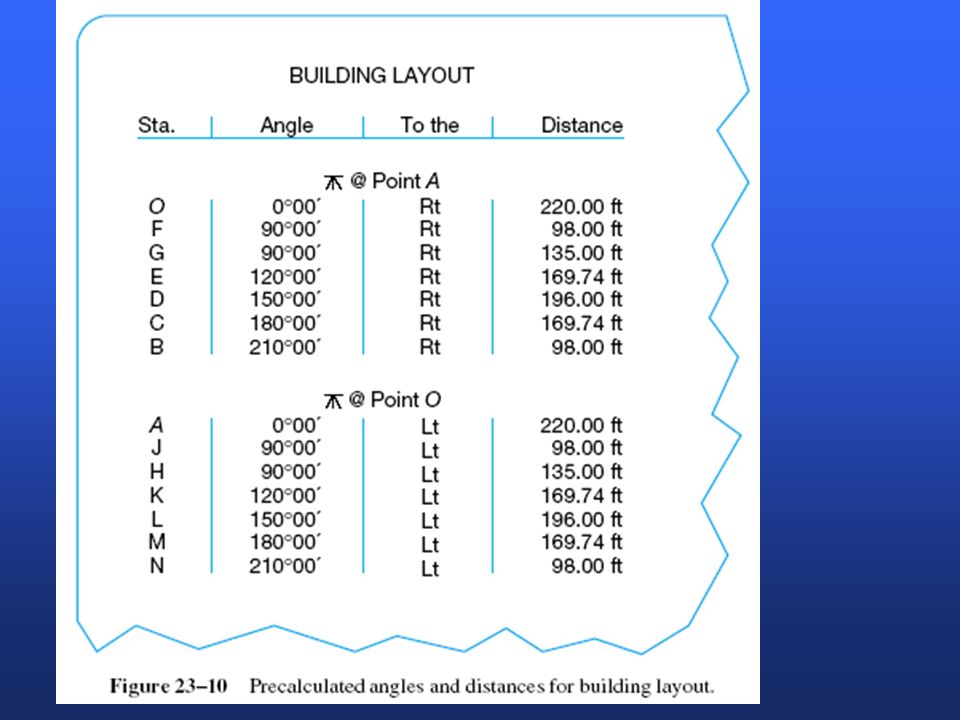
Staking out a Building First step is to locate the building by boundary surveying. Stakes are placed temporarily at the corners as a check. In a small size building, a set of batter boards and reference stakes are first set. The boards are around the building corners and nailed at a full number of feet above the footing base or at first floor elevation. Nails are driven into the batter board tops so that a string connecting them will define an outside wall See fig 23-7, and the example which illustrates staking out the building in fig 23-8. In a larger building, radial methods, the one you used to lay out piles, are used used. Fig 23-9

27
Additional Control for Buildings Elevations: Visible benchmark(s) should be set. Additional control could be done using marks on nearby buildings, or marks on interior structure elements (columns, walls). Horizontal : temporary batter boards inside the site, marks on nearby buildings. Plumbness: Essential for multistory buildings: columns, elevator shafts, construction walls, etc. Checked by a theodolite line of sight rotating in a vertical plane, or by lasers. Two instruments, with perpendicular line of sights, could be used to guide the construction of vertical members in real time.
. Horizontal : temporary batter boards inside the site, marks on nearby buildings. Plumbness: Essential for multistory buildings: columns, elevator shafts, construction walls, etc. Checked by a theodolite line of sight rotating in a vertical plane, or by lasers. Two instruments, with perpendicular line of sights, could be used to guide the construction of vertical members in real time..")
28
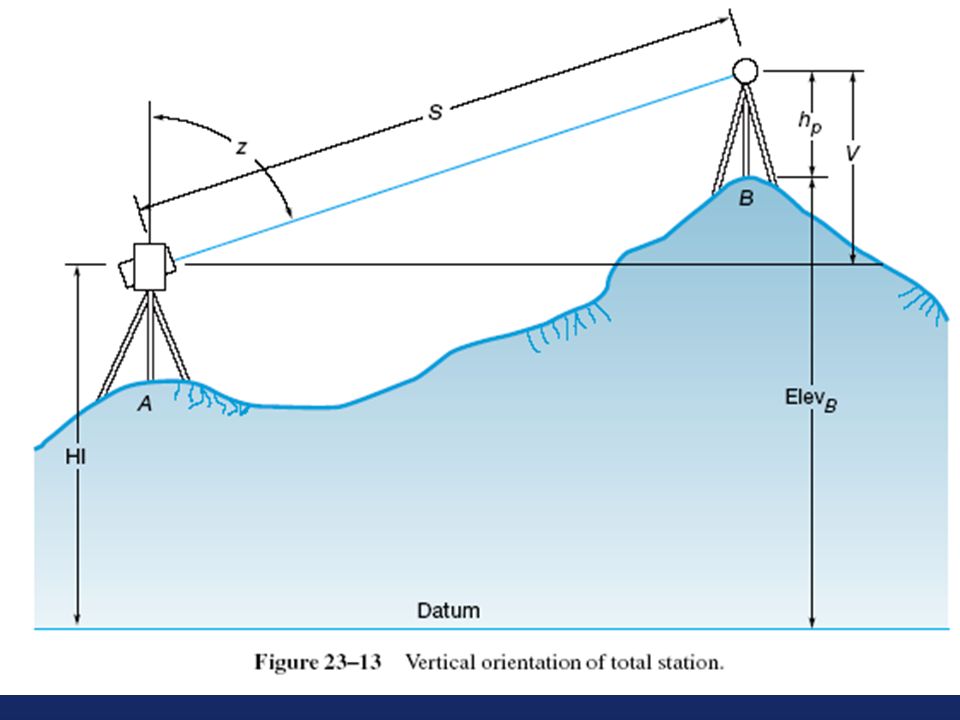
CS Using Total Stations We are simply trying to define (X,Y) and maybe (Z) of the center of the TS. Once stored in memory, the TS can do further computations onsite. Horizontal Orientation : By azimuth: input occupied point coordinates and azimuth to another point. By coordinates: input occupied point coordinates and another point coordinates By resection: input coordinates of unoccupied points, at least three, output is occupied point coordinates. Vertical Orientation: if necessary, output is HI: By adding the instrument height to occupied point elevation. By adding the vertical distance to a benchmark elevation and prism height: HI = elev B + h p - V

30
Staking out with a Total Station First the instrument is oriented, and a file that contains control points and stake points information is downloaded into the total station. For 2-D stakeout, the number of the desired stake point is entered, the instrument will display differences of angles and distances to orient the prism. For 3-D works, The difference in elevation between the stake elevation and the required elevation (cut or fill) is also displayed.
 is also displayed..")
Similar presentations


>")


: Roads, Canals, Pipes,… Cross-Sectional View, Roads, Canals, Pipes, Building,…>")


