Download presentation
Presentation is loading. Please wait.

1
Day 1 Session 2

2
Setup & Installation sarita@codefruxtechnology.com

3
Agenda Android Setup & Installation Create your first application Build and run your application

4
Setup the Android Environment ComponentVersion JDKJava SE 7u9 Eclipse IDELatest version Android SDK Downloader Android SDK Tools revision 21 Android ADT Latest version that is for SDK tools rev 21 Android SDK platform support Android SDK Platform tools revision 21 sarita@codefruxtechnology.com

5
Download the Java SE Development Kit (JDK) from http://www.oracle.com/technetwork/java/javase/downloads/ Click Download from the JDK section of the 'Java Platform, Standard Edition' table. Install the JDK environment with default settings. MAC: The JDK is already integrated into the Mac OS X operation system. sarita@codefruxtechnology.com JDK Installation

6
My Computer Properties Advanced System Setting Environmental Variables. sarita@codefruxtechnology.com Set the environment variable:

7
Give the path variable value :.;C:\Program Files\Java\jdk1.6.0_21\bin; And JAVA Home variable value : C:\Program Files\Java\jdk1.7.0_17; sarita@codefruxtechnology.com

8
The Android SDK is distributed through an SDK starter package containing the SDK tools. Download the starter package from: http://developer.android.com/sdk/index.html Unzip the archive and copy the contents into a directory, e.g., C:\Development\Android\android-sdk-windows\. Throughout the Getting Started guide, we refer to the base directory of your development environment as = c:\Development\Android. Add the tools\ directory to your Windows path. sarita@codefruxtechnology.com Installation - Android SDK

9
Right-click Computer on the desktop and select Properties. Use the Advanced system settings to open the System Properties window, and select Environment Variables on the Advanced tab. Look for the variable Path in the System variables window. Press Edit. Scroll to the end of the Variable value, and add the full path to the tools\ directory to the end of the path, separated by a semicolon from the path before like : ;C:\Development\Android\android-sdk-windows\tools\ sarita@codefruxtechnology.com

10
MAC: Update the PATH variable to point to the 'make' utility and the Android SDK tools directory in the/etc/rc.common or ~/.bash_profile file: PATH=/bin:/sbin:/usr/bin:/usr/sbin:/usr/libexec:/System/Library/CoreServices:/Dev eloper/usr/bin:~/Development/Android/android-sdk- macosx/tools; export PATH LINUX: Update your PATH to point to the 'make' utility and the Android SDK tools directory. If you use bash shell, add the following to the ~/.bashrc : export PATH=/opt/android-sdk-linux/tools/;$PATH sarita@codefruxtechnology.com

11
The ADT Bundle provides everything you need to start developing apps, including a version of the Eclipse IDE with built-in ADT (Android Developer Tools) to streamline your Android app development. If you don’t have, then download Android SDK from http://developer.android.com/sdk/index.html Unpack the ZIP file (named adt-bundle-.zip) and save it to an appropriate location, such as a "Development" directory in your home directory. Open the adt-bundle- /eclipse/ directory and launch eclipse. sarita@codefruxtechnology.com Setting of ADT Bundle
 and save it to an appropriate location, such as a Development directory in your home directory. Open the adt-bundle- /eclipse/ directory and launch eclipse. Setting of ADT Bundle.")
12
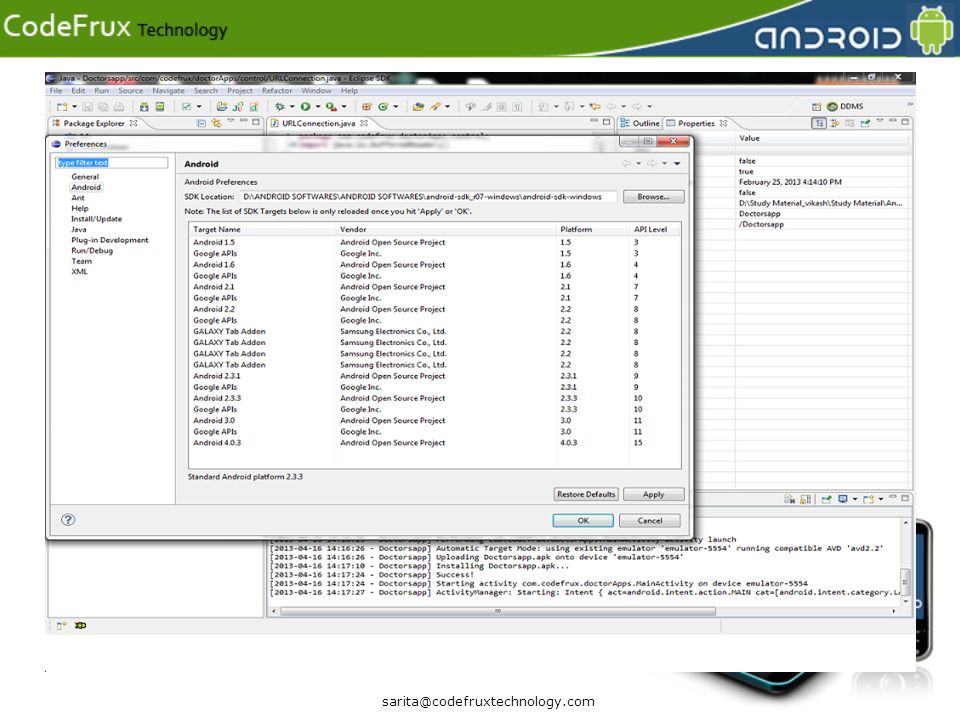
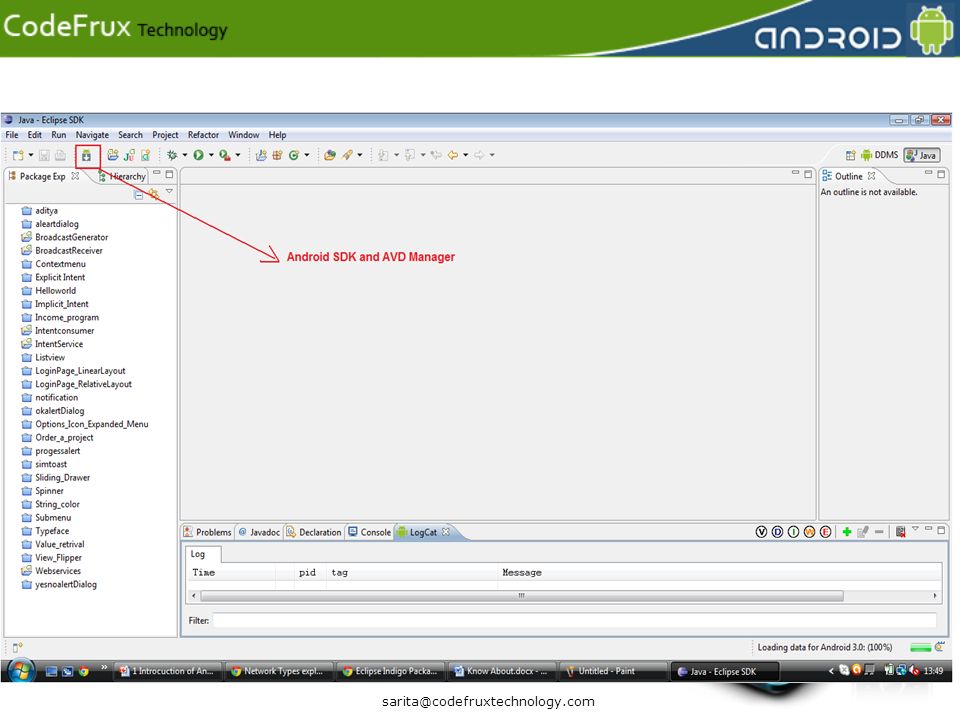
In Eclipse, select the menu Window->Android SDK Manager. If the Android SDK location was not set up correctly within Eclipse, go to Windows-> Preferences->Android. Then browse Copy the path from your address bar and paste it. Click on Apply and finally Ok sarita@codefruxtechnology.com Android SDK platform support

13
sarita@codefruxtechnology.com
14
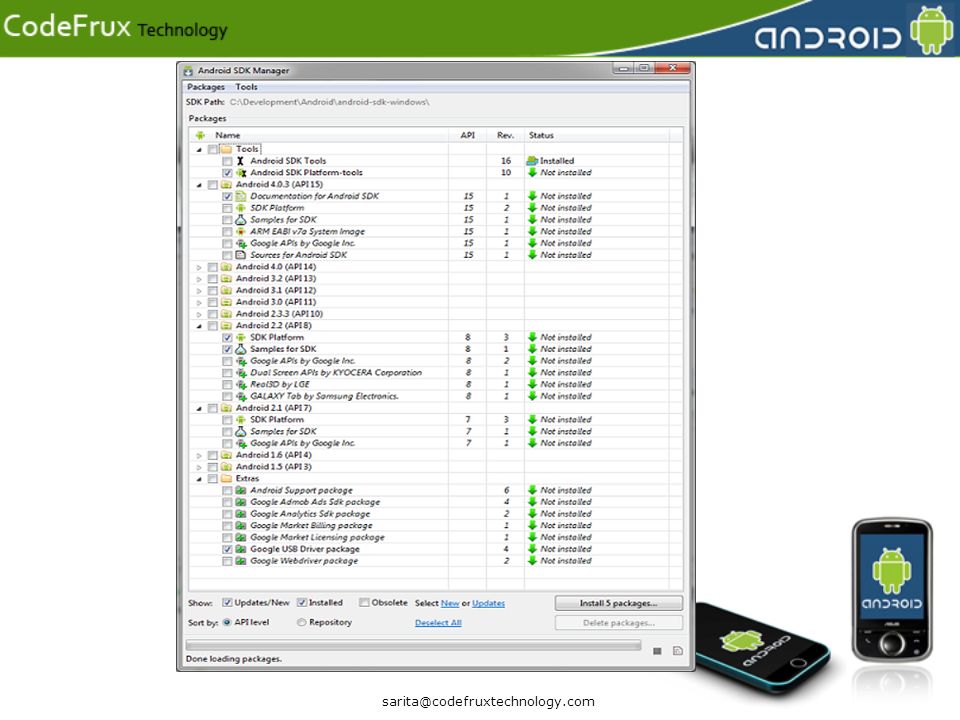
In the Android SDK manager window, sort by API level, click Deselect All and check the following boxes: From Tools: Android SDK Platform-tools From Android 4.1 (API 16): Documentation for Android SDK From Android 2.2 (API 8): SDK Platform Samples for SDK (optional) From Extras: Google USB Driver package (not compatible with Linux) sarita@codefruxtechnology.com
: Documentation for Android SDK From Android 2.2 (API 8): SDK Platform Samples for SDK (optional) From Extras: Google USB Driver package (not compatible with Linux)")
16
1. Select File > New > Android Application Project. 2. Enter the Application name. 3. Enter Project Name. 4. Enter com.android.projectName as the Package name.(Should be fully qualified) 5. Select Minimum required SDK and Target SDK (for ex. : API8:Android 2.2(Froyo) ). 6. Click Next. 7. Enter the Activity name. 8. Click Finish. 9. Then go to src folder and open the HelloWorld.java sarita@codefruxtechnology.com Create an Application
 5. Select Minimum required SDK and Target SDK (for ex. : API8:Android 2.2(Froyo) ). 6. Click Next. 7. Enter the Activity name. 8. Click Finish. 9. Then go to src folder and open the HelloWorld.java Create an Application.")
17
To build the project, select the project -> Right click and select Build Project Option. To run the application, we need an Android Virtual Device (AVD). AVD is an emulator that runs on your computer. The emulator lets you prototype, develop and test Android applications without using a physical device. The Android emulator mimics all of the hardware and software features of a typical mobile device, except that it cannot place actual phone calls. It also provides a screen in which your application is displayed, together with any other active Android applications. sarita@codefruxtechnology.com Build & Run The Application
. AVD is an emulator that runs on your computer. The emulator lets you prototype, develop and test Android applications without using a physical device. The Android emulator mimics all of the hardware and software features of a typical mobile device, except that it cannot place actual phone calls. It also provides a screen in which your application is displayed, together with any other active Android applications. Build & Run The Application.")
18
sarita@codefruxtechnology.com Execution Flow Java Source Code Java Byte Code.dex Resources Manifest.apk dx aapt

19
The simplest way to create an AVD is to use the graphical AVD Manager. Or 1. Select Window > Android SDK and AVD Manager. The Android SDK and AVD Manager displays. 2. Make sure the entry for Virtual Devices is selected and click New. The Create new AVD window displays. 3. Enter a Name for the AVD. 4. Select Android APIs (API level 8) as the Target. 5. Click Create AVD. 6. Close the Android SDK and AVD Manager. sarita@codefruxtechnology.com AVD Creation
 as the Target. 5. Click Create AVD. 6. Close the Android SDK and AVD Manager. AVD Creation.")
20
sarita@codefruxtechnology.com AVD

21
sarita@codefruxtechnology.com
23
Q & A sarita@codefruxtechnology.com

Similar presentations


 – running the phone emulator Chris Greenhalgh G54UBI / 2011-02-21 1Chris Greenhalgh>")


, be sure I have your name and student ID We.>")
 Eclipse plug-in ▫Android SDK and.>")

 500 MHz Pentium or better Macintosh: must run Mac OS X, preferably.>")


