Download presentation
Presentation is loading. Please wait.

1
SalsaJ (Such a Lovely Software for Astronomy) Practical Session
 Practical Session")
2
Installation Open the webpage http://www.euhou.net/ and click on softwarehttp://www.euhou.net/

3
Installation Choose the adequate version

4
How to measure Light A CCD (Charge Coupled Device) converts photons in electrons criating na electric current. A CCD (Charge Coupled Device) converts photons in electrons criating na electric current. CCDs are detectors made our of silicon. Each element is a pixel (picture element). CCDs are detectors made our of silicon. Each element is a pixel (picture element).
 converts photons in electrons criating na electric current. CCDs are detectors made our of silicon. Each element is a pixel (picture element). CCDs are detectors made our of silicon. Each element is a pixel (picture element)..")
5
Open the SalsaJ program After completing the installation click on this icon :

6
Image brightness Click on the icon or click on ‘Open’ in the ‘File’ menu Choose your image, e.g. the image ‘ sny.fts ’: How to adjust the image brightness?

7
Click on the icon or on ‘Image’ menu of the toolbar, choose “Adjust” and “Brightness/Contrast” Image brightness

8
A new window will be displayed click ‘Auto’ Image brightness

9
Display the Look-Up Table

10
The Look-Up Table (LUT) represents the relation between color and intensity of stars. Select the option ‘Show LUT’ in the ‘Image’ menu.

11
Select the option ‘Lookup Tables’ in the ‘Image‘ menu, for example ‘Red’, ‘Green’, ‘Blue’ or multi-color LUT ‘Spectrum’. Change the Look-Up Table

12
Make a profile The cursor on the segment displays the actual position on the profile. Plot a segment on the image to get the corresponding plot profile.

13
About the Display Open a moon imageOpen a moon image x and y are the coordinates of the cursor. In this example x and y are the coordinates of the central spike of the biggest crater. Value is the number of counts of the pixel which coordinates are displayed (brigthness)
.")
14
Zoom In SalsaJ, you can “zoom” the image using the magnifying glass tool in the tool bar. Just click anywhere in the image and it zoom in. To “zoom out” hold down Ctrl key while clicking on the image or use the right side or your mouse.

15
Measuring size with images Open an image and zoom in Each square is a pixel (picture element) Open an image and zoom in
 Open an image and zoom in")
16
Measuring size with images Find a crater as big as your town. Find a crater as big as your town. Finaly in “Analyse” menu choose ‘measure’ diameter/2=radius radius x 1.1km Area= radius 2 Open image Craters000314.fits Shift arrow will make the selection horizontal

17
Make a surface plot Select a region in image “M51.fits” to obtain the correspondent surface plot or just measure the whole image Open the “Analyze” menu and choose “Surface plot” and accept the default options.

18
Basic operations Open two images to make some basic operations : Adjust images with ‘Auto’

19
To compare two images, it is interesting to add them : Select in the ‘Process’ menu the option ‘Image Calculator…’, the result will be created in a new window. Add two images Choose the images, the operation and click ‘OK’

20
It is also interesting to subtract them : Subtract two images

21
To make a movie open all the images and chose in the Image menu the option Stacks followed by Images to Stack Open all Jupiter files Make a movie

22
You can save the stack as and.avi file Convert images to stack. Adjust brightness and contrast to be able to see the Moons Identify the image that doesn’t belong to the sequence Manually scroll to see the animation. Or Start animation

23
Delete a slice Manually position in the slice you want to delete

24
Change the Speed

25
Open M27 blue, green and red images. Remember to adjust brightness and contrast Open M27 blue, green and red images. Remember to adjust brightness and contrast Color Images with SalsaJ

26
After zooming each image to the maximum, verify the coordinates of the pixel with higher counts (value) and use the function ‘translation’ in “Process” menu to correct the shift…if needed … you will not need it in this example. After zooming each image to the maximum, verify the coordinates of the pixel with higher counts (value) and use the function ‘translation’ in “Process” menu to correct the shift…if needed … you will not need it in this example. color images with SalsaJ
 and use the function ‘translation’ in Process menu to correct the shift…if needed … you will not need it in this example. color images with SalsaJ.")
27
After zooming out each image change the ‘Type’ in “Image” menu to 8-bit. After zooming out each image change the ‘Type’ in “Image” menu to 8-bit. color images with SalsaJ

28
Build a color image using ‘RGB Merge’ of ‘color’ in “Image” menu. Build a color image using ‘RGB Merge’ of ‘color’ in “Image” menu. Color Images with SalsaJ

29
On the displayed box choose the correspondent image and remember to check the option ‘keep source stacks’. On the displayed box choose the correspondent image and remember to check the option ‘keep source stacks’. Color Images with SalsaJ

30
Usually the filter is not part of the name of the image. To find this check the image info. Usually the filter is not part of the name of the image. To find this check the image info. Color Images with SalsaJ Att.: jpeg images don’t have this type of info associated to it. This is a FITS feature FITS or Flexible Image Transport System is a digital file format used to store, transmit, and manipulate images.

31
If the result is good save the image. If the result is good save the image. color images with SalsaJ

32
Open the ZetaOph images W2, W3 and W4 fromWISE telescope one by one and change the type to 8 bit to reduce the size if needed Open the ZetaOph images W2, W3 and W4 fromWISE telescope one by one and change the type to 8 bit to reduce the size if needed

33
Make your color image

34
Play with the image

35
Open the images of the Sun Open the images of the Sun Making a movie

37
Invert the color of the images Invert the color of the images Making a movie

38
Other alternative to invert the color Other alternative to invert the color

39
Stack -> Convert images to Stack Stack -> Convert images to Stack Making a movie

40
Change the animation options if needed

41
Making a movie Change the animation to 1 frame/seg and start animation

42
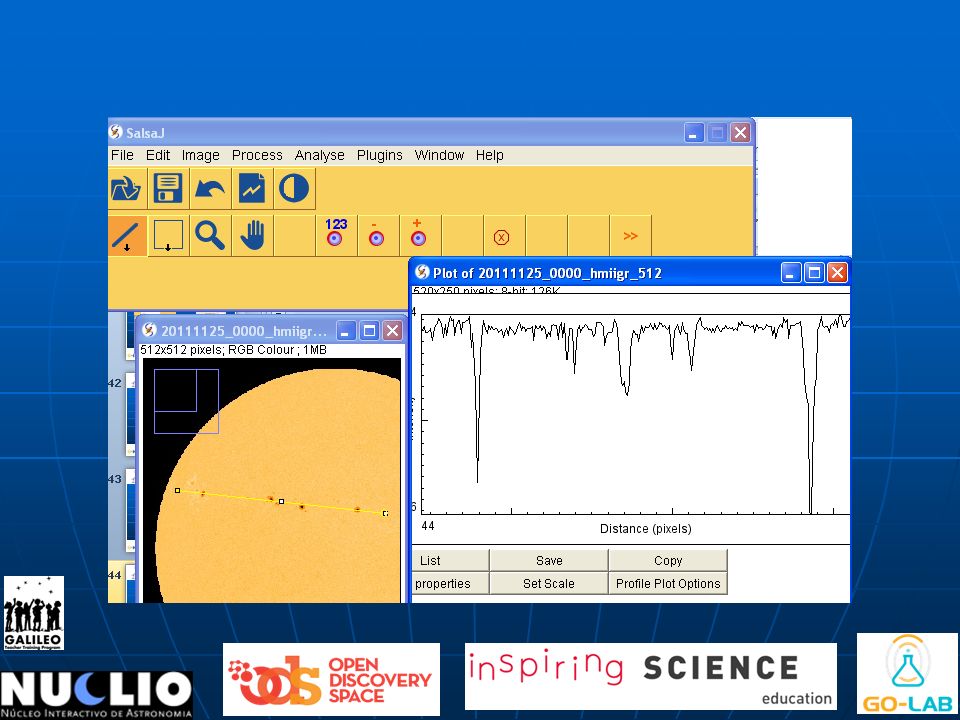
COUNTING SUNSPOTS WITH PLOT PROFILE

44
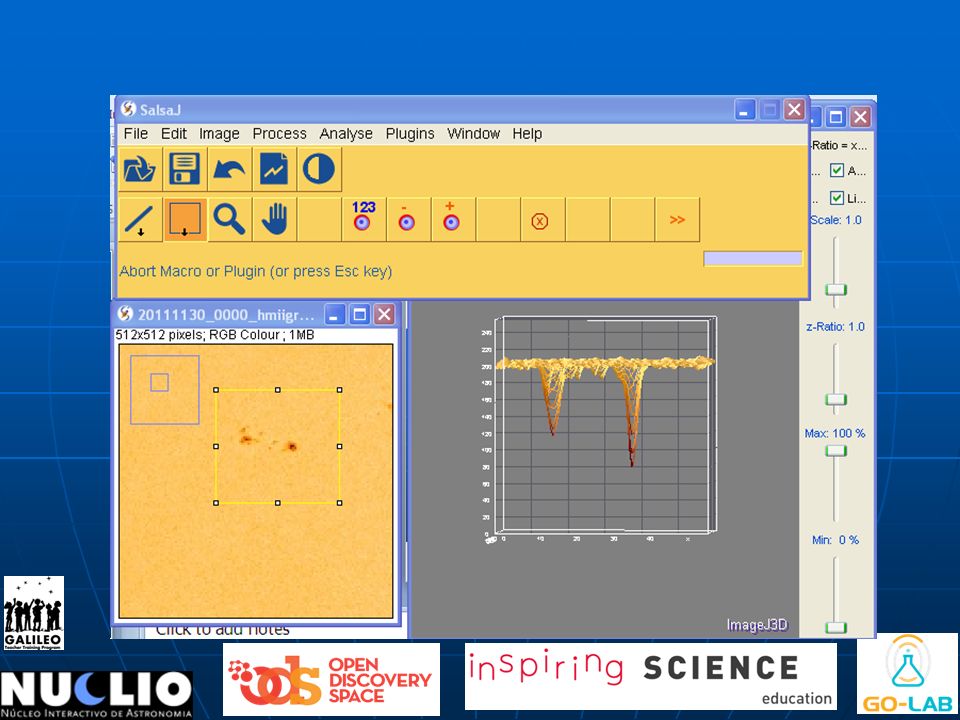
COUNTING SUNSPOTS WITH SURFACE PLOT

46
Measuring the size of a sunspot Zoom in to measure the spot in pixels. Select the straight line and draw it across the spot. Then Select : Analyse and Measure from the menu. In this case the value is approx. 8 pixels

47
Measuring the diameter of the Sun Select the straight line and draw it across the Sun. Then Select : Analyse and Measure from the menu. In this case the value is approx. 486 pixels

48
Knowing that the sun has a diameter of approx. 1 360 000 km you can calculate the size of the spot. Knowing that the sun has a diameter of approx. 1 360 000 km you can calculate the size of the spot. Solar disk ~ 1 380 000 km 486 pixels Solar disk ~ 1 380 000 km 486 pixels Sunspot x 8 pixels Sunspot x 8 pixels Sunspot size ~ 22 716km (1,7 times de size of the Earth) Sunspot size ~ 22 716km (1,7 times de size of the Earth) Measuring the size of a sunspot
 Sunspot size ~ km (1,7 times de size of the Earth) Measuring the size of a sunspot.")
49
Photometry The photometry tool enables to measure the brightness of stars. Click on the object you want to measure. The result appears in the second window. With the right button of your mouse choose the circle

50
You can make adjustments in the photometry parameters Photometry

Similar presentations