Download presentation
Presentation is loading. Please wait.

2
Assumptions: You have a Raspberry Pi with Cayenne installed You have an Android device with the Cayenne App installed Adafruit P/NParts 161Photo Cell 856MCP3008 ADC 153Breadboard wire 1954Male/Female jumper wires 64Half size breadboard 165TMP36 Temperature Sensor 10K Ω Resistor

3
This is how the components get wired to the Pi. Be sure the Pi is shutdown and powered off (unplugged) before attaching or adjusting any wiring.
 before attaching or adjusting any wiring..")
4
Power up the Pi with the newly attached sensors. Start the Cayenne App on your phone. Select the appropriate PiSelect the add device icon

5
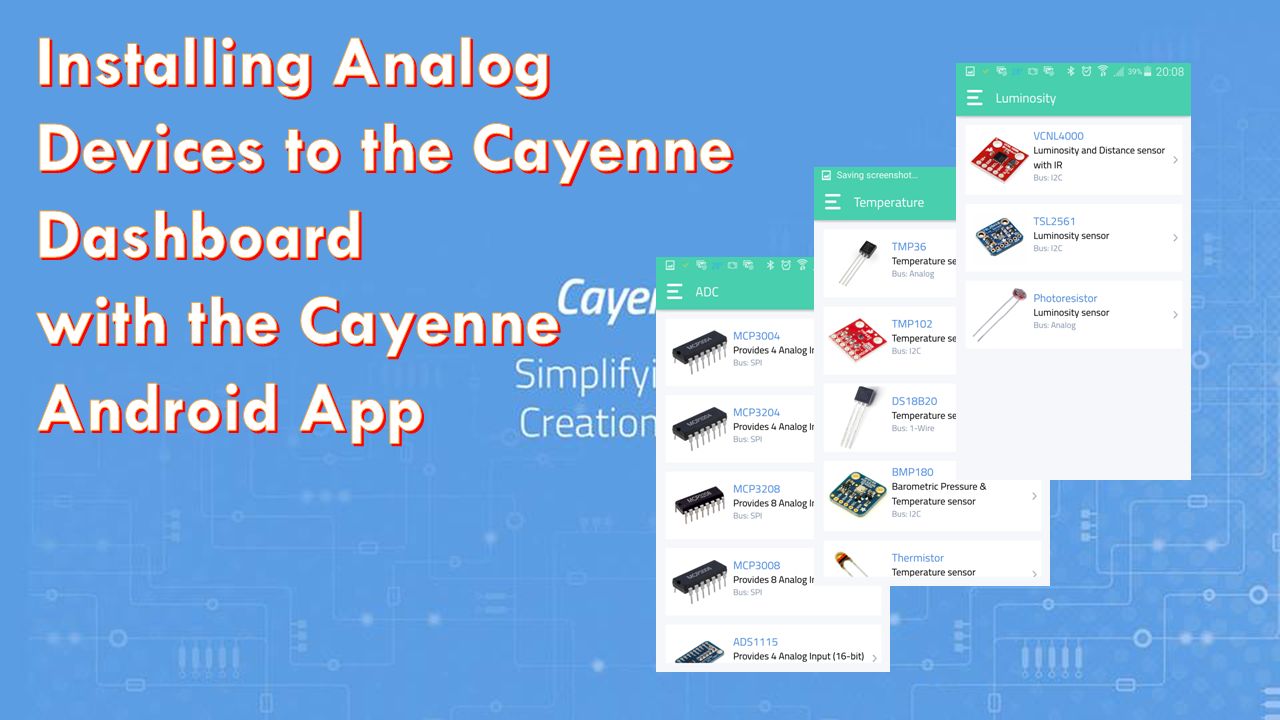
Select the ADC group from the list of Extension First we’ll add the MCP3008 which is an Analog to Digital Converter (ADC). We have installed a MCP3008, so that is the one we will select The device needs a unique name, I called this one adc3008 Next select the SPI Chip- Select drop down. The choices are 0, and 1. Since we attached to SPIO CE0 pin on the header (pin 24) select 0 Choose MCP3008 Then Add Extension
 select 0 Choose MCP3008 Then Add Extension.")
6
But, you can check on the ADC by selecting the GPIO button You will then be returned to the dashboard which won’t tell you much because extensions aren’t populated on the dashboard. And then select the drop down and your ADC should be on the list, select it, adc3008 in my case This page shows what the ADC is ‘seeing’, even though we haven’t told Cayenne about the sensors yet, we can see their output on channel-0 and -1. Now we will return to the dashboard to add the sensors so select the dashboard gauge. Choose your ADC The other low voltages are noise

7
But, you can check on the ADC by selecting the GPIO button Select Luminosity from the Sensor list. You may need to scroll down to find the Sensors On this page you give the widget a name (desk light sensor) and then from the first two drop downs select the widget type and icon you would like. I selected value and light Select Photoresistor from the list Now we will add the photoresistor. Select the add device icon The last two drop downs are for choosing the ADC and Channel. Should be adc3008 and 0 because we hooked the sensor to CH0 on the MCP3008 Select Add Sensor when done
 and then from the first two drop downs select the widget type and icon you would like. I selected value and light Select Photoresistor from the list Now we will add the photoresistor. Select the add device icon The last two drop downs are for choosing the ADC and Channel. Should be adc3008 and 0 because we hooked the sensor to CH0 on the MCP3008 Select Add Sensor when done.")
8
Success, the desk light sensor is added! We will follow the same work flow that we used for the photoresistor to add the TMP36 widget to the desktop

9
Again we need enter a widget name and select a widget type and icon Congratulations! You have added the ADC, photoresistor, and temperature sensor to Cayenne. We will select the ADC and this time choose channel 1 because the TMP36 is hooked to CH1 on the MCP3008 Click Add Sensor when done Please visit our community forum at http://community.mydevices.com/ and our resources page at https://www.cayenne-mydevices.com/resources/ http://community.mydevices.com/https://www.cayenne-mydevices.com/resources/

Similar presentations