Download presentation
Presentation is loading. Please wait.

1
PORTRAITS Learning from the masters

2
JOHN RANKIN http://www.cbsnews.com/video/watch/?id=7227864n&tag=mnc ol;lst;2 http://www.cbsnews.com/video/watch/?id=7227864n&tag=mnc ol;lst;2

3
DOROTHEA LANGE What makes a good portrait? Is there a story?

4
HOW TO CAPTURE A GREAT PORTRAIT Alter Your Perspective Most portraits are taken with the camera at (or around) the eye level of the subject. While this is good common sense – completely changing the angle that you shoot from can give your portrait a real WOW factor.

5
PLAY WITH EYE CONTACT Looking off camera have your subject focus their attention on something unseen and outside the field of view of your camera. This can create a feeling of candidness and also create a little intrigue and interest as the viewer of the shot wonders what they are looking at. Or Looking within the frame alternatively you could have your subject looking at something (or someone) within the frame.
 within the frame..")
6
BREAK THE RULES OF COMPOSITION Rule of Thirds Placing your subject either dead center can sometimes create a powerful image – or even creative placement with your subject right on the edge of a shot can sometimes create interesting images.

7
EXPERIMENT WITH LIGHTING Another element of randomness that you can introduce to your portraits is the way that you light them. There are almost unlimited possibilities when it comes to using light in portraits. Side-lighting can create mood, backlighting and silhouetting your subject to hide their features can be powerful.

8
EXPERIMENT WITH LIGHTING Silhouettes are another way of creating dramatic lighting effects. Matthew Jordan Smith, photographer http://www.youtube.com/watch?v=4 WAKTLBP1AU

9
MOVE YOUR SUBJECT OUT OF THEIR COMFORT ZONE Ask your subject to do something out of the ordinary for some really extreme shots. NOTHING DANGEROUS!

10
SHOOT CANDIDLY Sometimes posed shots can look somewhat…. posed. Some people don’t look good in a posed environment and so switching to a candid type approach can work. Photograph your subject at work, with family or doing something that they love. This will put them more at ease and you can end up getting some special shots with them reacting naturally to the situation that they are in.

11
STEVE MCCURRY http://www.youtube.com/watch?v=3Uic6p4lwX8 http://www.youtube.com/watch?v=3Uic6p4lwX8 Most of my photos are grounded in people, I look for the unguarded moment, the essential soul peeking out, experience etched on a person’s face. - Steve McCurry

12
INTRODUCE A PROP Add a prop of some kind into your shots and you create another point of interest that can enhance your shot. Yes you might run the risk of taking too much focus away from your main subject but you could also really add a sense of story and place to the image that takes it in a new direction and gives the person you’re photographing an extra layer of depth that they wouldn’t have had without the prop.

13
FOCUS UPON ONE BODY PART – CLOSE UP Just photograph a part of your subject. Photographing a person’s hands, eyes, mouth or even just their lower body… can leave a lot to the imagination of the viewer of an image. Sometimes it’s what is left out of an image that says more than what is included.

14
TAKE A SERIES OF SHOTS

15
COMPOSING PORTRAITS https://www.youtube.com/watch?v=c8AC4VeIgkg

16
PORTRAIT ASSIGNMENT Part 1 – Research master photographer Part 2 – Take 1 st set of 12 images, emulating photographer Part 3 – Take 2 nd set of 12 images, develop your own style Part 4 – Print contact sheets and large photos Part 5 - Critique

17
MASTERS OF PHOTOGRAPHY.COM CHECK LIST Start with the RESEARCH portion of the project first Use masters-of-photography.com or Google images to collect your images - appropriate portrait images ONLY Save all images into a folder called PORTRAITS Decide which master photographer you will study Type 1 paragraph biography on master photographer Save to your Portrait folder When all of the above is complete then you may move onto taking photographs

18
Emphasis on hands Emphasis on feet/shoes Close-up Extreme close-up Medium shot against a blurred background Full figure (long shot) 1 ST SET OF 12 PHOTOS Profile (side view) Back of figure ¾ Medium shot Low Angle – Worm’s Eye view High Angle – Bird’s Eye view Face in a “Crowd”
 1 ST SET OF 12 PHOTOS Profile (side view) Back of figure ¾ Medium shot Low Angle – Worm’s Eye view High Angle – Bird’s Eye view Face in a Crowd")
19
1 ST 12 PHOTOS Emulate your chosen photographer’s style Print a contact sheet of all 12 black & white photos to lab 208 4700 laser printer Pick your best two photos to print in large scale Put all 12 completed photos on my flash drive in a folder with your first and last name

20
2 ND SET OF 12 PHOTOS These photos will consist of your own style Using the photographer you studied for inspiration, you should now feel confident to break free and create your own sense of style The last 12 photos will be shot in color but you can choose to convert them to black and white, sepia tone or a combination of both, but they should be consistent Print a contact sheet You will be printing your 2 best photos and submitting all remaining 12 photos to me on my flash drive

21
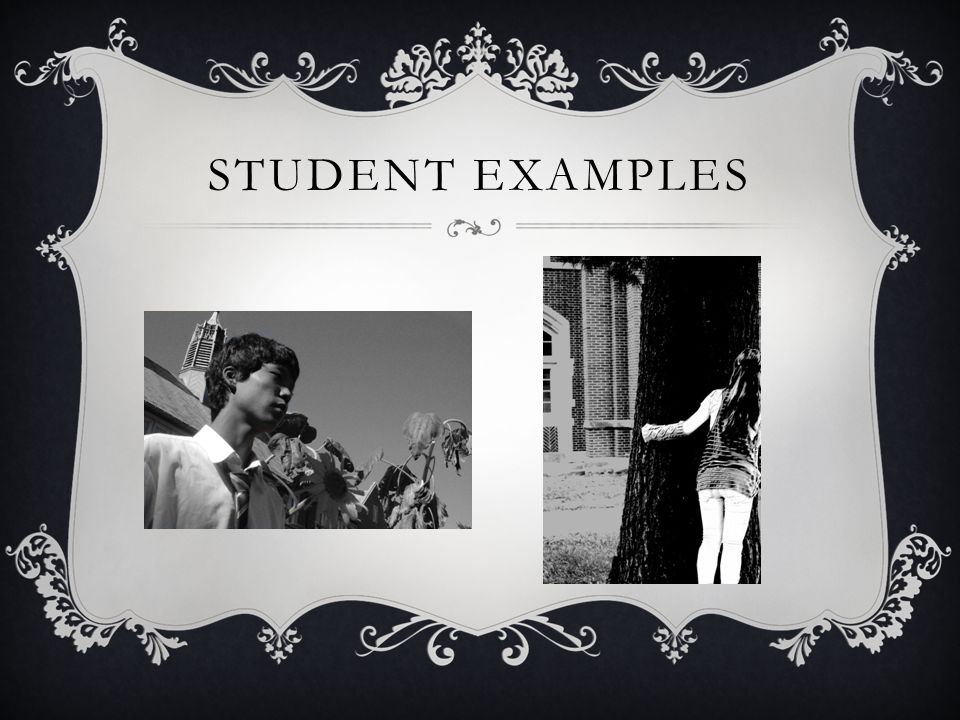
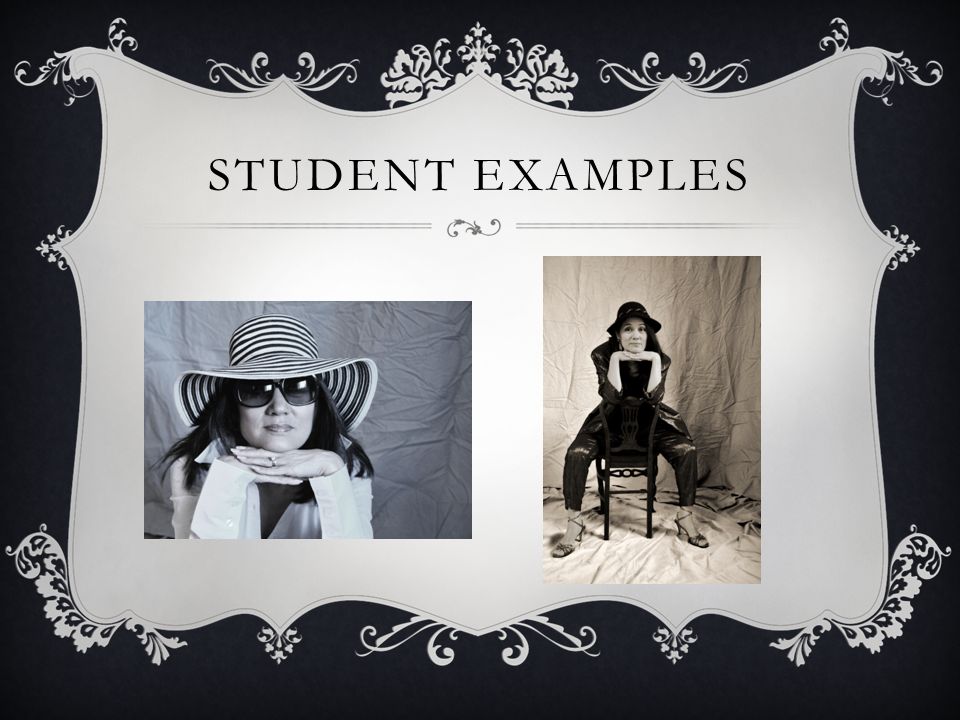
STUDENT EXAMPLES

Similar presentations


Alter Your Perspective; changing the angle that you shoot from can give your portrait a real WOW factor. 2)Play.>")


