Download presentation
Presentation is loading. Please wait.

1
Text Basics It's important to know how to perform basic tasks with text when working in a word processing application. In this lesson, you'll learn the basics of working with text, including how to insert, delete, select, copy, cut, paste, and drag and drop text. Working with text If you're new to Microsoft Word, you'll need to learn the basics of working with text so you can type, reorganize, and edit text. You'll need to know how to insert, delete, and move text, as well as how to find and replace specific words or phrases. To insert text: 1.Move your mouse to the location where you want text to appear in the document. 2.Click the mouse. The insertion point appears. 3.Type the text you want to appear.

2
To delete text: 1.Place the insertion point next to the text you want to delete. 2.Press the Backspace key on your keyboard to delete text to the left of the insertion point. 3.Press the Delete key on your keyboard to delete text to the right of the insertion point. To select text: 1.Place the insertion point next to the text you want to select. 2.Click the mouse. While holding it down, drag your mouse over the text to select it. 3.Release the mouse button. You have selected the text. A highlighted box will appear over the selected text.

3
When you select text or images in Word, a hover toolbar with formatting options appears. This makes formatting commands easily accessible, which can save you time. If the toolbar does not appear at first, try moving the mouse over the selection. To copy and paste text: 1.Select the text you want to copy. 2.Click the Copy command on the Home tab. You can also right-click your document and select Copy.

4
3.Place your insertion point where you want the text to appear. 4.Click the Paste command on the Home tab. The text will appear. To cut and paste text: 1.Select the text you want to copy. 2.Click the Cut command on the Home tab. You can also right-click the document and select Cut. 3.Place your insertion point where you want the text to appear. 4.Click the Paste command on the Home tab. The text will appear.

5
You can also cut, copy, and paste by right-clicking the document and choosing the desired action from the drop-down menu. When you use this method to paste, you can choose from three options that determine how text will be formatted: Keep Source Formatting, Merge Formatting, and Keep Text Only. You can hover the mouse over each icon to see what it will look like before clicking it. To drag and drop text: 1.Select the text you want to copy. 2.Click and drag the text to the location where you want it to appear. The cursor will have a rectangle under it to indicate that you are moving text.

6
3.Release the mouse button, and the text will appear. If text does not appear in the exact location you want, you can click the Enter key on your keyboard to move the text to a new line. Finding and replacing text When you're working with longer documents, it can be difficult and time consuming to locate a specific word or phrase. Word can automatically search your document using the Find feature, and it even allows you to change words or phrases using Replace.

7
To find text: 1.From the Home tab, click the Find (Ctrl+F) command. The navigation pane will appear on the left side of the screen. 2.Type the text you want to find in the field at the top of the navigation pane. 3.If the text is found in the document, it will be highlighted in yellow, and a preview will appear in the navigation pane. 4.If the text appears more than once, you can click the arrows on the navigation pane to step through the results. You can also click the result previews on the navigation pane to jump to the location of a result in your document.

8
5.When you close the navigation pane, the highlighting will disappear.

9
To replace text: 1.From the Home tab, click the Replace (Ctrl+H) command. The Find and Replace dialog box will appear. 2.Type the text you want to find in the Find what field. 3.Type the text you want to replace it with in the Replace with field. 4.Click Find Next and then Replace to replace text. You can also click Replace All to replace all instances within the document.

10
It's important to know how to save the documents you are working with. Frequently saving your documents prevents you from losing your work, and using Save Asallows you to edit a document while leaving the original copy unchanged. There are several ways to share and receive documents, which will affect how you need to save the file. Are you downloading the document? Saving it for the first time? Saving it as another name? Sharing it with someone who doesn't have Word 2010? All of these factors will affect how you save your Word documents. In this lesson, you'll learn how to use the Save and Save As commands, how to save as a Word 97-2003 compatible document, and how to save as a PDF.

11
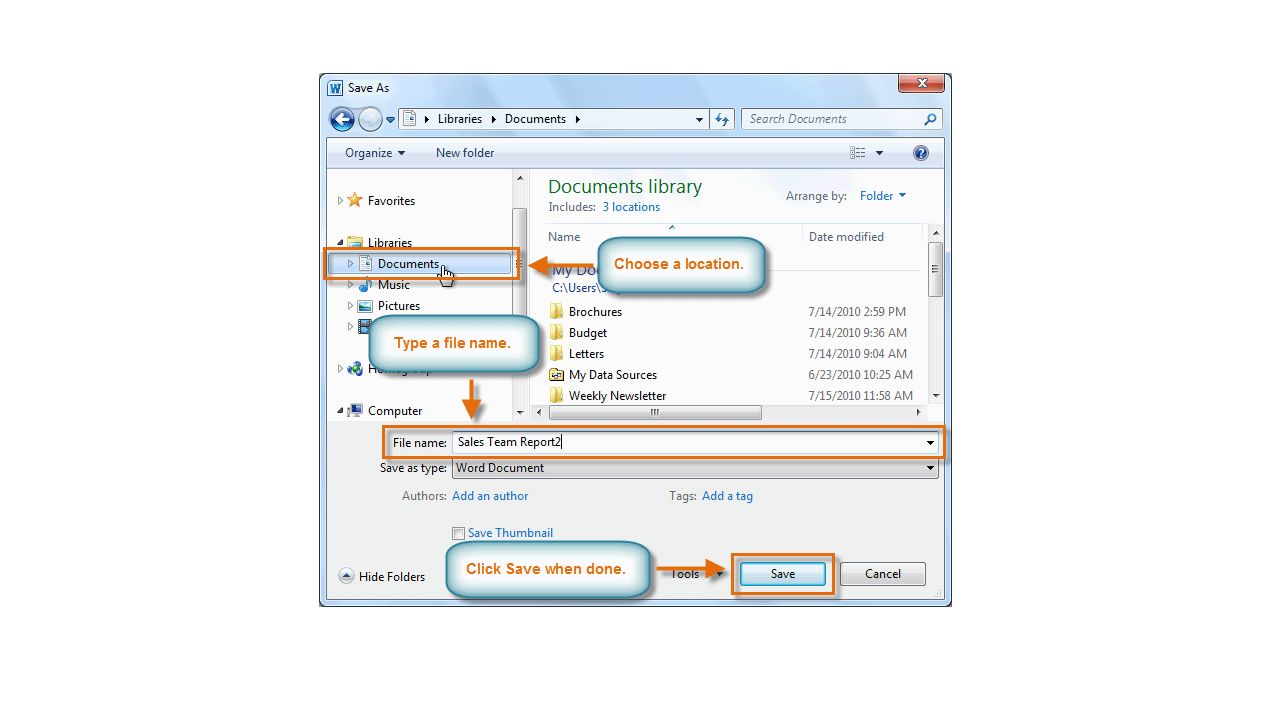
How to save documents When you create a new document in Word, you'll need to know how to save it in order to access and edit it later. Word allows you to save your documents in several ways. To use the Save As command: Save As allows you to choose a name and location for your document. It's useful if you've first created a document or if you want to save a different version of a document while keeping the original. 1.Click the File tab. 2.Select Save As. 3.The Save As dialog box will appear. Select the location where you want to save the document. 4.Enter a name for the document, then click Save.

13
To use the Save command: 1.Click the Save command on the Quick Access toolbar. 2.The document will be saved in its current location with the same file name. If you are saving for the first time and select Save, the Save As dialog box will appear. AutoRecover Word automatically saves your documents to a temporary folder while you're working on them. If you forget to save your changes or if Word crashes, you can recover the autosaved file.

14
1.Open a document that was previously closed without saving. 2.In Backstage view, click Info. 3.If there are autosaved versions of your file, they will appear under Versions. Click on the file to open it. 4.To save changes, click Restore, then click OK.

15
By default, Word autosaves every 10 minutes. If you are editing a document for less than 10 minutes, Word may not create an autosaved version. Other file formats You can share your documents with anyone using Word 2010 or 2007 because they use the same file format. However, earlier versions of Word use a different file format, so if you want to share your document with someone using an earlier version of Word you'll need to save it as a Word 97-2003 document.

16
To save as a Word 97-2003 document: 1.Click the File tab. 2.Select Save As. 3.In the Save as type drop-down menu, select Word 97-2003 Document. 4.Select the location where you want to save the document. 5.Enter a name for the document, then click Save.

17
To save as a PDF: 1.Click the File tab. 2.Select Save As. 3.In the Save as type drop-down menu, select PDF. 4.Select the location where you want to save the document. 5.Enter a name for the document. 6.Click the Save button.

Similar presentations