Download presentation
Presentation is loading. Please wait.

1
Firearms ID Presentation
Polson High School Frequently, presenters must deliver material of a technical nature to an audience unfamiliar with the topic or vocabulary. The material may be complex or heavy with detail. To present technical material effectively, use the following guidelines from Dale Carnegie Training®. Consider the amount of time available and prepare to organize your material. Narrow your topic. Divide your presentation into clear segments. Follow a logical progression. Maintain your focus throughout. Close the presentation with a summary, repetition of the key steps, or a logical conclusion. Keep your audience in mind at all times. For example, be sure data is clear and information is relevant. Keep the level of detail and vocabulary appropriate for the audience. Use visuals to support key points or steps. Keep alert to the needs of your listeners, and you will have a more receptive audience.

2
What is Firearms Identification?
Sometimes incorrectly referred to as ballistics. The identification of fired bullets, cartridge cases or other ammunition components as having been fired from a specific firearm. In your opening, establish the relevancy of the topic to the audience. Give a brief preview of the presentation and establish value for the listeners. Take into account your audience’s interest and expertise in the topic when choosing your vocabulary, examples, and illustrations. Focus on the importance of the topic to your audience, and you will have more attentive listeners. Firearms identification is actually a form of Tool Mark Identification.

3
Firearms evidence submitted to a lab's Firearms Section will typically include a firearm, fired bullets, spent cartridge cases, spent shot shells, shot, shot shell wadding, live ammunition, clothing, and most anything else. Lead bullets, SW Mod 49 with wad cutters,

4
In addition to comparing ammunition components to firearms, firearm examiners conduct other examinations that usually include the following: Testing firearms to determine if they function properly.

5
Determine caliber and manufacturer of ammunition components
Determine caliber and manufacturer of ammunition components. Including the examination of various shotshell components Determine the manufacturer or manufacturers of firearms that may have fired a particular bullet or cartridge case.

6
Firearm Illustrations

7
Pump Shotgun

8
Auto Shotgun

9
Bolt Action Rifle

10
All cases that involve firearms identification start with preliminary examinations of the evidence for similar class characteristics. Class characteristics can be defined as: Intentional or design characteristics that would be common to a particular group or family of items. Such as:

11
The class characteristics of firearms that relate to the bullets fired from them includes the caliber of the firearm and the rifling pattern contained in the barrel of the firearm. Cartridges and Cartridge cases on the other hand are examined for Unique level similarities in what are called breech marks, firing pin impressions, extractor marks, ejector marks and others. Let’s look at some marks and impressions…..

12
44 SPECIAL caliber cartridge cases fired in a TAURUS revolver.
Breech Marks 44 SPECIAL caliber cartridge cases fired in a TAURUS revolver.

13
More Breech Marks 12 GAUGE shotshells

14
38 SUPER AUTO cartridge cases fired in a COLT pistol.

15
357 MAGNUM caliber cartridge cases fired in a TAURUS revolver.

16
357 MAGNUM caliber cartridge cases fired in a COLT revolver.

17
Firing Pin Impression 22 LR caliber rimfire cartridge cases fired in a RUGER pistol.

18
Action Marks 7.62x39mm cartridge cases fired in an AK or SKS Type rifle.

19
Bullets collected for comparison to a specific firearm are examined first to see if they are of a caliber that could have been fired from the submitted firearm. Then they are examined to determine if the pattern of rifling impressions found on the bullet match the pattern of rifling contained in the barrel of the questioned firearm.

20
If these class characteristics agree, the next step is to try to make a positive match between the unique characteristics that may have transferred to the bullet from the barrel.

21
GRC Identification

22
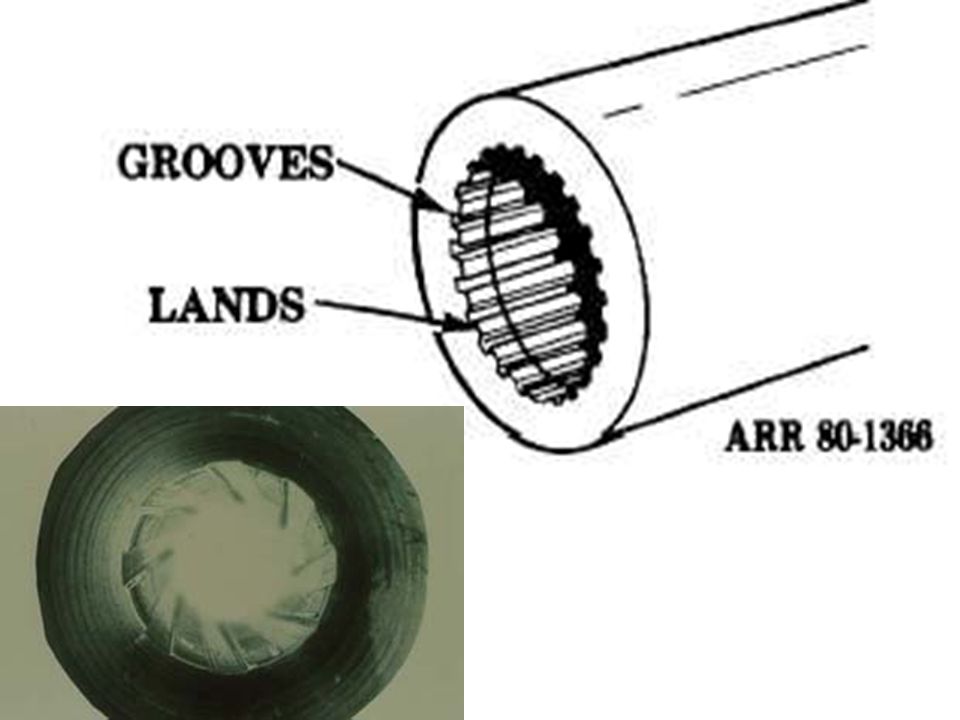
General rifling characteristics or GRC are the identified rifling pattern (i.e. 8/right) and the widths of the individual lands and grooves.in a barrel. What are Lands and Grooves?

24
The Pitch is the angle (tilt) at which the rifling is cut in the barrel.
Note these two bullets have different sized land impressions. They were fired from different weapons.

25
The Rate of Twist is referring to the distance the rifling will travel to complete a single complete turn. Ex: 1 turn in 10 inches.

26
MANUFACTURE CARTRIDGE TWIST L&G LAND R 6 .055 66666 .128 .054 .056
GROOVE 9MM LUGER AA ARMS INC R 6 .055 .120 ASTRA 66666 .053 .128 BERETTA .130 HI-POINT FIREARMS INTERDYNAMIC .124 LLAMA .054 MAUSER SMITH & WESSON .056 .122 STAR .126 SWD INC

27
Land Impression Groove Impression

28
The images below show rifling impressions on a 32 caliber bullet at progressively increasing magnifications.

29
A submitted firearm will be fired several times using a water tank to obtain standards from the firearm. The tank is 3ft by 3ft and 10 ft long.

30
To make these comparisons the firearm examiner will use a comparison microscope.

31
Evidence Bullet Land Impressions Match With Those On Test Fired Standard Bullet.

32
What about a fragment? Can you still determine the GRC of the weapon?

33
Maybe... if you have at least one Land and one Groove impression.

34
Let’s say you suspect the weapon to be a 0.357 handgun.
You would divide the by the sum of the two impressions and then multiply that value by pi. Like this....

35
If the Land impression measures 0
If the Land impression measures 0.055” wide and the Groove impression measures 0.130” wide... 0.055” Land ” Groove ” Total

36
So... if Pi = 3.14 and the suspected
weapon is 0.357 then the formula becomes... 0.055” Land ” Groove ” Total ( / ) 3.14 = 6.05 So total L & G should be ~6
 3.14 = 6.05 So total L & G should be ~6.")
37
You just got the call; a shooting has occurred and as the investigator it's your responsibility to go to the scene and start the difficult job of determining the facts of the case. Arriving at the scene you find out that the shooting happened at a large party. You go through all of the steps to document, collect the physical evidence from the scene and then start to interview witnesses. Friends of the victim state the suspect shot him in the back, from across the room. When you interview the suspect and he says something completely different. He states that the victim and he were fighting over the gun when it discharged. He further says that the bullet struck the victim in the chest. Who's telling the truth? Who ya gonna call?!? As described above, gunshot residue can be deposited on articles of clothing when in close proximity to a discharged firearm. But will it stay there? In most cases the answer is yes.

38
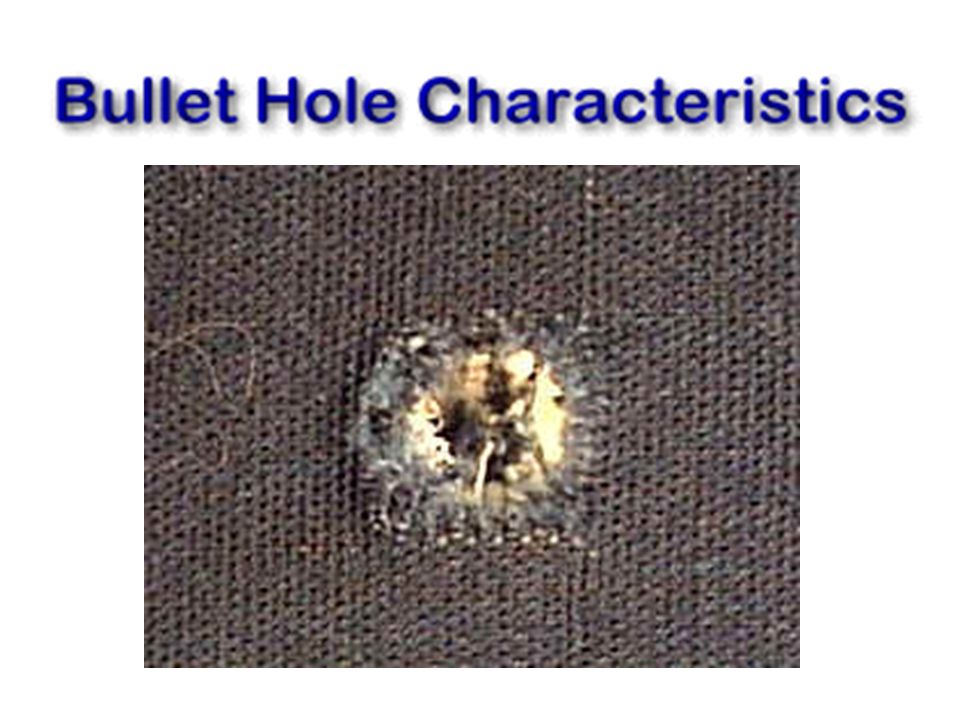
Firearm examiners routinely examine a shooting victim's clothing for bullet holes and other evidence that may allow for a determination of the distance from the muzzle of the firearm to the clothing.

39
There are tests to determine the firing distance by examining the area around a bullet entrance hole for gunshot residues

40
These examinations are sometimes referred to as muzzle-to-garment or muzzle-to-target distance tests.

42
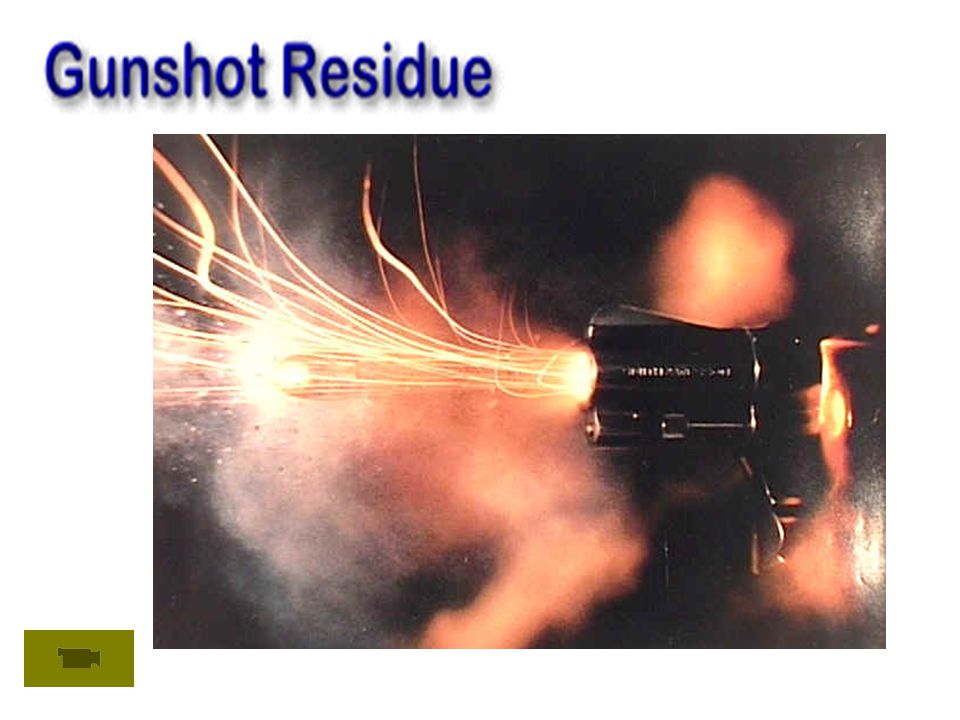
Gunshot residues can also be emitted from areas of a firearm other than the muzzle.
Because the various elements included in gunshot residues are very small and lack mass they lose their energy rapidly.

43
Gunshot Residue can only travel between 3 and 5 feet out from the muzzle.
The further gunshot residues travel from the muzzle, the broader and less concentrated the pattern becomes.

44
Gun Shot Residue & Testing For Distance From Muzzle…..

45
Gunshot residue distance standards are made by firing the firearm, using ammunition like that used in the actual case, into witness panels that consist of white pieces of cotton twill jean cloth.

46
How do we prove that the particles around this bullet entrance hole are GSR?
The first chemical test conducted is called the Modified Griess Test. The Modified Griess Test is performed first on the exhibit because it will not interfere with later tests for lead residues. The Modified Griess Test is a test to detect the presence of nitrite residues. As described earlier, nitrite residues are a by-product of the combustion of smokeless gunpowder. When a firearm is discharged nitrite particles are expelled from the muzzle of a firearm and can be imbedded in or deposited on the surface of a target. The Modified Griess Test is the primary test used by firearms examiners to determine a muzzle-to-garment distance. The Modified Griess Test is performed by first treating a piece of desensitized photographic paper with a chemical mixture of sulfanilic acid in distilled water and alpha-naphthol in methanol. Desensitized photographic paper is obtained by exposing the paper to a hypo solution. The photographic paper will no longer be light-sensitive but will be reactive to the presence of nitrite residues

47
The first chemical test conducted is called the Modified Griess Test
The Modified Griess Test is a test to detect the presence of nitrite residues. The Modified Griess Test is the primary test used by firearms examiners to determine a muzzle-to-garment distance.

48
The exhibit being processed is placed face down against a piece of treated photo paper, with the bullet hole centered on the paper.

49
The back of the exhibit being examined is then steam ironed with a dilute acetic acid solution in the iron instead of water.

50
The acetic acid vapors will penetrate the exhibit and a reaction takes place between any nitrite residues on the exhibit and the chemicals contained in the photographic paper. The nitrite residues will appear as orange specks on the piece photographic paper.

51
A close-up of the results.

52
Spray with SR + water solution A: The Sodium Rhodizionate Test.
Q: What chemical test would be used to detect any lead residues present on the exhibit? Spray with SR + water solution A: The Sodium Rhodizionate Test. The Sodium Rhodizionate Test is performed by spraying the exhibit with a weak solution of a mixture of Sodium Rhodizionate and distilled water. This solution has a dark yellowish/orange color. Step #1

53
Residue turns dark yellow/orange. A: The Sodium Rhodizionate Test.
Q: What chemical test would be used to detect any lead residues present on the exhibit? Residue turns dark yellow/orange. A: The Sodium Rhodizionate Test. The Sodium Rhodizionate Test is performed by spraying the exhibit with a weak solution of a mixture of Sodium Rhodizionate and distilled water. This solution has a dark yellowish/orange color. Step #2

54
Spray on a buffer solution A: The Sodium Rhodizionate Test.
Q: What chemical test would be used to detect any lead residues present on the exhibit? Spray on a buffer solution A: The Sodium Rhodizionate Test. The Sodium Rhodizionate Test is performed by spraying the exhibit with a weak solution of a mixture of Sodium Rhodizionate and distilled water. This solution has a dark yellowish/orange color. Step #3

55
The background color fades & pink appears
Q: What chemical test would be used to detect any lead residues present on the exhibit? The background color fades & pink appears A: The Sodium Rhodizionate Test. The Sodium Rhodizionate Test is performed by spraying the exhibit with a weak solution of a mixture of Sodium Rhodizionate and distilled water. This solution has a dark yellowish/orange color. Step #4

56
Add dilute Hydrochloric Acid solution A: The Sodium Rhodizionate Test.
Q: What chemical test would be used to detect any lead residues present on the exhibit? Add dilute Hydrochloric Acid solution A: The Sodium Rhodizionate Test. The Sodium Rhodizionate Test is performed by spraying the exhibit with a weak solution of a mixture of Sodium Rhodizionate and distilled water. This solution has a dark yellowish/orange color. Step #5 Blue = Lead

57
The above images show a car's headrest with a sooty deposit around a bullet entrance hole. The right image shows the headrest after processing with Sodium Rhodizionate and a buffer solution. Here's a brief case history on the headrest above. A subject was holding a gun to the head of his estranged girlfriend who was sitting in the driver's seat of her car. As police approached her car the subject fired several shots through the windshield of the car at the officers. He then turned to shoot his ex-girlfriend as a police officer returns fire through the windshield. The subject fires a shot off, missing the victim's head, shooting through the headrest above. The victim now has opened the car's door and started to roll out of the drivers seat. The suspect manages to get off one more shot, striking the victim in the "lower back side". The assailant is struck several times by shots fired from the officer and later dies. The pattern of residue found on the headrest certainly shows the intent by the suspect to kill his ex-girlfriend. She later fully recovered from her injuries. Her car had sustained fatal injuries from multiple gunshot wounds.

59
Typical contact entrance hole

60
Bullet hole (angled)
")
61
Angled grazing bullet holes made by a single bullet.

62
Typical Bullet Exit Holes

63
Another Typical Bullet Exit Hole

64
The “Hand”gun of tomorrow ?????

Similar presentations

 and firearms>")


 REVOLVER SEMIAUTOMATIC RIFLES SHOTGUNS AIR OR BB GUNS.>")


